# MCP Adapter
Source: https://docs.sendai.fun/docs/v2/adapters/mcp/mcp-adapter-intro
Create a Model Context Protocol server for the Solana Agent Kit
# MCP Adapter
The `@solana-agent-kit/adapter-mcp` adapter provides a framework for creating a Model Context Protocol (MCP) server to handle protocol operations on the Solana blockchain using the Solana Agent Kit.
## Installation
Install the adapter alongside the core Solana Agent Kit and your desired plugins:
```bash theme={"system"}
npm install solana-agent-kit @solana-agent-kit/adapter-mcp @solana-agent-kit/plugin-token dotenv
```
## Features
* Supports all actions from the Solana Agent Kit
* MCP server implementation for standardized interactions with Claude Desktop
* Environment-based configuration
* Selective action exposure
## Prerequisites
* Node.js (v16 or higher recommended)
* pnpm, yarn, or npm
* Solana wallet with private key
* Solana RPC URL
* Claude Desktop application
## Basic Setup
Create a new project for your MCP server:
```bash theme={"system"}
mkdir solana-agent-mcp
cd solana-agent-mcp
npm init -y
```
Install the required dependencies:
```bash theme={"system"}
npm install solana-agent-kit @solana-agent-kit/adapter-mcp @solana-agent-kit/plugin-token dotenv
```
Create a `.env` file in your project root:
```env theme={"system"}
SOLANA_PRIVATE_KEY=your_private_key_here
RPC_URL=your_solana_rpc_url_here
OPENAI_API_KEY=your_openai_api_key_here
```
Create an `index.js` file with the following code:
```javascript theme={"system"}
import { SolanaAgentKit, KeypairWallet } from "solana-agent-kit";
import { startMcpServer } from '@solana-agent-kit/adapter-mcp';
import TokenPlugin from '@solana-agent-kit/plugin-token';
import * as dotenv from "dotenv";
// Load environment variables
dotenv.config();
// Initialize wallet with private key from environment
const wallet = new KeypairWallet(process.env.SOLANA_PRIVATE_KEY);
// Create agent with plugin
const agent = new SolanaAgentKit(
wallet,
process.env.RPC_URL,
{
OPENAI_API_KEY: process.env.OPENAI_API_KEY,
}
).use(TokenPlugin);
// Select which actions to expose to the MCP server
const finalActions = {
BALANCE_ACTION: agent.actions.find((action) => action.name === "BALANCE_ACTION"),
TOKEN_BALANCE_ACTION: agent.actions.find((action) => action.name === "TOKEN_BALANCE_ACTION"),
GET_WALLET_ADDRESS_ACTION: agent.actions.find((action) => action.name === "GET_WALLET_ADDRESS_ACTION"),
};
// Start the MCP server
startMcpServer(finalActions, agent, { name: "solana-agent", version: "0.0.1" });
```
Update your `package.json` to add the `type` field:
```json theme={"system"}
{
"name": "solana-agent-mcp",
"version": "1.0.0",
"type": "module",
"main": "index.js",
"scripts": {
"start": "node index.js"
}
}
```
## Claude Desktop Configuration
1. Open the Claude Desktop configuration file:
**MacOS:**
```bash theme={"system"}
code ~/Library/Application\ Support/Claude/claude_desktop_config.json
```
**Windows:**
```bash theme={"system"}
code $env:AppData\Claude\claude_desktop_config.json
```
2. Add your MCP server configuration:
```json theme={"system"}
{
"mcpServers": {
"agent-kit": {
"command": "node",
"env": {
"RPC_URL": "your_solana_rpc_url_here",
"SOLANA_PRIVATE_KEY": "your_private_key_here",
"OPENAI_API_KEY": "your_openai_api_key_here"
},
"args": [
"/ABSOLUTE/PATH/TO/YOUR/solana-agent-mcp/index.js"
]
}
}
}
```
Replace the path with the absolute path to your `index.js` file.
3. Restart Claude Desktop after updating the configuration.
## Customizing Available Actions
You can customize which actions are available to Claude by modifying the `finalActions` object:
```javascript theme={"system"}
// Example of adding more actions from different plugins
const finalActions = {
// Basic wallet actions
BALANCE_ACTION: agent.actions.find((action) => action.name === "BALANCE_ACTION"),
GET_WALLET_ADDRESS_ACTION: agent.actions.find((action) => action.name === "GET_WALLET_ADDRESS_ACTION"),
// Token actions
TOKEN_BALANCE_ACTION: agent.actions.find((action) => action.name === "TOKEN_BALANCE_ACTION"),
TRANSFER_ACTION: agent.actions.find((action) => action.name === "TRANSFER_ACTION"),
// Trading actions
TRADE_ACTION: agent.actions.find((action) => action.name === "TRADE_ACTION"),
};
```
## Testing the Integration
1. Start your MCP server (if running manually):
```bash theme={"system"}
node index.js
```
2. Open Claude Desktop and ask questions about Solana, like:
* "What's my SOL balance?"
* "Show me my token balances"
* "What's my wallet address?"
Claude will use your MCP server to interact with the Solana blockchain and provide responses based on the available actions.
For more detailed information, please refer to the full documentation at [docs.sendai.fun](https://docs.sendai.fun).
## Solana Agent Kit MCP Server
[](https://www.npmjs.com/package/solana-mcp)
[](https://opensource.org/licenses/ISC)
A Model Context Protocol (MCP) server that provides onchain tools for Claude AI, allowing it to interact with the Solana blockchain through a standardized interface. This implementation is based on the Solana Agent Kit and enables AI agents to perform blockchain operations seamlessly.
### Overview
This MCP server extends Claude's capabilities by providing tools to:
* Interact with Solana blockchain
* Execute transactions
* Query account information
* Manage Solana wallets
The server implements the Model Context Protocol specification to standardize blockchain interactions for AI agents.
### Prerequisites
* Node.js (v16 or higher)
* pnpm (recommended), npm, or yarn
* Solana wallet with private key
* Solana RPC URL (mainnet, testnet, or devnet)
### Installation
#### Option 1: Quick Install (Recommended)
```bash theme={"system"}
# Download the installation script
curl -fsSL https://raw.githubusercontent.com/sendaifun/solana-mcp/main/scripts/install.sh -o solana-mcp-install.sh
# Make it executable and run
chmod +x solana-mcp-install.sh && ./solana-mcp-install.sh --backup
```
This will start an interactive installation process that will guide you through:
* Setting up Node.js if needed
* Configuring your Solana RPC URL and private key
* Setting up the Claude Desktop integration
#### Option 2: Install from npm (Recommended for clients like Cursor/Cline)
```bash theme={"system"}
# Install globally
npm install -g solana-mcp
# Or install locally in your project
npm install solana-mcp
```
#### Option 3: Build from Source
1. Clone this repository:
```bash theme={"system"}
git clone https://github.com/sendaifun/solana-mcp
cd solana-mcp
```
2. Install dependencies:
```bash theme={"system"}
pnpm install
```
3. Build the project:
```bash theme={"system"}
pnpm run build
```
### Configuration
#### Environment Setup
Create a `.env` file with your credentials:
```env theme={"system"}
# Solana Configuration
SOLANA_PRIVATE_KEY=your_private_key_here
RPC_URL=your_solana_rpc_url_here
OPENAI_API_KEY=your_openai_api_key # OPTIONAL
```
#### Integration with Claude Desktop
To add this MCP server to Claude Desktop, follow these steps:
1. **Locate the Claude Desktop Configuration File**
* macOS: `~/Library/Application Support/Claude/claude_desktop_config.json`
* Windows: `%APPDATA%\Claude\claude_desktop_config.json`
* Linux: `~/.config/Claude/claude_desktop_config.json`
2. **Add the Configuration**
Create or edit the configuration file and add the following JSON:
If you installed via npm (Option 1):
```json theme={"system"}
{
"mcpServers": {
"solana-mcp": {
"command": "npx",
"args": ["solana-mcp"],
"env": {
"RPC_URL": "your_solana_rpc_url_here",
"SOLANA_PRIVATE_KEY": "your_private_key_here",
"OPENAI_API_KEY": "your_openai_api_key" // OPTIONAL
},
"disabled": false,
"autoApprove": []
}
}
}
```
If you built from source (Option 2):
```json theme={"system"}
{
"mcpServers": {
"solana-mcp": {
"command": "node",
"args": ["/path/to/solana-mcp/build/index.js"],
"env": {
"RPC_URL": "your_solana_rpc_url_here",
"SOLANA_PRIVATE_KEY": "your_private_key_here",
"OPENAI_API_KEY": "your_openai_api_key" // OPTIONAL
},
"disabled": false,
"autoApprove": []
}
}
}
```
3. **Restart Claude Desktop**
After making these changes, restart Claude Desktop for the configuration to take effect.
### Project Structure
```
solana-agent-kit-mcp/
├── src/
│ ├── index.ts # Main entry point
├── package.json
└── tsconfig.json
```
### Available Tools
The MCP server provides all the Solana Agent Kit tools like:
* `GET_ASSET` - Retrieve information about a Solana asset/token
* `DEPLOY_TOKEN` - Deploy a new token on Solana
* `GET_PRICE` - Fetch price information for tokens
* `WALLET_ADDRESS` - Get the wallet address
* `BALANCE` - Check wallet balance
* `TRANSFER` - Transfer tokens between wallets
* `MINT_NFT` - Create and mint new NFTs
* `TRADE` - Execute token trades
* `REQUEST_FUNDS` - Request funds (useful for testing/development)
* `RESOLVE_DOMAIN` - Resolve Solana domain names
* `GET_TPS` - Get current transactions per second on Solana
### Security Considerations
* Keep your private key secure and never share it
* Use environment variables for sensitive information
* Consider using a dedicated wallet for AI agent operations
* Regularly monitor and audit AI agent activities
* Test operations on devnet/testnet before mainnet
### Troubleshooting
If you encounter issues:
1. Verify your Solana private key is correct
2. Check your RPC URL is accessible
3. Ensure you're on the intended network (mainnet, testnet, or devnet)
4. Check Claude Desktop logs for error messages
5. Verify the build was successful
### Dependencies
Key dependencies include:
* [@solana/web3.js](https://github.com/solana-labs/solana-web3.js)
* [@modelcontextprotocol/sdk](https://github.com/modelcontextprotocol/typescript-sdk)
* [solana-agent-kit](https://github.com/sendaifun/solana-agent-kit)
### Contributing
Contributions are welcome! Please feel free to submit a Pull Request.
1. Fork the repository
2. Create your feature branch (`git checkout -b feature/amazing-feature`)
3. Commit your changes (`git commit -m 'Add some amazing feature'`)
4. Push to the branch (`git push origin feature/amazing-feature`)
5. Open a Pull Request
### License
This project is licensed under the MIT License.
# n8n Integration
Source: https://docs.sendai.fun/docs/v2/adapters/n8n/n8n-adapter-intro
Integrate Solana Agent Kit with n8n workflows
# n8n Integration
The `n8n-nodes-solana-agent` package provides custom nodes for integrating the Solana Agent Kit with n8n workflows. It enables users to interact with the Solana blockchain through automated workflows without coding.
## Installation
### Local Installation
1. Clone the repository:
```bash theme={"system"}
git clone https://github.com/yourusername/n8n-nodes-solana-agent
cd n8n-nodes-solana-agent
```
2. Install dependencies:
```bash theme={"system"}
npm install
```
3. Build the project:
```bash theme={"system"}
npm run build
```
4. Link to your n8n installation:
```bash theme={"system"}
npm link
cd ~/.n8n/nodes
npm link n8n-nodes-solana-agent
```
### Global Installation (via npm)
```bash theme={"system"}
npm install -g n8n-nodes-solana-agent
```
## Features
### Token Operations
| Operation | Description |
| -------------- | ------------------------------------ |
| Create Token | Create a new SPL token on Solana |
| Mint Token | Mint additional tokens to an address |
| Transfer Token | Send tokens to another wallet |
### NFT Operations
| Operation | Description |
| ----------------- | ------------------------------------ |
| Deploy Collection | Create a new NFT collection |
| Mint NFT | Create a new NFT within a collection |
| List NFT for Sale | List an NFT on a marketplace |
### DeFi Operations (Coming soon)
| Operation | Description |
| ----------------- | ------------------------------ |
| Swap Tokens | Exchange one token for another |
| Provide Liquidity | Add liquidity to DEX pools |
| Yield Farming | Set up automated yield farming |
## Configuration
To use the Solana Agent nodes in n8n, you need to configure credentials:
1. Add your Solana private key
2. Set your preferred RPC URL
3. Add your OpenAI API key (for AI-powered features)
## Available Operations
### Token Operations
#### Create Token
Create a new SPL token on the Solana blockchain.
**Required fields:**
* Token Name: The name of your token
* Token Symbol: A short symbol for the token (e.g., "SOL", "USDC")
**Optional fields:**
* Decimals: Number of decimal places (default: 9)
* Initial Supply: Amount to mint initially (default: 0)
#### Mint Token
Mint additional tokens to a specified address.
**Required fields:**
* Token Address: The mint address of the token
* Amount: Quantity to mint
* Recipient Address: Where to send the minted tokens
### NFT Operations
#### Deploy Collection
Create a new NFT collection.
**Required fields:**
* Collection Name: The name of your NFT collection
* Collection Symbol: A short symbol for the collection
**Optional fields:**
* Description: Details about the collection
* Base URI: Base URI for the collection metadata
#### Mint NFT
Create a new NFT within a collection.
**Required fields:**
* Collection Address: The address of the collection
* NFT Name: Name of the NFT
* NFT URI: URI to the NFT metadata
## Development
If you want to contribute to this node or modify its functionality:
1. Clone the repository
```bash theme={"system"}
git clone https://github.com/yourusername/n8n-nodes-solana-agent
```
2. Install dependencies
```bash theme={"system"}
cd n8n-nodes-solana-agent
npm install
```
3. Build the project
```bash theme={"system"}
npm run build
```
4. Test your changes
```bash theme={"system"}
npm run test
```
For more detailed information, please refer to the full documentation at [docs.sendai.fun](https://docs.sendai.fun).
# Jito
Source: https://docs.sendai.fun/docs/v2/devrel-agents/jito
# Jito Devrel Agent Setup Guide
The Jito Devrel agent provides access to comprehensive Jito documentation and helps developers integrate with Jito's restaking program, keeper bots, and other services.
## Demo Video
Watch the complete setup walkthrough:
*[Watch on YouTube](https://youtu.be/am9QN3R02HI)*
## Setup Methods
### Using Cursor
1. **Open Cursor Settings**
* Open Cursor
* Navigate to Cursor Settings
* Go to Tools & Integrations
2. **Add MCP Server**
* Click on "New MCP server"
* This opens a JSON configuration file
* Add the following code to the `mcpServers` object:
```json theme={"system"}
"jito_devrel": {
"url": "https://jito-proxy.sendai.fun/mcp"
}
```
3. **Verify Installation**
* Return to Tools & Integrations
* You should now see 2 tools available as shown below:

* You can now ask questions like:
* "How do I set up and run a Jito keeper bot?"
* "What CLI commands are available for managing Jito restaking operations?"
### Using MCP Inspector (Local Testing)
If you want to test the MCP locally using the MCP Inspector tool:
1. **Install and Run Inspector**
```bash theme={"system"}
npx @modelcontextprotocol/inspector
```
2. **Configure Transport**
* Select Transport type as "Streamable http"
* Set URL to: `https://jito-proxy.sendai.fun/mcp`
3. **Access Tools**
* You can now see the search and fetch functions under Tools
* Test queries like: "How do I register as an operator in the Jito restaking program?"
### Using Claude AI
1. **Access Claude Integrations**
* Visit [claude.ai](https://claude.ai)
* Click on the Search and Tools icon (2nd icon)
* Select "Add integrations"
2. **Add Jito Integration**
* In the integrations modal, give it a name like "Jito Devrel"
* Add the URL: `https://jito-proxy.sendai.fun/mcp`
3. **Connect and Verify**
* The integration will show up in the list with a "Custom" tag
* Click "Connect"
* Optional: Click "more" icon > Tools and Settings > view tools and permissions
4. **Start Using**
* Open a new chat
* Ask Jito-related questions like:
* "How does the Jito StakeNet program manage validator selection and rebalancing?"
## Example Queries
Once set up, you can ask questions about:
* **Keeper Bots**: Setup, configuration, and management
* **Restaking Operations**: CLI commands and program interactions
* **Validator Selection**: How StakeNet manages validator selection and rebalancing
* **Operator Registration**: Steps to register as an operator in the Jito restaking program
* **General Jito Services**: Documentation and integration guides
## Available Tools
The Jito Devrel agent provides access to:
* **Search Function**: Semantic search across Jito documentation
* **Fetch Function**: Retrieve specific documentation sections
* **Expert Guidance**: Detailed answers for Jito-related development questions
## Support
For additional support or questions about the Jito Devrel agent, refer to the official Jito documentation or reach out to the development team.
# Crossmint Solana Agent
Source: https://docs.sendai.fun/docs/v2/examples/embedded-wallets/crossmint
Modern web application with Crossmint wallet integration for Solana Agent Kit
A modern web application built with TanStack Router, React, and Solana integration, featuring authentication via Crossmint and AI capabilities.
## Features
Secure wallet authentication powered by Crossmint's embedded wallet solution
Built with Solana Agent Kit for blockchain interactions and transactions
OpenAI integration for intelligent features and natural language interactions
Built with Radix UI components and Tailwind CSS for a sleek user experience
Full TypeScript support throughout the application codebase
PostgreSQL with Drizzle ORM for efficient data management
## Tech Stack
### Frontend
* React 19
* TanStack Router for type-safe routing
* Radix UI components
* Tailwind CSS for styling
### Authentication
* Crossmint embedded wallet
### Blockchain
* Solana Web3.js
* Solana Agent Kit
### Backend & Data
* PostgreSQL
* Drizzle ORM
### AI Integration
* OpenAI SDK
### Development Tools
* TypeScript
* Biome for linting and formatting
* Vinxi
## Installation
```bash theme={"system"}
npx gitpick sendaifun/solana-agent-kit/examples/embedded-wallets/crossmint-sak-v2
cd crossmint-sak-v2
```
```bash theme={"system"}
pnpm install
```
Create a `.env` file in the root directory with the following variables:
```
VITE_CROSSMINT_SECRET=your_crossmint_secret
VITE_RPC_URL=your_solana_rpc_url
```
```bash theme={"system"}
pnpm db:generate
pnpm db:migrate
```
## Development
Start the development server:
```bash theme={"system"}
pnpm dev
```
The application will be available at `http://localhost:3000`.
## Database Management
| Command | Description |
| ------------------ | -------------------- |
| `pnpm db:generate` | Generate migrations |
| `pnpm db:migrate` | Run migrations |
| `pnpm db:studio` | Open database studio |
| `pnpm db:push` | Push schema changes |
| `pnpm db:pull` | Pull schema changes |
| `pnpm db:check` | Check schema |
| `pnpm db:up` | Update schema |
## Project Structure
```
src/
├── components/ # React components
├── functions/ # Server-side functions
├── hooks/ # Custom React hooks
├── lib/ # Library code and utilities
├── routes/ # Application routes
├── styles/ # Global styles
└── utils/ # Utility functions
```
## Crossmint Integration
The application uses Crossmint to provide a seamless embedded wallet experience for users. This integration allows users to:
* Create wallets without leaving the application
* Sign transactions securely
* Manage their Solana assets
* Interact with the Solana blockchain through Agent Kit
```tsx theme={"system"}
import { useCrossmintWallet } from '@/hooks/useCrossmintWallet';
import { SolanaAgentKit, createVercelAITools } from 'solana-agent-kit';
import TokenPlugin from '@solana-agent-kit/plugin-token';
import { PublicKey } from '@solana/web3.js';
// Custom hook to use Solana Agent Kit with Crossmint
export function useSolanaAgent() {
const { wallet, connected } = useCrossmintWallet();
// Create Solana Agent Kit instance when wallet is connected
const agent = useMemo(() => {
if (!connected || !wallet) return null;
// Initialize with the Crossmint wallet
return new SolanaAgentKit(
{
publicKey: new PublicKey(wallet.publicKey),
signTransaction: async (tx) => await wallet.signTransaction(tx),
signMessage: async (msg) => await wallet.signMessage(msg),
sendTransaction: async (tx) => {
return await wallet.sendTransaction(tx);
},
},
process.env.VITE_RPC_URL,
{}
).use(TokenPlugin);
}, [wallet, connected]);
// Create AI tools for the agent
const tools = useMemo(() => {
if (!agent) return null;
return createVercelAITools(agent, agent.actions);
}, [agent]);
return { agent, tools, connected };
}
```
## Key Features
### Secure Authentication
The Crossmint integration provides a secure authentication flow that doesn't require users to manage private keys directly.
### Wallet Creation
Users can create a new Solana wallet through Crossmint's embedded wallet solution with just a few clicks.
### Transaction Signing
The application handles transaction signing through Crossmint's secure interface, providing a seamless experience.
### AI-Powered Assistance
The integration of OpenAI with Solana Agent Kit allows for natural language interactions with the blockchain.
## License
This project is licensed under the MIT License - see the LICENSE file for details.
## Contributing
Contributions are welcome! Please feel free to submit a Pull Request.
## Credits
* [Samridhi](https://github.com/samridhi2003)
# Para Plugin Example
Source: https://docs.sendai.fun/docs/v2/examples/embedded-wallets/para
Integration example of Solana Agent Kit with Para plugins
This example demonstrates how to integrate and use Solana Agent Kit v2 with Para plugins in your application.
## Features
Integration of solana-plugin-para for both backend and frontend environments
Complete example of Para wallet creation, management, and transaction handling
Real-world usage patterns and implementation best practices
Includes both server-side and client-side integration examples
## Prerequisites
* Node.js 16.x or higher
* pnpm or bun package manager
* Solana development environment
* Para API credentials
## Installation
```bash theme={"system"}
git clone
```
First, clone and build the Para plugin:
```bash theme={"system"}
npx gitpick sendaifun/solana-agent-kit/examples/embedded-wallets/para-plugin-example
cd solana-plugin-para
pnpm install
pnpm build
cd ..
```
Then install the example project dependencies:
```bash theme={"system"}
cd /examples/para-plugin-example
pnpm install
```
Copy the example environment file:
```bash theme={"system"}
cp .env.example .env
```
Update the `.env` file with your credentials:
```env theme={"system"}
LANGCHAIN_CALLBACKS_BACKGROUND=false
OPENAI_API_KEY=#optional
RPC_URL=
SOLANA_PRIVATE_KEY=
PARA_API_KEY=
PARA_ENV=BETA | PROD
GROQ_API_KEY=
NEXT_PUBLIC_PARA_ENV=BETA | PROD
NEXT_PUBLIC_PARA_API_KEY=
```
## Running the Example
Start the development server:
```bash theme={"system"}
pnpm dev
```
Open [http://localhost:3000](http://localhost:3000) in your browser to view the application.
## Implementation Details
### Server-Side Integration
Para can be integrated on the server side by using the Para Server Plugin:
```typescript theme={"system"}
import { SolanaAgentKit } from "solana-agent-kit";
import ParaServerPlugin from "@getpara/plugin-para-server";
// Initialize Solana Agent Kit with your configuration
const solanaAgent = new SolanaAgentKit(
wallet,
process.env.RPC_URL,
{
// Optional configuration options
}
);
// Extend the agent with Para Server Plugin
export const solanaAgentWithPara = solanaAgent.use(ParaServerPlugin);
```
### Web Integration
For client-side integration, use the Para Web Plugin:
```typescript theme={"system"}
import ParaWebPlugin from "@getpara/plugin-para-web";
import { solanaAgent } from "./solana";
// Extend the agent with Para Web Plugin
export const solanaAgentWithPara = solanaAgent.use(ParaWebPlugin);
// Access the Para instance directly
export const para = solanaAgentWithPara.methods.getParaInstance();
```
## Para Plugin Features
The Para plugin adds the following capabilities to your Solana Agent:
Create embedded wallets for your users without requiring them to manage private keys or install extensions.
```typescript theme={"system"}
// Create a new wallet
const wallet = await para.createWallet({
name: "User Wallet",
email: "user@example.com"
});
```
Sign transactions securely through Para's infrastructure:
```typescript theme={"system"}
// Sign a transaction
const signedTx = await para.signTransaction(transaction);
// Sign and send a transaction
const signature = await para.signAndSendTransaction(transaction);
```
Para handles all key management securely, allowing you to focus on building your application logic.
```typescript theme={"system"}
// Retrieve wallet information
const walletInfo = await para.getWallet(walletId);
// Update wallet settings
await para.updateWallet(walletId, {
name: "Updated Wallet Name"
});
```
## Project Structure
```
app/
├── api/ # API routes for Para operations
│ └── agent/ # Agent endpoints for Para integration
├── components/ # React components
│ ├── ui/ # UI components
│ └── wallet/ # Wallet-specific components
├── utils/ # Utility functions
│ ├── para.ts # Para configuration
│ └── solana.ts # Solana agent setup
└── pages/ # Application pages
```
## Integration Benefits
Using Para with Solana Agent Kit provides several advantages:
1. **User-friendly onboarding** - Create wallets for users without requiring technical knowledge
2. **Enhanced security** - Para's secure infrastructure manages keys and signing
3. **Developer simplicity** - Abstract away complex wallet management
4. **Flexible deployment** - Works in both server and client environments
5. **Seamless AI integration** - Para works naturally with the Agent Kit's AI capabilities
## Resources
Official Para integration guides and API documentation
Solana Agent Kit v2 documentation and examples
Learn more about Para and its features
Access the example source code on GitHub
## License
This project is licensed under the MIT License - see the [LICENSE](LICENSE) file for details.
## Contributing
Contributions are welcome! Please feel free to submit a Pull Request.
# Phantom Agent Starter
Source: https://docs.sendai.fun/docs/v2/examples/embedded-wallets/phantom
Modern Chat Agent with Phantom wallet integration for Solana Agent Kit
Demo
## Features
Secure user authentication powered by Phantom wallet
Built with Solana Agent Kit for blockchain interactions and transactions
OpenAI integration for intelligent features and natural language interactions
Built with modern UI components and Tailwind CSS for a sleek user experience
Full TypeScript support throughout the application codebase
## Tech Stack
| Category | Technologies |
| -------------- | -------------------------------- |
| Framework | Next.js |
| Authentication | Phantom |
| Blockchain | Solana Web3.js, Solana Agent Kit |
| Styling | Tailwind CSS |
| AI | OpenAI SDK |
| Development | TypeScript |
## Installation
```bash theme={"system"}
npx gitpick sendaifun/solana-agent-kit/examples/phantom-agent-starter -b v2
cd phantom-agent-starter
```
```bash theme={"system"}
pnpm install
```
Create a `.env.local` file in the root directory with the following variables:
```env theme={"system"}
# Solana configuration
NEXT_PUBLIC_RPC_URL=your_solana_rpc_url
# OpenAI API key
OPENAI_API_KEY=your_openai_api_key
```
## Development
Start the development server:
```bash theme={"system"}
pnpm dev
```
The application will be available at `http://localhost:3000`.
## Project Structure
```
src/app
├── components/ # UI components
├── chat/ # /chat route
└── utils/ # Utility functions
```
## Phantom Integration
This starter uses Phantom wallet to provide a seamless authentication experience. Phantom is one of the most popular wallets in the Solana ecosystem and offers several advantages:
* **Wide Adoption**: Millions of users already have Phantom installed
* **Simple Connection**: Connect with just a few clicks
* **Built-in Security**: Hardware wallet support and security features
* **Mobile Support**: Works across desktop and mobile
```tsx theme={"system"}
// app/components/WalletConnectButton.tsx
import { useWallet } from '@solana/wallet-adapter-react';
import { WalletMultiButton } from '@solana/wallet-adapter-react-ui';
import { useEffect, useState } from 'react';
export function WalletConnectButton() {
const { connected, publicKey } = useWallet();
const [address, setAddress] = useState(null);
useEffect(() => {
if (publicKey) {
setAddress(publicKey.toString());
} else {
setAddress(null);
}
}, [publicKey]);
return (
);
}
```
```tsx theme={"system"}
// app/utils/agent.ts
import { SolanaAgentKit, createVercelAITools } from 'solana-agent-kit';
import TokenPlugin from '@solana-agent-kit/plugin-token';
import { Connection, PublicKey } from '@solana/web3.js';
export function createSolanaAgent(wallet: any) {
if (!wallet || !wallet.publicKey) {
return null;
}
// Create Solana Agent Kit instance
const agent = new SolanaAgentKit(
{
publicKey: wallet.publicKey,
signTransaction: async (tx) => {
return await wallet.signTransaction(tx);
},
signMessage: async (msg) => {
const encodedMessage = new TextEncoder().encode(msg);
const signedMessage = await wallet.signMessage(encodedMessage);
return signedMessage;
},
sendTransaction: async (tx) => {
const connection = new Connection(
process.env.NEXT_PUBLIC_RPC_URL!,
'confirmed'
);
return await wallet.sendTransaction(tx, connection);
},
},
process.env.NEXT_PUBLIC_RPC_URL!,
{}
).use(TokenPlugin);
// Create AI tools
const tools = createVercelAITools(agent, agent.actions);
return { agent, tools };
}
```
## Wallet Adapter Setup
This starter utilizes the Solana Wallet Adapter library to connect with Phantom. The setup includes configuration for the wallet adapter provider:
```tsx theme={"system"}
// app/providers.tsx
import { WalletAdapterNetwork } from '@solana/wallet-adapter-base';
import { PhantomWalletAdapter } from '@solana/wallet-adapter-phantom';
import { WalletProvider, ConnectionProvider } from '@solana/wallet-adapter-react';
import { WalletModalProvider } from '@solana/wallet-adapter-react-ui';
import { clusterApiUrl } from '@solana/web3.js';
import { useMemo } from 'react';
// Import the wallet adapter CSS
import '@solana/wallet-adapter-react-ui/styles.css';
export function Providers({ children }: { children: React.ReactNode }) {
// Set up network and endpoint
const network = WalletAdapterNetwork.Mainnet;
const endpoint = useMemo(() =>
process.env.NEXT_PUBLIC_RPC_URL || clusterApiUrl(network),
[network]
);
// Set up wallets
const wallets = useMemo(() => [
new PhantomWalletAdapter(),
], []);
return (
{children}
);
}
```
## Chat Implementation
The starter includes a chat interface that allows users to interact with the Solana blockchain through natural language:
```tsx theme={"system"}
// app/chat/page.tsx
import { Chat } from '@/components/Chat';
import { WalletConnectButton } from '@/components/WalletConnectButton';
export default function ChatPage() {
return (
Solana AI Assistant
);
}
```
## AI Integration
The starter uses the OpenAI API to process natural language requests and execute Solana transactions:
```tsx theme={"system"}
// app/utils/ai.ts
import { generateText } from 'ai';
import { createSolanaAgent } from './agent';
export async function processUserMessage(message, wallet) {
if (!wallet || !wallet.publicKey) {
return {
role: 'assistant',
content: 'Please connect your Phantom wallet first.',
};
}
// Create Solana agent and tools
const { tools } = createSolanaAgent(wallet);
// Generate AI response
const response = await generateText({
model: 'openai/gpt-4o',
system: `You are a helpful Solana blockchain assistant.
You can help users check their balances, send tokens, and more.
The user's wallet address is ${wallet.publicKey.toString()}.`,
messages: [{ role: 'user', content: message }],
tools,
});
return {
role: 'assistant',
content: response.text,
};
}
```
This is a starter template and may not include all features or optimizations for production use (e.g the use of the OpenAI API key on the client). Please review and modify as necessary for your specific use case.
## License
This project is licensed under the MIT License - see the LICENSE file for details.
## Contributing
Contributions are welcome! Please feel free to submit a Pull Request.
# Privy Agent Tanstack Starter
Source: https://docs.sendai.fun/docs/v2/examples/embedded-wallets/privy
Modern web application with Privy wallet integration for Solana Agent Kit
A modern web application built with TanStack Router, React, and Solana integration, featuring authentication via Privy and AI capabilities.
## Features
Secure user authentication powered by Privy's embedded wallet solution
Built with Solana Agent Kit for blockchain interactions and transactions
OpenAI integration for intelligent features and natural language interactions
Built with Radix UI components and Tailwind CSS for a sleek user experience
Full TypeScript support throughout the application codebase
PostgreSQL with Drizzle ORM for efficient data management
## Tech Stack
| Category | Technologies |
| -------------- | -------------------------------- |
| Frontend | React 19, TanStack Router |
| Authentication | Privy |
| Blockchain | Solana Web3.js, Solana Agent Kit |
| Styling | Tailwind CSS, Radix UI |
| Database | PostgreSQL, Drizzle ORM |
| AI | OpenAI SDK |
| Development | TypeScript, Biome, Vinxi |
## Installation
```bash theme={"system"}
# Clone the starter template
npx gitpick sendaifun/solana-agent-kit/examples/privy-agent-tanstack-starter -b v2
cd privy-solana-agent
```
```bash theme={"system"}
pnpm install
```
Create a `.env` file in the root directory with the following variables:
```
# Privy credentials
VITE_PRIVY_APP_ID=
# Database connection
DATABASE_URL=
# Solana RPC URL
VITE_RPC_URL=
# OpenAI API key
OPENAI_API_KEY=
```
```bash theme={"system"}
pnpm db:generate
pnpm db:migrate
```
## Development
Start the development server:
```bash theme={"system"}
pnpm dev
```
The application will be available at `http://localhost:3000`.
## Linting and Formatting
| Command | Description |
| --------------- | ------------------ |
| `pnpm lint` | Run linting |
| `pnpm lint:fix` | Fix linting issues |
## Database Management
| Command | Description |
| ------------------ | -------------------- |
| `pnpm db:generate` | Generate migrations |
| `pnpm db:migrate` | Run migrations |
| `pnpm db:studio` | Open database studio |
| `pnpm db:push` | Push schema changes |
| `pnpm db:pull` | Pull schema changes |
| `pnpm db:check` | Check schema |
| `pnpm db:up` | Update schema |
## Project Structure
```
src/
├── components/ # React components
├── functions/ # Server-side functions
├── hooks/ # Custom React hooks
├── lib/ # Library code and utilities
├── routes/ # Application routes
├── styles/ # Global styles
└── utils/ # Utility functions
```
## Privy Integration
This starter uses Privy to provide a seamless embedded wallet experience. Privy offers several advantages for Solana Agent Kit applications:
* **Simplified Authentication**: Email, social, and wallet-based auth
* **Human-in-the-loop Transactions**: Users confirm all transactions
* **Multi-device Support**: Access from multiple devices
* **Non-custodial**: Users maintain control of their keys
* **Social Recovery Options**: Easy key recovery methods
```tsx theme={"system"}
import { useSolanaWallets } from '@privy-io/react-auth';
import { SolanaAgentKit, createVercelAITools } from 'solana-agent-kit';
import TokenPlugin from '@solana-agent-kit/plugin-token';
import { Connection, PublicKey } from '@solana/web3.js';
export function useSolanaAgent() {
// Get Solana wallets from Privy
const { wallets, ready } = useSolanaWallets();
// Create agent when wallet is ready
const agent = useMemo(() => {
if (ready && wallets.length > 0) {
const wallet = wallets[0];
return new SolanaAgentKit(
{
publicKey: new PublicKey(wallet.address),
// Handle transaction signing through Privy
signTransaction: async (tx) => {
return await wallet.signTransaction(tx);
},
// Handle message signing through Privy
signMessage: async (msg) => {
return await wallet.signMessage(msg);
},
// Handle transaction sending
sendTransaction: async (tx) => {
const connection = new Connection(
import.meta.env.VITE_RPC_URL,
'confirmed'
);
return await wallet.sendTransaction(tx, connection);
},
// Handle multiple transaction signing
signAllTransactions: async (txs) => {
return await wallet.signAllTransactions(txs);
},
},
import.meta.env.VITE_RPC_URL,
{}
).use(TokenPlugin);
}
return null;
}, [wallets, ready]);
// Create tools for AI integration
const tools = useMemo(() => {
if (agent) {
return createVercelAITools(agent, agent.actions);
}
return null;
}, [agent]);
return { agent, tools, isReady: ready && wallets.length > 0 };
}
```
## Key Benefits
### User-friendly Authentication
Privy provides a streamlined authentication experience that supports multiple methods including email, social logins, and existing wallets. This makes your application accessible to both crypto novices and experienced users.
### Human-in-the-loop Security
All transactions require explicit user approval, ensuring that users maintain control over their assets while still allowing for an AI-assisted experience.
### Database Integration
This starter includes a complete database setup with PostgreSQL and Drizzle ORM, allowing you to:
* Store user preferences and settings
* Save conversation history
* Track transaction history
* Implement custom features requiring persistent data
### Type-safe Routing
The TanStack Router integration provides type-safe routing throughout the application, reducing errors and improving developer experience.
This is a starter template and may not include all features or optimizations for production use (e.g the use of the OpenAI API key on the client). Please review and modify as necessary for your specific use case.
## License
This project is licensed under the MIT License - see the LICENSE file for details.
## Contributing
Contributions are welcome! Please feel free to submit a Pull Request.
# Privy Server wallet NextJS Starter
Source: https://docs.sendai.fun/docs/v2/examples/embedded-wallets/privy-server-wallet
Modern Next.js 15 starter with Privy authentication and Solana Agent Kit
A modern, full-stack web application starter kit that integrates Privy Server wallet authentication with Solana Agent Kit for building secure and scalable web3 applications.
## Features
Server-side authentication using `@privy-io/server-auth` for secure user management
Built-in Solana wallet and token management using `solana-agent-kit`
Built on the latest Next.js framework with App Router for optimal performance
Uses Drizzle ORM with PostgreSQL for type-safe database operations
Styled with Tailwind CSS and Radix UI components for a polished look
Includes CodeMirror and ProseMirror integration for enhanced editing
Full TypeScript support throughout the entire codebase
Configured with Playwright for comprehensive end-to-end testing
## Prerequisites
* Node.js 18+
* pnpm 9.12.3+
* PostgreSQL database
## Getting Started
```bash theme={"system"}
npx gitpick sendaifun/solana-agent-kit/examples/misc/privy-server-wallet-agent -b v2
cd privy-server-wallet-agent
```
```bash theme={"system"}
pnpm install
```
Create a `.env` file with the following variables:
```env theme={"system"}
# Database
DATABASE_URL=your_postgres_connection_string
# Privy
PRIVY_APP_ID=your_privy_app_id
PRIVY_APP_SECRET=your_privy_app_secret
# Solana
NEXT_PUBLIC_RPC_URL=your_solana_rpc_url
# Optional: OpenAI for AI features
OPENAI_API_KEY=your_openai_api_key
```
```bash theme={"system"}
pnpm db:generate
pnpm db:migrate
```
```bash theme={"system"}
pnpm dev
```
Your application will be available at [http://localhost:3000](http://localhost:3000)
## Available Scripts
| Command | Description |
| ------------- | ------------------------ |
| `pnpm dev` | Start development server |
| `pnpm build` | Build for production |
| `pnpm start` | Start production server |
| `pnpm lint` | Run linting |
| `pnpm format` | Format code |
| `pnpm test` | Run Playwright tests |
### Database Commands
| Command | Description |
| ------------------ | ------------------------- |
| `pnpm db:generate` | Generate database schemas |
| `pnpm db:migrate` | Run database migrations |
| `pnpm db:studio` | Open Drizzle Studio |
| `pnpm db:push` | Push schema changes |
| `pnpm db:check` | Check schema changes |
## Project Structure
```
├── app/ # Next.js app directory
│ ├── api/ # API routes
│ ├── (auth)/ # Authentication routes
│ └── dashboard/ # User dashboard
├── components/ # React components
│ ├── ui/ # UI components
│ ├── forms/ # Form components
│ └── wallet/ # Wallet components
├── lib/ # Utility functions and libraries
│ ├── db/ # Database configuration
│ ├── auth/ # Auth utilities
│ └── solana/ # Solana utilities
├── hooks/ # Custom React hooks
├── public/ # Static assets
├── tests/ # Playwright tests
└── artifacts/ # Build artifacts
```
## Key Integrations
### Privy Authentication
This starter uses Privy for authentication, providing:
* Social login (Google, Twitter, etc.)
* Email and phone authentication
* Wallet-based authentication
* Server-side session management
```tsx theme={"system"}
// app/providers.tsx
import { PrivyProvider } from '@privy-io/react-auth';
import { PrivyWagmiConnector } from '@privy-io/wagmi-connector';
export function Providers({ children }: { children: React.ReactNode }) {
return (
{children}
);
}
```
### Solana Agent Kit Integration
The starter comes with Solana Agent Kit pre-configured, allowing users to:
* View token balances
* Send and receive tokens
* Interact with Solana programs
* Use AI-powered blockchain interactions
```tsx theme={"system"}
// lib/solana/agent.ts
import { SolanaAgentKit, createVercelAITools } from 'solana-agent-kit';
import TokenPlugin from '@solana-agent-kit/plugin-token';
import { PublicKey } from '@solana/web3.js';
export function createSolanaAgent(wallet: any) {
const agent = new SolanaAgentKit(
{
publicKey: new PublicKey(wallet.publicKey),
signTransaction: wallet.signTransaction,
signMessage: wallet.signMessage,
sendTransaction: wallet.sendTransaction,
},
process.env.NEXT_PUBLIC_RPC_URL!,
{}
).use(TokenPlugin);
const tools = createVercelAITools(agent, agent.actions);
return { agent, tools };
}
```
## Database Setup
This starter uses Drizzle ORM with PostgreSQL. The schema is defined in `lib/db/schema.ts`:
```tsx theme={"system"}
// lib/db/schema.ts
import { pgTable, serial, text, timestamp, uuid } from 'drizzle-orm/pg-core';
export const users = pgTable('users', {
id: serial('id').primaryKey(),
privyUserId: text('privy_user_id').notNull().unique(),
walletAddress: text('wallet_address'),
email: text('email'),
createdAt: timestamp('created_at').defaultNow(),
updatedAt: timestamp('updated_at').defaultNow(),
});
export const transactions = pgTable('transactions', {
id: uuid('id').defaultRandom().primaryKey(),
userId: serial('user_id').references(() => users.id),
signature: text('signature').notNull(),
amount: text('amount').notNull(),
tokenAddress: text('token_address'),
recipient: text('recipient').notNull(),
status: text('status').notNull(),
createdAt: timestamp('created_at').defaultNow(),
});
```
## Contributing
Contributions are welcome! Please feel free to submit a Pull Request.
## License
This project is licensed under the terms of the license included in the [LICENSE](LICENSE) file.
# Privy App Kit - React Native
Source: https://docs.sendai.fun/docs/v2/examples/embedded-wallets/react-native
Mobile chat application for Solana blockchain interaction with React Native and Privy
Demo
## Features
Authentication with Privy supporting Google, Apple, and Email login methods
Chat interface for interacting with Solana blockchain using simple language
Solana transaction capabilities through an intelligent AI assistant
Persistent chat history management across sessions
User profile creation and management
Built with React Native for native mobile performance
## Prerequisites
* Node.js (v16+)
* MongoDB
* OpenAI API Key
* Helius API Key (for Solana RPC access)
* iOS/Android development environment
## Setup Instructions
```bash theme={"system"}
git clone https://github.com/yourusername/privy-sak-react-native.git
cd privy-sak-react-native
```
```bash theme={"system"}
yarn install
```
Copy the example environment files:
```bash theme={"system"}
# For client
cp .env.local.example .env.local
# For server
cd server
cp .env.example .env
cd ..
# For Expo configuration
cp app.example.json app.json
```
Update these files with your app's information and API keys.
```bash theme={"system"}
cd server
yarn dev
```
```bash theme={"system"}
npx expo run:ios
```
For Android:
```bash theme={"system"}
npx expo run:android
```
This app cannot be run with Expo Go as some polyfills used in the project are not compatible with Expo Go. You must use the development build with `npx expo run:ios` or `npx expo run:android`.
## Environment Variables
The following environment variables are required:
### Client (.env.local)
```env theme={"system"}
# OpenAI API Key for chat functionality
EXPO_PUBLIC_OPENAI_API_KEY=your_openai_api_key
# Server URL
EXPO_PUBLIC_API_URL=http://localhost:3001
# Helius RPC URL with API key
EXPO_PUBLIC_HELIUS_URL=https://mainnet.helius-rpc.com/?api-key=your_helius_api_key
```
### Server (.env)
```env theme={"system"}
# OpenAI API Key
OPENAI_API_KEY=your_openai_api_key
# MongoDB connection string
MONGODB_URI=mongodb://localhost:27017/privy-sak
# Helius RPC URL
HELIUS_STAKED_URL=https://mainnet.helius-rpc.com/?api-key=your_helius_api_key
# Server port
PORT=3001
```
## Project Structure
```
src/
├── screens/ # App screens
│ ├── AuthScreen.js # Authentication screen
│ ├── ChatScreen.js # Main chat interface
│ ├── ProfileScreen.js # User profile management
│ └── SettingsScreen.js # App settings
├── components/ # Reusable components
│ ├── chat/ # Chat-related components
│ ├── wallet/ # Wallet components
│ └── ui/ # UI components
├── hooks/ # Custom React hooks
│ ├── useChat.js # Chat functionality
│ ├── useSolana.js # Solana interaction
│ └── useAuth.js # Authentication
├── walletProviders/ # Privy wallet integration
├── navigation/ # Navigation setup
├── assets/ # Images, colors, icons
├── lib/ # Utility functions
│ ├── ai/ # AI providers and tools
│ ├── api/ # API interactions
│ └── utils/ # Helper functions
└── state/ # State management
```
```
server/
├── controllers/ # API endpoint controllers
│ ├── authController.js # Authentication endpoints
│ ├── chatController.js # Chat history management
│ └── userController.js # User profile management
├── models/ # MongoDB models
│ ├── Chat.js # Chat data model
│ └── User.js # User data model
├── routes/ # API routes
│ ├── auth.js # Auth routes
│ ├── chat.js # Chat routes
│ └── user.js # User routes
├── middleware/ # Custom middleware
│ ├── auth.js # Authentication middleware
│ └── error.js # Error handling
├── db/ # Database connection
└── server.js # Main server file
```
## Privy Integration
This example demonstrates how to integrate Privy's embedded wallet solution with React Native. Key integration points include:
### Wallet Provider Setup
```jsx theme={"system"}
// src/walletProviders/index.js
import React, { createContext, useContext, useState, useEffect } from 'react';
import { PrivyClient } from '@privy-io/react-native';
const WalletContext = createContext(null);
export function WalletProvider({ children }) {
const [privyClient, setPrivyClient] = useState(null);
const [wallet, setWallet] = useState(null);
const [connected, setConnected] = useState(false);
useEffect(() => {
const initPrivy = async () => {
const client = new PrivyClient({
appId: process.env.EXPO_PUBLIC_PRIVY_APP_ID,
});
setPrivyClient(client);
// Check if user is already logged in
const session = await client.getSession();
if (session) {
const walletInfo = await client.getWallet();
setWallet(walletInfo);
setConnected(true);
}
};
initPrivy();
}, []);
const login = async (method) => {
try {
await privyClient.login(method);
const walletInfo = await privyClient.getWallet();
setWallet(walletInfo);
setConnected(true);
return true;
} catch (error) {
console.error('Login failed:', error);
return false;
}
};
const logout = async () => {
try {
await privyClient.logout();
setWallet(null);
setConnected(false);
return true;
} catch (error) {
console.error('Logout failed:', error);
return false;
}
};
return (
await wallet?.signTransaction(tx),
signMessage: async (msg) => await wallet?.signMessage(msg),
sendTransaction: async (tx, connection) => {
return await wallet?.sendTransaction(tx, connection);
},
}}
>
{children}
);
}
export const useWallet = () => useContext(WalletContext);
```
### Solana Agent Kit Integration
```jsx theme={"system"}
// src/hooks/useSolanaAgent.js
import { useMemo } from 'react';
import { SolanaAgentKit, createVercelAITools } from 'solana-agent-kit';
import TokenPlugin from '@solana-agent-kit/plugin-token';
import { Connection, PublicKey } from '@solana/web3.js';
import { useWallet } from '../walletProviders';
export function useSolanaAgent() {
const { wallet, connected, signTransaction, signMessage, sendTransaction } = useWallet();
const agent = useMemo(() => {
if (!connected || !wallet) return null;
return new SolanaAgentKit(
{
publicKey: new PublicKey(wallet.address),
signTransaction,
signMessage,
sendTransaction,
signAndSendTransaction: async (tx) => {
const signed = await signTransaction(tx);
const connection = new Connection(
process.env.EXPO_PUBLIC_HELIUS_URL,
'confirmed'
);
const signature = await sendTransaction(signed, connection);
return { signature };
},
},
process.env.EXPO_PUBLIC_HELIUS_URL,
{}
).use(TokenPlugin);
}, [wallet, connected, signTransaction, signMessage, sendTransaction]);
const tools = useMemo(() => {
if (!agent) return null;
return createVercelAITools(agent, agent.actions);
}, [agent]);
return { agent, tools, isReady: !!agent };
}
```
## Mobile-Specific Considerations
When working with Solana Agent Kit in React Native, consider these mobile-specific aspects:
1. **Polyfills**: Several Node.js modules need polyfills in React Native
2. **Performance**: Be mindful of resource usage on mobile devices
3. **Offline Handling**: Implement proper handling for intermittent connectivity
4. **Deep Linking**: Configure for wallet connection redirects
5. **Secure Storage**: Use secure storage for sensitive information
## License
This project is licensed under the MIT License - see the LICENSE file for details.
## Contributing
Contributions are welcome! Please feel free to submit a Pull Request.
# Turnkey Agent Starter
Source: https://docs.sendai.fun/docs/v2/examples/embedded-wallets/turnkey
Modern web application with Turnkey wallet integration for Solana Agent Kit
A modern web application built with Next.js and Solana integration, featuring authentication via Turnkey and AI capabilities.
Demo
## Features
Secure user authentication powered by Turnkey's embedded wallet solution
Built with Solana Agent Kit for blockchain interactions and transactions
OpenAI integration for intelligent features and natural language interactions
Built with modern UI components and Tailwind CSS for a sleek user experience
Full TypeScript support throughout the application codebase
## Tech Stack
| Category | Technologies |
| -------------- | -------------------------------- |
| Framework | Next.js |
| Authentication | Turnkey |
| Blockchain | Solana Web3.js, Solana Agent Kit |
| Styling | Tailwind CSS |
| AI | OpenAI SDK |
| Development | TypeScript |
## Installation
```bash theme={"system"}
# Clone the starter template
npx gitpick sendaifun/solana-agent-kit/examples/turnkey-agent-starter -b v2
cd turnkey-agent-starter
```
```bash theme={"system"}
pnpm install
```
Create a `.env.local` file in the root directory with the following variables:
```
# Turnkey credentials
NEXT_PUBLIC_TURNKEY_API_BASE_URL=
NEXT_PUBLIC_TURNKEY_API_PUBLIC_KEY=
NEXT_PUBLIC_TURNKEY_ORGANIZATION_ID=
NEXT_PUBLIC_TURNKEY_API_PRIVATE_KEY=
# Solana configuration
NEXT_PUBLIC_RPC_URL=
# OpenAI API key
OPENAI_API_KEY=
```
## Development
Start the development server:
```bash theme={"system"}
pnpm dev
```
The application will be available at `http://localhost:3000`.
## Project Structure
```
src/app
├── components/ # UI components
├── chat/ # /chat route
└── utils/ # Utility functions
```
## Turnkey Integration
This starter uses Turnkey to provide a secure embedded wallet experience. Turnkey offers several advantages for Solana Agent Kit applications:
* **Enhanced Security**: Private keys are stored in secure enclaves
* **Programmatic Control**: Fine-grained control over wallet operations
* **Customizable Policies**: Set rules and limits for transactions
* **Multi-user Support**: Easily manage wallets for multiple users
```tsx theme={"system"}
import { TurnkeySigner } from '@turnkey/solana';
import { SolanaAgentKit, createVercelAITools } from 'solana-agent-kit';
import TokenPlugin from '@solana-agent-kit/plugin-token';
import { PublicKey } from '@solana/web3.js';
// Initialize Turnkey signer
const turnkeySigner = new TurnkeySigner({
organizationId: process.env.NEXT_PUBLIC_TURNKEY_ORGANIZATION_ID!,
apiKey: {
publicKey: process.env.NEXT_PUBLIC_TURNKEY_API_PUBLIC_KEY!,
privateKey: process.env.NEXT_PUBLIC_TURNKEY_API_PRIVATE_KEY!,
},
apiBaseUrl: process.env.NEXT_PUBLIC_TURNKEY_API_BASE_URL!,
privateKeyId: user.privateKeyId,
});
// Initialize Agent Kit with Turnkey
const agent = new SolanaAgentKit(
{
publicKey: new PublicKey(user.publicKey),
signTransaction: async (tx) => await turnkeySigner.signTransaction(tx),
signMessage: async (msg) => await turnkeySigner.signMessage(msg),
sendTransaction: async (tx) => {
const signedTx = await turnkeySigner.signTransaction(tx);
return await connection.sendRawTransaction(signedTx.serialize());
},
},
process.env.NEXT_PUBLIC_RPC_URL!,
{}
).use(TokenPlugin);
// Create AI tools
const tools = createVercelAITools(agent, agent.actions);
```
## Key Benefits
### Secure Authentication Flow
With Turnkey, this starter provides a secure authentication flow that protects users' private keys. Unlike traditional wallets, private keys are never exposed to the application or the user.
### Fine-grained Transaction Control
The integration allows for fine-grained control over transactions, making it possible to:
* Implement approval workflows
* Set transaction limits
* Create custom authorization rules
* Apply spending controls
### Seamless User Experience
Users can interact with the Solana blockchain through natural language, with the AI assistant handling the technical details. This creates a seamless experience for both blockchain beginners and experienced users.
## AI Integration
The starter leverages the OpenAI API to process natural language requests and convert them into Solana Agent Kit actions. This allows users to:
* Check balances
* Transfer tokens
* Swap tokens
* Get token information
* And much more...
This is a starter template and may not include all features or optimizations for production use (e.g the use of the OpenAI API key on the client). Please review and modify as necessary for your specific use case.
## License
This project is licensed under the MIT License - see the LICENSE file for details.
## Contributing
Contributions are welcome! Please feel free to submit a Pull Request.
# Examples
Source: https://docs.sendai.fun/docs/v2/examples/examples-intro
Implementation examples for the Solana Agent Kit v2
# Examples
This section contains a collection of examples demonstrating various implementations of the Solana Agent Kit v2. These examples are organized by category to help you find the right starting point for your project.
## Examples Overview
Market making, cross-chain operations, and DEX integration examples
Examples using Turnkey, Privy, Crossmint, and Para wallet solutions
Server implementation for Model Context Protocol with Claude Desktop
Persistent agents, LangChain and LangGraph integrations
Discord and Telegram bot integration examples
Workflow automation with n8n for no-code solutions
## DeFi Examples
| Example | Description |
| ------------------------------------------------------------- | ------------------------------------------------------------- |
| [market-making-agent](/examples/defi/market-making-agent) | Agent implementation for market making on Solana DEXs |
| [wormhole-nextjs-agent](/examples/defi/wormhole-nextjs-agent) | Cross-chain agent using Wormhole with Next.js framework |
| [okx-dex-starter](/examples/defi/okx-dex-starter) | Starter template for building agents interacting with OKX DEX |
## Embedded Wallets
| Example | Description |
| --------------------------------------------------------------------------------------- | ------------------------------------------------------------------------- |
| [turnkey-agent-starter](/examples/embedded-wallets/turnkey-agent-starter) | Agent implementation using Turnkey's secure embedded wallet solution |
| [privy-agent-tanstack-starter](/examples/embedded-wallets/privy-agent-tanstack-starter) | Example using Privy wallet integration with TanStack for state management |
| [crossmint-sak-v2](/examples/embedded-wallets/crossmint-sak-v2) | Implementation using Crossmint's wallet infrastructure |
| [para-plugin-example](/examples/embedded-wallets/para-plugin-example) | Example demonstrating Para wallet plugin integration |
## MCP (Model Context Provider)
| Example | Description |
| ---------------------------------------------------------- | ---------------------------------------------------------------------- |
| [agent-kit-mcp-server](/examples/mcp/agent-kit-mcp-server) | Server implementation for Model Context Protocol with Solana Agent Kit |
## Miscellaneous
| Example | Description |
| ----------------------------------------------------------------------- | ---------------------------------------------------------------- |
| [persistent-agent](/examples/misc/persistent-agent) | Example of an agent with persistent state between interactions |
| [agent-kit-nextjs-langchain](/examples/misc/agent-kit-nextjs-langchain) | Integration of Agent Kit with Next.js and LangChain |
| [orbofi-personality-engine](/examples/misc/orbofi-personality-engine) | Example using OrboFi personality engine for more engaging agents |
| [agent-kit-langgraph](/examples/misc/agent-kit-langgraph) | Integration with LangGraph for complex agent workflows |
## Social
| Example | Description |
| ----------------------------------------------------------- | --------------------------------------------------------- |
| [discord-bot-starter](/examples/social/discord-bot-starter) | Starter template for building Discord bots with Agent Kit |
| [tg-bot-starter](/examples/social/tg-bot-starter) | Template for Telegram bot integration |
## n8n Integration
A comprehensive [node setup](/examples/n8n-solana-agent) for integrating Solana Agent Kit with the n8n workflow automation platform. This allows creation of no-code/low-code blockchain workflows.
## Getting Started
Each example includes its own README with specific instructions. To get started:
1. Choose an example that best fits your use case
2. Navigate to the example directory
3. Follow the installation and setup instructions in the example's README
Most examples can be run with a simple set of commands:
```bash theme={"system"}
# Clone the repository
git clone https://github.com/solana-labs/agent-kit-v2
cd agent-kit-v2
# Navigate to the example
cd examples/[example-category]/[example-name]
# Install dependencies
npm install
# Start the development server
npm run dev
```
## Prerequisites
Most examples require:
* Node.js (version specified in each example)
* npm, yarn, or pnpm (as specified)
* Basic understanding of Solana and blockchain concepts
* API keys (OpenAI, Solana RPC, etc.) as specified in each example
- Create a `.env.local` file in the example directory to store your API keys
- Use a development wallet with a small amount of SOL for testing
- Most examples work with devnet or testnet by default
- Check the specific RPC requirements in each example's README
## Customizing Examples
The examples are designed to be starting points for your own implementations. Here are some ways you can extend them:
* Add additional plugins to expand functionality
* Customize prompts to create specialized agent behaviors
* Integrate with different wallet providers
* Connect to additional DeFi protocols
* Modify the UI components to match your application's design
## Contributing
If you'd like to contribute a new example, please follow the standard contribution guidelines in the main repository. New examples should:
* Include a comprehensive README.md
* Be well-documented with comments
* Follow the code structure of existing examples
* Include any necessary environment variable templates
For questions or issues with specific examples, please reference the individual example's documentation first. For general questions about the Solana Agent Kit, refer to the main documentation.
# Introduction
Source: https://docs.sendai.fun/docs/v2/fraction/intro
Split any transaction into fractions on Solana with automated revenue distribution
## What is Fraction?
Fraction is a Solana program that automatically splits all incoming SPL tokens (e.g., USDC, SOL, or any SPL token) among recipients according to pre-configured percentage shares. Built for autonomous agents and applications, Fraction enables seamless revenue distribution without manual intervention.
## Program Information
```text Mainnet theme={"system"}
FracVQuBhSeBvbw1qNrJKkDmcdPcFYWdneoKbJa3HMrj
```
```text Devnet theme={"system"}
FracVQuBhSeBvbw1qNrJKkDmcdPcFYWdneoKbJa3HMrj
```
Complete Interface Description Language for direct program integration
## How It Works
### 1. Create Configuration
You create a `fraction_config` that defines:
* **Recipients**: Who receives funds and their percentage shares
* **Authority**: Who can update the configuration
* **Agent**: Automated bot that triggers distributions
### 2. Receive Funds
Anyone can send tokens directly to your fraction configuration address. All tokens accumulate in a treasury account until distribution.
### 3. Automatic Distribution
An authorized agent (cranker) monitors the treasury and initiates `claim` transactions that:
* Distribute all accumulated funds according to configured percentages
* Transfer the agent's 0.05% protocol fee
* Complete all transfers atomically in a single transaction
* Empty the treasury completely
## Key Features
All transfers happen in a single transaction, ensuring consistency and preventing partial distributions.
Once configured, distributions happen automatically when triggered by authorized agents.
Works with any SPL token - USDC, SOL, project tokens, or custom mints.
Support upto 5 participants with customizable percentage allocations.
## Distribution Mechanics
When an authorized agent executes distribution:
1. **Protocol Fee**: Agent receives 0.05% as incentive
2. **Participant Split**: Remaining funds distributed per configured percentages
3. **Atomic Execution**: All transfers occur in single transaction
4. **Complete Drainage**: Treasury is emptied entirely
5. **No Manual Steps**: Recipients automatically receive their shares
## Real-World Use Cases
**Revenue Splitting**: Automatically split subscription revenue, sales proceeds, or service fees among team members, investors, and operational wallets.
**Payroll Automation**: Set up automated salary distributions for employees with different percentage allocations.
**Agent Revenue Share**: Instantly split revenue generated by AI agents running tasks, with automatic distribution to human operators and infrastructure costs.
**Service Commissions**: Distribute commissions from agent-facilitated transactions to multiple stakeholders.
**Sale Proceeds**: Automatically allocate token sale proceeds between team, marketing, development, and treasury wallets.
**Treasury Management**: Split ongoing protocol revenue among different operational buckets.
**Fee Distribution**: Split protocol fees among liquidity providers, governance token holders, and development funds.
**Yield Farming**: Distribute farming rewards across multiple participant categories.
## Security & Audits
All contracts are open-source with reproducible builds. Code is formally verified and independently audited by Sec3.
* **Open Source**: All code is publicly available and auditable
* **Sec3 Audited**: Independently audited by leading Solana security firm
* **Reproducible Builds**: Anyone can verify the deployed bytecode matches the source
* **Battle Tested**: Used in production by multiple applications
## Getting Started
Ready to integrate Fraction into your application? Check out our SDK documentation to start building with automated revenue distribution.
Learn how to integrate Fraction SDK into your TypeScript application
# Fraction SDK
Source: https://docs.sendai.fun/docs/v2/fraction/sdk
TypeScript SDK for integrating with the Fraction protocol on Solana
## Installation
Install the Fraction SDK using your preferred package manager:
```bash pnpm theme={"system"}
pnpm install @sendaifun/fraction
```
```bash npm theme={"system"}
npm install @sendaifun/fraction
```
```bash yarn theme={"system"}
yarn add @sendaifun/fraction
```
## Quick Start
### Initialize Client
```typescript theme={"system"}
import { Fraction } from '@sendaifun/fraction';
import { Connection, Keypair } from '@solana/web3.js';
const connection = new Connection('https://api.devnet.solana.com');
const payer = Keypair.generate();
// Initialize client
const client = new Fraction(
'https://api.devnet.solana.com', // RPC endpoint
payer.publicKey // Transaction payer
);
```
### Create Revenue Split Configuration
```typescript theme={"system"}
const participants = [
{ wallet: teamMember1.publicKey, shareBps: 4000 }, // 40%
{ wallet: teamMember2.publicKey, shareBps: 3000 }, // 30%
{ wallet: teamMember3.publicKey, shareBps: 2000 }, // 20%
{ wallet: teamMember4.publicKey, shareBps: 1000 }, // 10%
];
const { tx, fractionConfigPda } = await client.createFraction({
participants,
authority: authority.publicKey,
name: 'team-revenue-split',
botWallet: distributionAgent.publicKey
});
```
### Execute Distribution
```typescript theme={"system"}
// Agent triggers distribution
const tx = await client.claimAndDistribute(
fractionConfigPda, // Configuration account
usdcMint // Token mint to distribute
);
```
## API Reference
### Client Class
#### Constructor
```typescript theme={"system"}
new Fraction(rpc?: string, payer?: PublicKey)
```
RPC endpoint URL (defaults to mainnet-beta)
Transaction fee payer (only required for versioned transactions)
#### Methods
Configuration for the new fraction setup
```typescript theme={"system"}
type CreatorFractionInputArgs = {
participants: Participant[];
authority: PublicKey;
name?: string;
botWallet: PublicKey;
}
```
**Returns:** `Promise<{ tx: Transaction | VersionedTransaction, fractionConfigPda: PublicKey }>`
Creates a new revenue split configuration with the specified participants and settings.
The fraction configuration account to update
Updated configuration parameters
```typescript theme={"system"}
type UpdateFractionInputArgs = {
participants: Participant[];
botWallet?: PublicKey;
}
```
**Returns:** `Promise`
Updates an existing fraction configuration with new participants or agent wallet.
The fraction configuration account
The SPL token mint to distribute
**Returns:** `Promise`
Executes distribution of accumulated tokens to all participants according to their configured shares.
### State Queries
Wallet address of the participant
**Returns:** `Promise`
Retrieves all fraction configurations where the specified wallet is a participant.
The fraction configuration account
**Returns:** `Promise`
Retrieves the details of a specific fraction configuration account.
The fraction configuration account
**Returns:** `Promise`
Gets the current treasury balance for the specified configuration.
## Advanced Usage
### Low-Level Instructions
For advanced users who need fine-grained control over transaction building:
```typescript theme={"system"}
import { createFractionIx, getProgram } from '@sendaifun/fraction';
const program = getProgram(connection);
// Create instruction
const { ix, fractionConfigPda } = await createFractionIx(program, {
participants: participants,
authority: authority.publicKey,
botWallet: agent.publicKey
});
// Build composite transaction
const tx = new Transaction()
.add(setupInstruction)
.add(ix)
.add(followupInstruction);
```
### Treasury Management
Calculate and manage treasury accounts:
```typescript theme={"system"}
import { getAssociatedTokenAddressSync } from '@solana/spl-token';
// Calculate treasury address
const treasuryAddress = getAssociatedTokenAddressSync(
tokenMint, // Token to be distributed
fractionConfigPda, // Treasury owner (PDA)
true // Allow off-curve addresses
);
// Fund treasury
await transfer(
connection,
payer,
sourceTokenAccount,
treasuryAddress,
authority,
amount
);
```
## Examples
### Enterprise Revenue Distribution
```typescript theme={"system"}
import { Fraction } from '@sendaifun/fraction';
import { Connection, Keypair } from '@solana/web3.js';
const connection = new Connection('https://api.mainnet-beta.solana.com');
const client = new Fraction(connection.rpcEndpoint, authority.publicKey);
// Define revenue allocation
const participants = [
{ wallet: founder.publicKey, shareBps: 4000 }, // 40% founder
{ wallet: team.publicKey, shareBps: 3000 }, // 30% team
{ wallet: investors.publicKey, shareBps: 2000 }, // 20% investors
{ wallet: operations.publicKey, shareBps: 1000 } // 10% operations
];
// Deploy configuration
const { tx, fractionConfigPda } = await client.createFraction({
participants,
authority: company.publicKey,
name: 'quarterly-revenue-2024',
botWallet: automatedAgent.publicKey
});
// Sign and submit
await connection.sendTransaction(tx, [authority]);
```
### Multi-Token Distribution
```typescript theme={"system"}
const tokens = [
{ mint: usdcMint, name: 'USDC Revenue' },
{ mint: solMint, name: 'SOL Rewards' },
{ mint: projectToken, name: 'Token Emissions' }
];
// Distribute multiple tokens using same configuration
for (const token of tokens) {
const distributionTx = await client.claimAndDistribute(
fractionConfigPda,
token.mint
);
await connection.sendTransaction(distributionTx, [agent]);
console.log(`Distributed ${token.name}`);
}
```
### Dynamic Updates
```typescript theme={"system"}
// Quarterly rebalancing
const newAllocation = [
{ wallet: founder.publicKey, shareBps: 3500 }, // Reduced to 35%
{ wallet: team.publicKey, shareBps: 3500 }, // Increased to 35%
{ wallet: investors.publicKey, shareBps: 2000 }, // Maintained 20%
{ wallet: operations.publicKey, shareBps: 1000 } // Maintained 10%
];
const updateTx = await client.updateFraction(fractionConfigPda, {
participants: newAllocation,
botWallet: newAgent.publicKey // Optional: update agent
});
await connection.sendTransaction(updateTx, [authority]);
```
## Error Handling
### Common Validation Errors
The SDK implements client-side validation with clear error messages:
| Error | Description |
| ---------------------------- | ------------------------------------------ |
| `InvalidShareDistribution` | Participant shares don't sum to 10,000 BPS |
| `NoFundsToDistribute` | Treasury account is empty |
| `DuplicateParticipantWallet` | Same wallet appears multiple times |
| `BotWalletConflict` | Agent wallet matches participant wallet |
| `SystemProgramParticipant` | System program cannot have non-zero shares |
### Error Handling Pattern
```typescript theme={"system"}
async function safeDistribution(config: PublicKey, mint: PublicKey) {
try {
const tx = await client.claimAndDistribute(config, mint);
const signature = await connection.sendTransaction(tx, [agent]);
return { success: true, signature };
} catch (error) {
if (error.message.includes('NoFundsToDistribute')) {
return { success: false, reason: 'Treasury empty' };
}
throw error; // Re-throw unexpected errors
}
}
```
## Type Definitions
### Core Types
```typescript theme={"system"}
type Participant = {
wallet: PublicKey;
shareBps: number; // 0-10,000 basis points (0-100%)
}
type FractionConfig = {
authority: PublicKey;
name: string;
participants: Participant[];
botWallet: PublicKey;
incentiveBps: number;
bump: number;
}
```
**Basis Points (BPS)**: Share allocations use basis points where 10,000 BPS = 100%. For example, 4000 BPS = 40%.
### Configuration Derivation
```typescript theme={"system"}
import { PublicKey } from '@solana/web3.js';
// Derive configuration PDA
const [configPda, bump] = PublicKey.findProgramAddressSync(
[
Buffer.from("fraction_config"),
authority.toBuffer(),
Buffer.from(configurationName)
],
programId
);
```
## Program IDL
The complete Interface Description Language (IDL) for the Fraction protocol:
```json theme={"system"}
{
"address": "FracVQuBhSeBvbw1qNrJKkDmcdPcFYWdneoKbJa3HMrj",
"metadata": {
"name": "fraction",
"version": "0.1.0",
"spec": "0.1.0",
"description": "Created with Anchor"
},
"instructions": [
{
"name": "claim_and_distribute",
"discriminator": [3],
"accounts": [
{ "name": "bot_wallet", "writable": true, "signer": true },
{ "name": "authority" },
{
"name": "fraction_config",
"writable": true,
"pda": {
"seeds": [
{
"kind": "const",
"value": [
102, 114, 97, 99, 116, 105, 111, 110, 95, 99, 111, 110, 102,
105, 103
]
},
{
"kind": "account",
"path": "fraction_config.authority",
"account": "FractionConfig"
},
{
"kind": "account",
"path": "fraction_config.name",
"account": "FractionConfig"
}
]
}
},
{
"name": "treasury",
"writable": true,
"pda": {
"seeds": [
{ "kind": "account", "path": "fraction_config" },
{ "kind": "account", "path": "token_program" },
{ "kind": "account", "path": "treasury_mint" }
],
"program": {
"kind": "const",
"value": [
140, 151, 37, 143, 78, 36, 137, 241, 187, 61, 16, 41, 20, 142,
13, 131, 11, 90, 19, 153, 218, 255, 16, 132, 4, 142, 123, 216,
219, 233, 248, 89
]
}
}
},
{ "name": "treasury_mint" },
{ "name": "bot_token_account", "writable": true },
{ "name": "participant_token_account_0", "writable": true },
{ "name": "participant_token_account_1", "writable": true },
{ "name": "participant_token_account_2", "writable": true },
{ "name": "participant_token_account_3", "writable": true },
{ "name": "participant_token_account_4", "writable": true },
{ "name": "token_program" },
{
"name": "system_program",
"address": "11111111111111111111111111111111"
}
],
"args": []
},
{
"name": "initialize_fraction",
"discriminator": [1],
"accounts": [
{ "name": "authority", "writable": true, "signer": true },
{
"name": "fraction_config",
"writable": true,
"pda": {
"seeds": [
{
"kind": "const",
"value": [
102, 114, 97, 99, 116, 105, 111, 110, 95, 99, 111, 110, 102,
105, 103
]
},
{ "kind": "account", "path": "authority" },
{ "kind": "arg", "path": "name" }
]
}
},
{
"name": "system_program",
"address": "11111111111111111111111111111111"
}
],
"args": [
{ "name": "name", "type": "string" },
{
"name": "participants",
"type": { "array": [{ "defined": { "name": "Participant" } }, 5] }
},
{ "name": "bot_wallet", "type": "pubkey" }
]
},
{
"name": "update_fraction",
"discriminator": [2],
"accounts": [
{
"name": "authority",
"signer": true,
"relations": ["fraction_config"]
},
{
"name": "fraction_config",
"writable": true,
"pda": {
"seeds": [
{
"kind": "const",
"value": [
102, 114, 97, 99, 116, 105, 111, 110, 95, 99, 111, 110, 102,
105, 103
]
},
{
"kind": "account",
"path": "fraction_config.authority",
"account": "FractionConfig"
},
{
"kind": "account",
"path": "fraction_config.name",
"account": "FractionConfig"
}
]
}
}
],
"args": [
{
"name": "participants",
"type": { "array": [{ "defined": { "name": "Participant" } }, 5] }
},
{ "name": "bot_wallet", "type": "pubkey" }
]
}
],
"accounts": [{ "name": "FractionConfig", "discriminator": [1] }],
"errors": [
{
"code": 6000,
"name": "InvalidShareDistribution",
"msg": "Invalid share distribution - must sum to 10,000"
},
{ "code": 6001, "name": "NameTooLong", "msg": "Name too long" },
{
"code": 6002,
"name": "NoFundsToDistribute",
"msg": "No funds to distribute"
},
{
"code": 6003,
"name": "ArithmeticOverflow",
"msg": "Arithmetic overflow"
},
{
"code": 6004,
"name": "DuplicateParticipantWallet",
"msg": "Duplicate participant wallet detected"
},
{
"code": 6005,
"name": "BotWalletConflict",
"msg": "Bot wallet cannot be the same as any participant wallet"
},
{
"code": 6006,
"name": "InvalidAuthority",
"msg": "Invalid authority provided"
},
{ "code": 6007, "name": "InvalidBot", "msg": "Invalid bot wallet" },
{
"code": 6008,
"name": "SystemProgramParticipant",
"msg": "System program cannot be a participant wallet"
},
{ "code": 6009, "name": "InvalidAccount", "msg": "Invalid account owner" }
],
"types": [
{
"name": "FractionConfig",
"type": {
"kind": "struct",
"fields": [
{ "name": "authority", "type": "pubkey" },
{ "name": "name", "type": "string" },
{
"name": "participants",
"type": { "array": [{ "defined": { "name": "Participant" } }, 5] }
},
{ "name": "bot_wallet", "type": "pubkey" },
{ "name": "incentive_bps", "type": "u8" },
{ "name": "bump", "type": "u8" }
]
}
},
{
"name": "Participant",
"type": {
"kind": "struct",
"fields": [
{ "name": "wallet", "type": "pubkey" },
{ "name": "share_bps", "type": "u16" }
]
}
}
]
}
```
**Program Address**: The Fraction protocol is deployed at `Ck2PtB73t36kjk4mLUztwsBV9jvq7q3mGfSNmQevwFgg`. This IDL can be used with Anchor clients or other Solana development tools for direct program interaction.
## Best Practices
**Share Distribution**: Always ensure participant shares sum to exactly 10,000 BPS (100%) to avoid validation errors.
**Agent Selection**: Choose reliable agents for distribution triggers. Consider using services like Clockwork for automated scheduling.
**Authority Security**: The authority can update configurations and should use secure key management practices.
**Multi-Token Support**: The same configuration can distribute different SPL tokens - just call `claimAndDistribute` with different mint addresses.
# Adrena Protocol Integration
Source: https://docs.sendai.fun/docs/v2/integrations/defi-integration/adrena
Learn how to use perpetual trading functionality with Adrena Protocol
Solana Agent Kit provides comprehensive integration with Adrena Protocol for perpetual trading. The integration supports both long and short positions with configurable leverage and slippage parameters.
## Key Features
* Long/Short position trading
* Configurable leverage up to 100x
* Slippage protection
* Automated token account setup
* Price feed integration
* Support for multiple collateral types
## Opening Positions
### Long Position
```typescript theme={"system"}
const signature = await agent.methods.openPerpTradeLong({
price: 300, // USD price
collateralAmount: 10, // Amount of collateral
collateralMint: new PublicKey("J1toso1uCk3RLmjorhTtrVwY9HJ7X8V9yYac6Y7kGCPn"), // jitoSOL
leverage: 50000, // 5x leverage (10000 = 1x)
tradeMint: new PublicKey("J1toso1uCk3RLmjorhTtrVwY9HJ7X8V9yYac6Y7kGCPn"), // Trading asset
slippage: 0.3, // 0.3% slippage tolerance
});
```
### Short Position
```typescript theme={"system"}
const signature = await agent.methods.openPerpTradeShort({
price: 300,
collateralAmount: 10,
collateralMint: TOKENS.USDC, // Default collateral for shorts
leverage: 50000,
tradeMint: TOKENS.jitoSOL,
slippage: 0.3,
});
```
## Closing Positions
### Close Long Position
```typescript theme={"system"}
const signature = await agent.methods.closePerpTradeLong({
price: 200, // Minimum exit price
tradeMint: new PublicKey("J1toso1uCk3RLmjorhTtrVwY9HJ7X8V9yYac6Y7kGCPn"),
});
```
### Close Short Position
```typescript theme={"system"}
const signature = await agent.methods.closePerpTradeShort({
price: 200,
tradeMint: new PublicKey("J1toso1uCk3RLmjorhTtrVwY9HJ7X8V9yYac6Y7kGCPn"),
});
```
## LangChain Integration
Solana Agent Kit provides LangChain tools for automated trading:
### Open Trade Tool
```typescript theme={"system"}
import { SolanaPerpOpenTradeTool } from 'solana-agent-kit';
const openTradeTool = new SolanaPerpOpenTradeTool(agent);
// Tool input format:
const input = {
collateralAmount: 1,
collateralMint: "J1toso1uCk3RLmjorhTtrVwY9HJ7X8V9yYac6Y7kGCPn",
tradeMint: "J1toso1uCk3RLmjorhTtrVwY9HJ7X8V9yYac6Y7kGCPn",
leverage: 50000,
price: 100,
slippage: 0.3,
side: "long" // or "short"
};
```
### Close Trade Tool
```typescript theme={"system"}
import { SolanaPerpCloseTradeTool } from 'solana-agent-kit';
const closeTradeTool = new SolanaPerpCloseTradeTool(agent);
// Tool input format:
const input = {
tradeMint: "J1toso1uCk3RLmjorhTtrVwY9HJ7X8V9yYac6Y7kGCPn",
price: 100,
side: "long" // or "short"
};
```
## Example Prompts
For LangChain AI tools, here are example prompts:
### Opening Trades
```text theme={"system"}
"Open a long position in SOL with 5x leverage using 10 jitoSOL as collateral"
"Short ETH with 3x leverage using 100 USDC as collateral with 0.5% slippage"
"Go long on JitoSOL with maximum leverage of 10x using 5 SOL"
```
### Closing Trades
```text theme={"system"}
"Close my long SOL position at $100 minimum price"
"Exit short ETH position when price reaches $2000"
"Close all my open perpetual trades"
```
## Important Notes
1. **Leverage Configuration**
* Leverage is specified in basis points (10000 = 1x)
* Maximum leverage varies by market
* Example: 50000 = 5x leverage
2. **Collateral Types**
* Long positions: Use same token as tradeMint to avoid swaps
* Short positions: USDC recommended as collateral
3. **Price and Slippage**
* Price in USD
* Slippage as percentage (0.3 = 0.3%)
* Always monitor price impact before trading
## Error Handling
```typescript theme={"system"}
try {
await agent.methods.openPerpTradeLong({...});
} catch (error) {
if (error.message.includes("insufficient funds")) {
// Handle insufficient collateral
} else if (error.message.includes("slippage tolerance exceeded")) {
// Handle price movement
}
}
```
## Technical Details
### Program ID
```typescript theme={"system"}
const ADRENA_PROGRAM_ID = new PublicKey(
"13gDzEXCdocbj8iAiqrScGo47NiSuYENGsRqi3SEAwet"
);
```
### Price Decimals
```typescript theme={"system"}
const PRICE_DECIMALS = 10;
```
### Default Values
```typescript theme={"system"}
const DEFAULT_OPTIONS = {
LEVERAGE_BPS: 50000, // 5x leverage
};
```
### Token Support
* jitoSOL
* USDC
* Additional assets based on protocol liquidity
# AllDomains Integration
Source: https://docs.sendai.fun/docs/v2/integrations/defi-integration/alldomains
Manage and resolve domains across multiple TLDs on Solana
Comprehensive integration with AllDomains service for managing and resolving domains across multiple TLDs on Solana. Supports domain resolution, ownership lookup, and TLD management.
## Core Features
1. Domain Resolution
* Multi-TLD support
* Owner lookup
* Main domain resolution
* Reverse resolution
2. Domain Management
* Owned domains lookup
* TLD enumeration
* Domain registration
* Favorite domains
## Usage
### Resolve Domain
```typescript theme={"system"}
// Resolve any domain
const owner = await agent.methods.resolveAllDomains("mydomain.blink");
// Get owned domains
const domains = await agent.methods.getOwnedAllDomains(
new PublicKey("owner-address")
);
// Get main domain
const mainDomain = await agent.methods.getMainAllDomainsDomain(
new PublicKey("owner-address")
);
```
### List TLDs
```typescript theme={"system"}
// Get all available TLDs
const tlds = await agent.methods.getAllDomainsTLDs();
// Get owned domains for specific TLD
const domainsByTld = await agent.methods.getOwnedDomainsForTLD("bonk");
```
## Example Prompts
### Natural Language Prompts
```text theme={"system"}
"Resolve mydomain.blink to a wallet address"
"Find all domains owned by this wallet"
"Get the main domain for address ABC..."
"List all available TLDs"
```
### LangChain Tool Prompts
#### Resolve Domain
```text theme={"system"}
{
"domain": "mydomain.blink"
}
```
#### Get Owned Domains
```text theme={"system"}
{
"owner": "7nxQB..."
}
```
#### Get Main Domain
```text theme={"system"}
{
"address": "7nxQB..."
}
```
## Response Formats
### Domain Resolution
```typescript theme={"system"}
{
status: "success",
message: "Domain resolved successfully",
owner: "7nxQB..."
}
```
### Owned Domains
```typescript theme={"system"}
{
status: "success",
message: "Owned domains fetched successfully",
domains: ["domain1.blink", "domain2.bonk"]
}
```
### TLD List
```typescript theme={"system"}
{
status: "success",
message: "TLDs fetched successfully",
tlds: [".blink", ".bonk", ".abc"]
}
```
## Implementation Details
### Domain Resolution
```typescript theme={"system"}
interface ResolutionParams {
domain: string; // Full domain with TLD
connection: Connection; // RPC connection
}
// Features
- Multi-TLD support
- Error recovery
- Owner validation
- Case sensitivity
```
### Owner Lookup
```typescript theme={"system"}
interface OwnerLookupParams {
owner: PublicKey; // Wallet address
connection: Connection; // RPC connection
}
// Features
- Domain enumeration
- TLD filtering
- Error handling
- Batch processing
```
## Error Handling
```typescript theme={"system"}
try {
const owner = await agent.methods.resolveAllDomains(domain);
} catch (error) {
if (error.message.includes("undefined")) {
// Handle domain not found
} else if (error.message.includes("invalid")) {
// Handle invalid domain format
}
}
```
## Best Practices
1. **Domain Resolution**
* Validate domain format
* Handle missing domains
* Implement caching
* Check TLD support
2. **Owner Lookup**
* Batch requests
* Cache results
* Filter inactive domains
* Validate addresses
3. **TLD Management**
* Monitor new TLDs
* Update regularly
* Check availability
* Handle migrations
4. **Performance**
* Cache common lookups
* Batch operations
* Monitor RPC usage
* Handle timeouts
## Common Issues
1. **Resolution**
* Invalid formats
* Unsupported TLDs
* Network errors
* Stale data
2. **Owner Lookup**
* Missing domains
* Invalid addresses
* Timeout issues
* RPC errors
3. **TLD Issues**
* New TLDs
* Deprecated TLDs
* Format changes
* Migration issues
## Common TLDs
* .blink
* .bonk
* .abc
* .glow
* .backpack
## Integration Notes
1. **Resolution Flow**
```typescript theme={"system"}
// Step by step resolution
const parser = new TldParser(connection);
const owner = await parser.getOwnerFromDomainTld(domain);
```
2. **Ownership Verification**
```typescript theme={"system"}
const domains = await parser.getParsedAllUserDomains(owner);
const isOwner = domains.some(d => d.domain === domain);
```
3. **Main Domain**
```typescript theme={"system"}
const mainDomain = await parser.getFavoriteDomain(owner);
```
## Related Functions
* `resolveAllDomains`: Domain resolution
* `getOwnedAllDomains`: Domain ownership
* `getAllDomainsTLDs`: TLD management
* `getMainAllDomainsDomain`: Primary domains
# Allora Integration
Source: https://docs.sendai.fun/docs/v2/integrations/defi-integration/allora
Learn how to use Allora price inference and topic functionality
Solana Agent Kit provides comprehensive integration with Allora's API for accessing price inferences and topics. The integration supports both mainnet and testnet environments with configurable API settings.
## Key Features
* Price inference for multiple tokens and timeframes
* Topic management and retrieval
* Inference data by topic ID
* LangChain tool integration
* Configurable network environment
## Configuration
The Allora integration uses the following configuration parameters:
```typescript theme={"system"}
const config: AlloraAPIClientConfig = {
apiKey: string, // Your Allora API key
chainSlug: ChainSlug, // MAINNET or TESTNET
baseAPIUrl: string // Optional custom API URL
};
```
## Basic Usage
### Getting All Topics
```typescript theme={"system"}
const topics = await agent.methods.getAllTopics();
```
### Getting Inference by Topic ID
```typescript theme={"system"}
const inference = await agent.methods.getInferenceByTopicId(topicId);
```
### Getting Price Inference
```typescript theme={"system"}
const priceInference = await agent.methods.getPriceInference(
tokenSymbol, // e.g., "BTC"
timeframe // e.g., "5m"
);
```
## LangChain Integration
Solana Agent Kit provides LangChain tools for automated Allora data retrieval:
### Get All Topics Tool
```typescript theme={"system"}
import { SolanaAlloraGetAllTopics } from 'solana-agent-kit';
const getAllTopicsTool = new SolanaAlloraGetAllTopics(agent);
// Tool returns JSON response:
{
status: "success",
message: "Topics fetched successfully",
topics: AlloraTopic[]
}
```
### Get Inference by Topic ID Tool
```typescript theme={"system"}
import { SolanaAlloraGetInferenceByTopicId } from 'solana-agent-kit';
const getInferenceByTopicIdTool = new SolanaAlloraGetInferenceByTopicId(agent);
// Tool input: topic ID as string
const input = "42";
// Tool returns JSON response:
{
status: "success",
message: "Inference fetched successfully",
topicId: number,
inference: AlloraInference
}
```
### Get Price Inference Tool
```typescript theme={"system"}
import { SolanaAlloraGetPriceInference } from 'solana-agent-kit';
const getPriceInferenceTool = new SolanaAlloraGetPriceInference(agent);
// Tool input format (JSON string):
const input = JSON.stringify({
tokenSymbol: "BTC",
timeframe: "5m"
});
// Tool returns JSON response:
{
status: "success",
message: "Price inference fetched successfully",
tokenSymbol: string,
timeframe: string,
priceInference: string
}
```
## Example Prompts
For LangChain AI tools, here are example prompts:
### Getting Topics
```text theme={"system"}
"Get all available Allora topics"
"List the current topics from Allora"
```
### Getting Inferences
```text theme={"system"}
"Get the inference for topic ID 42"
"What's the current inference for BTC with 5-minute timeframe"
```
## Important Notes
1. **API Key Configuration**
* Default API key provided but recommended to use your own
* Can be configured via ALLORA\_API\_KEY environment variable
2. **Network Environment**
* Supports both mainnet and testnet
* Configured via ALLORA\_NETWORK environment variable
* Defaults to testnet if not specified
3. **API Response Handling**
* All methods return structured responses
* Error handling included for network and API issues
* Status and message fields in all responses
## Error Handling
```typescript theme={"system"}
try {
await agent.methods.getAllTopics();
} catch (error) {
if (error.message.includes("API key invalid")) {
// Handle authentication error
} else if (error.message.includes("network error")) {
// Handle connection issues
}
}
```
## Technical Details
### Available Timeframes
```typescript theme={"system"}
enum PriceInferenceTimeframe {
FIVE_MIN = "5m",
FIFTEEN_MIN = "15m",
THIRTY_MIN = "30m",
ONE_HOUR = "1h",
FOUR_HOUR = "4h",
ONE_DAY = "1d"
}
```
### Supported Token Types
```typescript theme={"system"}
enum PriceInferenceToken {
BTC = "BTC",
ETH = "ETH",
SOL = "SOL"
// Additional tokens based on API support
}
```
### Default Values
```typescript theme={"system"}
const DEFAULT_CONFIG = {
ALLORA_API_KEY: "UP-d33e797de5134909854be2b7",
ALLORA_NETWORK: "testnet"
};
```
# deBridge Integration
Source: https://docs.sendai.fun/docs/v2/integrations/defi-integration/debridge
Learn how to use cross-chain bridging functionality with deBridge protocol
Solana Agent Kit provides comprehensive integration with deBridge's DLN protocol for cross-chain token transfers. The integration supports creating, executing, and monitoring bridge transactions across multiple blockchain networks.
## Key Features
* Cross-chain token transfers
* Transaction status monitoring
* Support for multiple blockchain networks
* Quote generation for bridge transactions
* Token information retrieval
* LangChain tool integration
## Basic Usage
### Creating a Bridge Order
```typescript theme={"system"}
const orderInput = {
srcChainId: "1", // Ethereum
srcChainTokenIn: "0xa0b86991c6218b36c1d19d4a2e9eb0ce3606eb48", // USDC on Ethereum
srcChainTokenInAmount: "1000000", // 1 USDC (6 decimals)
dstChainId: "7565164", // Solana
dstChainTokenOut: "EPjFWdd5AufqSSqeM2qN1xzybapC8G4wEGGkZwyTDt1v", // USDC on Solana
dstChainTokenOutRecipient: "Abws588GagNKeMViBPE2e1WjQ2jViDyw81ZRq8oMSx75",
senderAddress: "Abws588GagNKeMViBPE2e1WjQ2jViDyw81ZRq8oMSx75",
slippage: 0.5 // 0.5% slippage tolerance
};
const order = await agent.methods.createDebridgeOrder(orderInput);
```
### Executing a Bridge Order
```typescript theme={"system"}
const signature = await agent.methods.executeDebridgeBridgeOrder(order.tx.data);
```
### Checking Bridge Status
```typescript theme={"system"}
const status = await agent.methods.checkDebridgeTransactionStatus(signature);
```
### Getting Supported Chains
```typescript theme={"system"}
const chains = await agent.methods.getDebridgeSupportedChains();
```
## LangChain Integration
Solana Agent Kit provides LangChain tools for automated bridge operations:
### Create Bridge Order Tool
```typescript theme={"system"}
import { CreateDebridgeOrderTool } from 'solana-agent-kit';
const createOrderTool = new CreateDebridgeOrderTool(agent);
// Tool input format (JSON string):
const input = JSON.stringify({
srcChainId: "1",
srcChainTokenIn: "0xa0b86991c6218b36c1d19d4a2e9eb0ce3606eb48",
srcChainTokenInAmount: "1000000",
dstChainId: "7565164",
dstChainTokenOut: "EPjFWdd5AufqSSqeM2qN1xzybapC8G4wEGGkZwyTDt1v",
dstChainTokenOutRecipient: "Abws588GagNKeMViBPE2e1WjQ2jViDyw81ZRq8oMSx75",
senderAddress: "Abws588GagNKeMViBPE2e1WjQ2jViDyw81ZRq8oMSx75"
});
```
### Execute Bridge Order Tool
```typescript theme={"system"}
import { ExecuteDebridgeOrderTool } from 'solana-agent-kit';
const executeOrderTool = new ExecuteDebridgeOrderTool(agent);
// Tool input format (JSON string):
const input = JSON.stringify({
transactionData: "0x23b872dd..." // Hex-encoded transaction data from create_bridge_order
});
```
### Check Bridge Status Tool
```typescript theme={"system"}
import { CheckDebridgeStatusTool } from 'solana-agent-kit';
const checkStatusTool = new CheckDebridgeStatusTool(agent);
// Tool input format (JSON string):
const input = JSON.stringify({
txHashOrOrderId: "3Dq8kH5oeN..." // Transaction hash or order ID
});
```
### Get Supported Chains Tool
```typescript theme={"system"}
import { GetDebridgeSupportedChainsTool } from 'solana-agent-kit';
const getSupportedChainsTool = new GetDebridgeSupportedChainsTool(agent);
// No input required
```
## Example Prompts
For LangChain AI tools, here are example prompts:
### Creating Orders
```text theme={"system"}
"Bridge 1000 USDC from Ethereum to Solana"
"Transfer 0.5 ETH from Ethereum to BSC"
"Send 100 USDT from Solana to Polygon"
```
### Checking Status
```text theme={"system"}
"Check the status of my bridge transaction 0x1234..."
"What's the status of my recent bridge order?"
```
### Chain Information
```text theme={"system"}
"Which chains are supported for bridging?"
"Show me the available networks for cross-chain transfers"
```
## Important Parameters
### Bridge Order Parameters
Required Parameters:
* `srcChainId`: Source chain ID (e.g., "1" for Ethereum)
* `srcChainTokenIn`: Token address on source chain
* `srcChainTokenInAmount`: Amount to bridge (in smallest units)
* `dstChainId`: Destination chain ID
* `dstChainTokenOut`: Token address on destination chain
* `dstChainTokenOutRecipient`: Recipient address
* `senderAddress`: Sender's address
Optional Parameters:
* `slippage`: Slippage tolerance in percentage
* `referralCode`: Referral code for the transaction
* `affiliateFeePercent`: Affiliate fee percentage
* `prependOperatingExpenses`: Include operating expenses in calculation
## Error Handling
```typescript theme={"system"}
try {
const order = await agent.methods.createDebridgeOrder(orderInput);
} catch (error) {
if (error.message.includes("insufficient funds")) {
// Handle insufficient balance
} else if (error.message.includes("slippage")) {
// Handle price impact too high
}
}
```
## Technical Details
### Chain IDs
```typescript theme={"system"}
const CHAIN_IDS = {
ETHEREUM: "1",
BSC: "56",
POLYGON: "137",
SOLANA: "7565164"
};
```
### Transaction Status
```typescript theme={"system"}
type TransactionStatus = {
orderId: string;
status: "pending" | "completed" | "failed";
orderLink: string; // Link to deBridge explorer
};
```
### API Endpoints
```typescript theme={"system"}
const DEBRIDGE_API = "https://api.debridge.finance/v1";
```
## Best Practices
1. **Slippage Protection**
* Always set a reasonable slippage tolerance
* Default is 0.5% if not specified
* Consider market volatility when setting slippage
2. **Transaction Monitoring**
* Always monitor transaction status after creation
* Use order links for detailed tracking
* Keep track of order IDs for future reference
3. **Error Recovery**
* Handle network-specific errors appropriately
* Implement retry logic for failed transactions
* Store transaction details for manual resolution if needed
4. **Token Addresses**
* Use checksummed addresses for EVM chains
* Use base58 encoded addresses for Solana
* Verify token decimals before setting amounts
# DexScreener Integration
Source: https://docs.sendai.fun/docs/v2/integrations/defi-integration/dexscreener
Learn how to use DexScreener and Jupiter token lookup functionality
Solana Agent Kit provides integration with DexScreener and Jupiter for comprehensive token data lookup. The integration supports looking up tokens by their ticker symbols or addresses, providing detailed token information including market data.
## Key Features
* Token lookup by ticker symbol
* Token lookup by address
* Integration with Jupiter token list
* DexScreener market data
* LangChain tool integration
* Support for Solana tokens
## Basic Usage
### Get Token Data by Address
```typescript theme={"system"}
import { PublicKey } from "@solana/web3.js";
// Lookup token by its mint address
const mint = new PublicKey("EPjFWdd5AufqSSqeM2qN1xzybapC8G4wEGGkZwyTDt1v"); // USDC
const tokenData = await agent.methods.getTokenDataByAddress(mint);
```
### Get Token Data by Ticker
```typescript theme={"system"}
// Lookup token by its ticker symbol
const tokenData = await agent.methods.getTokenDataByTicker("USDC");
```
### Get Token Address from Ticker
```typescript theme={"system"}
// Get the token's Solana address using DexScreener
const address = await agent.methods.getTokenAddressFromTicker("USDC");
```
## Response Types
### Jupiter Token Data
```typescript theme={"system"}
interface JupiterTokenData {
address: string; // Token mint address
chainId: number; // Solana chain ID
decimals: number; // Token decimals
name: string; // Token name
symbol: string; // Token symbol
logoURI?: string; // Token logo URL
tags?: string[]; // Token tags
extensions?: {
coingeckoId?: string; // CoinGecko ID
website?: string; // Project website
twitter?: string; // Twitter handle
};
}
```
## LangChain Integration
Solana Agent Kit provides a LangChain tool for token lookups:
### Token Data by Ticker Tool
```typescript theme={"system"}
import { SolanaTokenDataByTickerTool } from 'solana-agent-kit';
const tokenDataTool = new SolanaTokenDataByTickerTool(agent);
// Tool input: ticker symbol as string
const input = "USDC";
// Tool returns JSON response:
{
status: "success",
tokenData: JupiterTokenData
}
```
## Example Prompts
For LangChain AI tools, here are example prompts:
### Token Lookups
```text theme={"system"}
"Get token data for USDC"
"Look up information about the SOL token"
"Find the token address for BONK"
```
## Error Handling
```typescript theme={"system"}
try {
const tokenData = await agent.methods.getTokenDataByTicker("USDC");
} catch (error) {
if (error.message.includes("Token address not found")) {
// Handle unknown token
} else if (error.message.includes("Error fetching token data")) {
// Handle API errors
}
}
```
## API Details
### Jupiter Token API
* Base URL: `https://tokens.jup.ag/token/`
* Returns detailed token information from Jupiter's token list
* Requires valid Solana public key as input
### DexScreener API
* Base URL: `https://api.dexscreener.com/latest/dex/`
* Provides market data and token addresses
* Supports searching by token symbol
* Returns multiple pairs sorted by FDV (Fully Diluted Valuation)
## Best Practices
1. **Token Address Validation**
* Always validate mint addresses before lookup
* Use PublicKey class for address handling
* Handle invalid addresses gracefully
2. **Ticker Symbol Search**
* Use uppercase symbols for consistency
* Handle case-insensitive matching
* Consider multiple token matches
3. **Error Recovery**
* Implement retry logic for API failures
* Provide meaningful error messages
* Cache frequently accessed token data
4. **Market Data**
* Sort pairs by FDV for most relevant results
* Filter for Solana pairs only
* Verify token symbol matches
## Implementation Notes
1. **DexScreener Integration**
* Filters for Solana pairs only
* Sorts by Fully Diluted Valuation (FDV)
* Returns highest FDV pair's token address
2. **Jupiter Integration**
* Uses official Jupiter token list
* Provides comprehensive token metadata
* Includes social and project information
3. **Tool Configuration**
* No API key required
* Public endpoints with rate limiting
* Consider implementing caching for performance
## Common Use Cases
1. **Token Discovery**
```typescript theme={"system"}
// Find token address by ticker
const address = await getTokenAddressFromTicker("USDC");
if (address) {
// Get detailed token information
const data = await getTokenDataByAddress(new PublicKey(address));
}
```
2. **Token Validation**
```typescript theme={"system"}
try {
const tokenData = await getTokenDataByTicker("USDC");
const isValid = tokenData && tokenData.address;
} catch (error) {
// Handle invalid token
}
```
3. **Market Analysis**
```typescript theme={"system"}
// Get token data including market pairs
const address = await getTokenAddressFromTicker("SOL");
if (address) {
// Analyze token pairs and market data
const pairs = await getDexScreenerPairs(address);
}
```
# Drift Protocol Integration
Source: https://docs.sendai.fun/docs/v2/integrations/defi-integration/drift
Manage Drift user accounts, vaults, and trading on Solana
Integrate with Drift Protocol for managing user accounts, vaults, perpetual trading, and deposits/withdrawals. This implementation provides comprehensive functionality for interacting with Drift's spot and perpetual markets.
## Core Features
1. **Account Management**
* User account creation
* Vault management
* Deposits and withdrawals
* Account information
2. **Trading Features**
* Perpetual trading
* Market/limit orders
* Position management
* Vault delegation
## Account Creation
```typescript theme={"system"}
// Create user account with initial deposit
const account = await agent.methods.createDriftUserAccount(
100, // amount
"USDC" // symbol
);
// Create vault
const vault = await agent.methods.createDriftVault({
name: "MyVault",
marketName: "USDC-SPOT",
redeemPeriod: 1,
maxTokens: 1000,
minDepositAmount: 100,
managementFee: 2,
profitShare: 20
});
```
### Account Parameters
| Parameter | Type | Required | Description |
| --------- | ------ | -------- | --------------------------- |
| amount | number | Yes | Initial deposit amount |
| symbol | string | Yes | Token symbol (e.g., "USDC") |
### Vault Parameters
| Parameter | Type | Required | Description |
| ---------------- | ------- | -------- | ---------------------------- |
| name | string | Yes | Unique vault name |
| marketName | string | Yes | Market in TOKEN-SPOT format |
| redeemPeriod | number | Yes | Days until redemption |
| maxTokens | number | Yes | Maximum vault capacity |
| minDepositAmount | number | Yes | Minimum deposit |
| managementFee | number | Yes | Management fee percentage |
| profitShare | number | Yes | Profit share percentage |
| hurdleRate | number | No | Optional hurdle rate |
| permissioned | boolean | No | Whether vault uses whitelist |
## Trading Operations
```typescript theme={"system"}
// Place perpetual trade
const trade = await agent.methods.tradeUsingDriftPerpAccount(
1000, // amount in USD
"SOL", // symbol
"long", // direction
"market" // order type
);
// Place limit order
const limitOrder = await agent.methods.tradeUsingDriftPerpAccount(
1000,
"SOL",
"long",
"limit",
50 // price
);
// Trade using vault
const vaultTrade = await agent.methods.tradeUsingDelegatedDriftVault(
"vault-address",
1000,
"SOL",
"long",
"market"
);
```
### Trading Parameters
| Parameter | Type | Required | Description |
| --------- | ------ | -------- | ------------------------- |
| amount | number | Yes | Trade amount in USD |
| symbol | string | Yes | Token symbol |
| action | string | Yes | "long" or "short" |
| type | string | Yes | "market" or "limit" |
| price | number | No | Required for limit orders |
## Deposits and Withdrawals
```typescript theme={"system"}
// Deposit to user account
const deposit = await agent.methods.depositToDriftUserAccount(
100,
"USDC",
false // isRepay
);
// Deposit to vault
const vaultDeposit = await agent.methods.depositIntoDriftVault(
100,
"vault-address"
);
// Request vault withdrawal
const withdrawal = await agent.methods.requestWithdrawalFromDriftVault(
50,
"vault-address"
);
// Execute withdrawal after period
const execute = await agent.methods.withdrawFromDriftVault(
"vault-address"
);
```
### Deposit Parameters
| Parameter | Type | Required | Description |
| --------- | ------- | -------- | --------------------------------- |
| amount | number | Yes | Amount to deposit |
| symbol | string | Yes | Token symbol |
| isRepay | boolean | No | Whether deposit is loan repayment |
## Example Prompts
### Natural Language Prompts
```text theme={"system"}
"Create a new Drift account with 1000 USDC"
"Open a long position in SOL perps"
"Create a trading vault with 2% fees"
"Deposit 100 USDC to my account"
"Get my account positions and balances"
"Create a limit order for SOL at $50"
"Withdraw from my vault"
```
### LangChain Tool Prompts
#### Create Account
```text theme={"system"}
{
"amount": 1000,
"symbol": "USDC"
}
```
#### Trade Perpetuals
```text theme={"system"}
{
"amount": 1000,
"symbol": "SOL",
"action": "long",
"type": "market"
}
```
## Implementation Details
### Market Structure
```typescript theme={"system"}
interface MarketParams {
marketIndex: number;
marketType: MarketType;
baseAssetSymbol: string;
marketPrice: number;
}
```
### Vault Structure
```typescript theme={"system"}
interface VaultConfig {
name: string;
redeemPeriod: number;
maxTokens: number;
minDepositAmount: number;
managementFee: number;
profitShare: number;
}
```
## Error Handling
```typescript theme={"system"}
try {
const tx = await agent.methods.tradeUsingDriftPerpAccount(...);
} catch (error) {
if (error.message.includes("insufficient collateral")) {
// Handle collateral errors
} else if (error.message.includes("price impact")) {
// Handle slippage issues
}
}
```
## Best Practices
1. **Account Management**
* Monitor collateral levels
* Track positions regularly
* Keep sufficient margin
* Use appropriate leverage
2. **Trading Operations**
* Set reasonable limits
* Monitor price impact
* Handle slippage
* Track positions
3. **Vault Management**
* Plan redemption periods
* Monitor fund utilization
* Track performance
* Manage delegations
## Common Issues
1. **Trading Issues**
* Insufficient collateral
* Price impact too high
* Oracle price issues
* Network congestion
2. **Account Issues**
* Account not initialized
* Insufficient funds
* Position limits
* Margin requirements
3. **Vault Issues**
* Redemption period
* Insufficient liquidity
* Delegation errors
* Permission issues
## Response Format
### Success Response
```typescript theme={"system"}
{
status: "success",
message: "Operation completed successfully",
data: {
signature?: string,
account?: string,
positions?: Position[],
balances?: Balance[]
}
}
```
### Error Response
```typescript theme={"system"}
{
status: "error",
message: "Error description",
code: "ERROR_CODE"
}
```
## Related Functions
* `createDriftUserAccount`: Create new user account
* `depositToDriftUserAccount`: Deposit to account
* `withdrawFromDriftAccount`: Withdraw from account
* `tradeUsingDriftPerpAccount`: Execute trades
* `getDriftVaultInfo`: Get vault information
* `createDriftVault`: Create new vault
* `depositIntoDriftVault`: Deposit to vault
* `withdrawFromDriftVault`: Withdraw from vault
## Resources
* [Drift Protocol Docs](https://docs.drift.trade)
* [SDK Documentation](https://drift-labs.github.io/protocol-v2/sdk/)
* [Perpetual Trading](https://docs.drift.trade/trading/what-are-perpetual-futures)
* [Vault Documentation](https://docs.drift.trade/technical-specifications/vaults)
# Flash Trade Integration
Source: https://docs.sendai.fun/docs/v2/integrations/defi-integration/flashtrade
Leverage trading on Flash.Trade with position management
Implement leveraged trading on Flash.Trade protocol, supporting position opening and closing with multiple tokens and configurable leverage.
## Core Features
1. **Position Management**
* Open positions
* Close positions
* Position sizing
* Leverage control
2. **Market Support**
* Multiple tokens (SOL, BTC, ETH)
* Long/Short positions
* Oracle price integration
* Slippage protection
## Quick Start
### Opening Position
```typescript theme={"system"}
const position = await agent.methods.flashOpenTrade({
token: "SOL", // Token to trade
side: "long", // Position side
collateralUsd: 1000, // Collateral in USD
leverage: 5 // Leverage multiplier
});
```
### Closing Position
```typescript theme={"system"}
const closure = await agent.methods.flashCloseTrade({
token: "SOL", // Token to close
side: "long" // Position side
});
```
## Market Configuration
```typescript theme={"system"}
const MARKET_TOKENS = {
SOL: {
long: { marketID: "..." },
short: { marketID: "..." }
},
BTC: {
long: { marketID: "..." },
short: { marketID: "..." }
},
ETH: {
long: { marketID: "..." },
short: { marketID: "..." }
}
};
```
## Example Prompts
### Natural Language Prompts
```text theme={"system"}
"Open a 5x leveraged long SOL position with 1000 USD"
"Close my ETH short position"
"Create a 10x BTC long with 500 USD collateral"
"Exit my SOL long position"
```
### LangChain Tool Prompts
#### Open Position
```text theme={"system"}
{
"token": "SOL",
"type": "long",
"collateral": 1000,
"leverage": 5
}
```
#### Close Position
```text theme={"system"}
{
"token": "SOL",
"side": "long"
}
```
## Implementation Details
### Position Opening
```typescript theme={"system"}
interface FlashTradeParams {
token: string; // Token symbol
side: "long" | "short"; // Position side
collateralUsd: number; // Collateral amount
leverage: number; // Leverage multiplier
}
// Calculate position size
const positionSize = perpClient.getSizeAmountFromLeverageAndCollateral(
collateralAmount,
leverage,
targetToken,
collateralToken,
side,
targetPrice,
collateralPrice,
targetCustody,
collateralCustody
);
```
### Position Closing
```typescript theme={"system"}
interface FlashCloseTradeParams {
token: string; // Token symbol
side: "long" | "short"; // Position side
}
// Calculate exit price with slippage
const priceWithSlippage = perpClient.getPriceAfterSlippage(
false, // isEntry
new BN(100), // 1% slippage
targetPrice.price,
side
);
```
## Transaction Structure
### Compute Budget
```typescript theme={"system"}
// Opening positions
const OPEN_POSITION_CU = 400000;
// Closing positions
const CLOSE_POSITION_CU = 300000;
const computeBudgetIx = ComputeBudgetProgram.setComputeUnitLimit({
units: OPEN_POSITION_CU // or CLOSE_POSITION_CU
});
```
## Error Handling
```typescript theme={"system"}
try {
const tx = await agent.methods.flashOpenTrade(params);
} catch (error) {
if (error.message.includes("Token not supported")) {
// Handle unsupported token
} else if (error.message.includes("slippage")) {
// Handle excessive slippage
}
}
```
## Best Practices
1. **Position Management**
* Validate tokens
* Check market status
* Monitor slippage
* Verify collateral
2. **Risk Management**
* Set reasonable leverage
* Monitor liquidation
* Use stop losses
* Track positions
3. **Market Interaction**
* Check oracle prices
* Verify calculations
* Monitor fees
* Handle timeouts
## Common Issues
1. **Position Opening**
* Insufficient collateral
* Invalid leverage
* Market closed
* Price impact
2. **Position Closing**
* Position not found
* High slippage
* Network congestion
* Oracle delays
3. **Technical Issues**
* NFT account missing
* Invalid custody
* Computation limits
* Transaction failure
## Helper Functions
### Price Conversion
```typescript theme={"system"}
function convertPriceToNumber(oraclePrice: OraclePrice): number {
const price = parseInt(oraclePrice.price.toString("hex"), 16);
const exponent = parseInt(oraclePrice.exponent.toString("hex"), 16);
return price * Math.pow(10, exponent);
}
```
### Collateral Calculation
```typescript theme={"system"}
function calculateCollateralAmount(
usdAmount: number,
tokenPrice: number,
decimals: number
): BN {
return new BN((usdAmount / tokenPrice) * Math.pow(10, decimals));
}
```
## Market Support
### Supported Tokens
* SOL/USD
* BTC/USD
* ETH/USD
### Configuration
```typescript theme={"system"}
const marketSdkInfo = {
[marketId]: {
tokenPair: string; // e.g., "SOL/USD"
pool: string; // Pool identifier
// Additional market data
}
};
```
## Resources
* [Flash Trade Documentation](https://docs.flash.trade)
* [Flash SDK Reference](https://github.com/flash-protocol/flash-sdk)
* [Oracle Integration](https://docs.flash.trade/price-feeds)
* [Market Configuration](https://docs.flash.trade/markets)
# Fluxbeam
Source: https://docs.sendai.fun/docs/v2/integrations/defi-integration/fluxbeam
***
title: 'FluxBeam Integration'
description: 'Learn how to create and manage liquidity pools with FluxBeam'
---------------------------------------------------------------------------
Solana Agent Kit provides integration with FluxBeam for creating and managing liquidity pools. The integration supports creating new pools with any pair of tokens, including native SOL and SPL tokens.
## Key Features
* Create new liquidity pools
* Support for native SOL and SPL tokens
* Automatic decimal handling
* LangChain tool integration
* Built-in slippage protection
## Basic Usage
### Creating a New Pool
```typescript theme={"system"}
import { PublicKey } from "@solana/web3.js";
const signature = await agent.methods.fluxbeamCreatePool(
new PublicKey("So11111111111111111111111111111111111111112"), // SOL
1.5, // 1.5 SOL
new PublicKey("EPjFWdd5AufqSSqeM2qN1xzybapC8G4wEGGkZwyTDt1v"), // USDC
10, // 10 USDC
);
```
## Input Parameters
### Pool Creation Parameters
```typescript theme={"system"}
interface CreatePoolParams {
token_a: PublicKey; // First token mint address
token_a_amount: number; // Amount of first token
token_b: PublicKey; // Second token mint address
token_b_amount: number; // Amount of second token
}
```
## LangChain Integration
Solana Agent Kit provides a LangChain tool for pool creation:
### Create Pool Tool
```typescript theme={"system"}
import { SolanaFluxbeamCreatePoolTool } from 'solana-agent-kit';
const createPoolTool = new SolanaFluxbeamCreatePoolTool(agent);
// Tool input format (JSON string):
const input = JSON.stringify({
token_a: "So11111111111111111111111111111111111111112",
token_a_amount: 1.5,
token_b: "EPjFWdd5AufqSSqeM2qN1xzybapC8G4wEGGkZwyTDt1v",
token_b_amount: 10
});
// Tool returns JSON response:
{
status: "success",
message: "Token pool created successfully",
transaction: "signature...",
token_a: "token_a_address",
token_a_amount: 1.5,
token_b: "token_b_address",
token_b_amount: 10
}
```
## Example Prompts
For LangChain AI tools, here are example prompts:
### Creating Pools
```text theme={"system"}
"Create a new pool with 1.5 SOL and 10 USDC"
"Setup a liquidity pool using 100 USDC and 5 SOL"
"Create a new FluxBeam pool for SOL/USDC pair"
```
## Error Handling
```typescript theme={"system"}
try {
const signature = await agent.methods.fluxbeamCreatePool(
tokenA,
amountA,
tokenB,
amountB
);
} catch (error) {
if (error.message.includes("insufficient funds")) {
// Handle insufficient balance
} else if (error.message.includes("invalid mint")) {
// Handle invalid token address
}
}
```
## API Details
### FluxBeam API
* Base URL: `FLUXBEAM_BASE_URI`
* Endpoint: `/token_pools`
* Method: POST
* Required fields: payer, token\_a, token\_b, token\_a\_amount, token\_b\_amount
## Best Practices
1. **Token Amount Handling**
* Input amounts in human-readable format (e.g., 1.5 SOL, not 1500000000 lamports)
* The integration automatically handles decimal conversion
* Always verify token decimals before submission
2. **Token Address Validation**
* Use PublicKey class for token addresses
* Verify token existence before pool creation
* Handle native SOL cases appropriately
3. **Transaction Signing**
* Transactions are automatically signed by the agent
* Uses VersionedTransaction for compatibility
* Includes retry logic for better reliability
4. **Error Recovery**
* Implement proper error handling
* Check for sufficient balances
* Verify token approvals
## Implementation Notes
1. **Decimal Handling**
```typescript theme={"system"}
// Example of how decimals are handled internally
const scaledAmount = amount * Math.pow(10, decimals);
```
2. **Native SOL Support**
```typescript theme={"system"}
const isNativeSol = token.equals(TOKENS.SOL);
const decimals = isNativeSol ? 9 : await getTokenDecimals(agent, token);
```
3. **Transaction Processing**
```typescript theme={"system"}
// Transaction is created, signed, and sent
const transaction = VersionedTransaction.deserialize(TransactionBuf);
transaction.sign([agent.methods.wallet]);
const signature = await agent.methods.connection.sendRawTransaction(
transaction.serialize(),
{
maxRetries: 3,
skipPreflight: true,
}
);
```
## Common Use Cases
1. **Creating a SOL/USDC Pool**
```typescript theme={"system"}
const signature = await agent.methods.fluxbeamCreatePool(
TOKENS.SOL,
1.5, // 1.5 SOL
TOKENS.USDC,
10 // 10 USDC
);
```
2. **Creating a Custom Token Pool**
```typescript theme={"system"}
const signature = await agent.methods.fluxbeamCreatePool(
new PublicKey("custom_token_a"),
100,
new PublicKey("custom_token_b"),
200
);
```
## Technical Details
### Constants
```typescript theme={"system"}
const TOKENS = {
SOL: new PublicKey("So11111111111111111111111111111111111111112"),
USDC: new PublicKey("EPjFWdd5AufqSSqeM2qN1xzybapC8G4wEGGkZwyTDt1v")
};
```
### Configuration Options
```typescript theme={"system"}
const TX_OPTIONS = {
maxRetries: 3,
skipPreflight: true
};
```
# Jupiter Exchange Swaps
Source: https://docs.sendai.fun/docs/v2/integrations/defi-integration/jupiter_exchange_swaps
Learn how to swap tokens using Jupiter Exchange integration
Execute token swaps on Solana using Jupiter Exchange aggregation. Support for all SPL tokens with automatic SOL wrapping/unwrapping and slippage protection.
## Usage
```typescript theme={"system"}
// Swap SOL for USDC
const signature = await agent.methods.trade(
new PublicKey("EPjFWdd5AufqSSqeM2qN1xzybapC8G4wEGGkZwyTDt1v"), // USDC
1, // 1 SOL
);
// Swap USDC for SOL with custom slippage
const signature = await agent.methods.trade(
new PublicKey("So11111111111111111111111111111111111111112"), // SOL
100, // 100 USDC
new PublicKey("EPjFWdd5AufqSSqeM2qN1xzybapC8G4wEGGkZwyTDt1v"), // USDC
100 // 1% slippage
);
```
## Parameters
| Parameter | Type | Required | Description |
| ----------- | --------- | -------- | ------------------------------------------------- |
| outputMint | PublicKey | Yes | Target token mint address |
| inputAmount | number | Yes | Amount to swap |
| inputMint | PublicKey | No | Source token mint (defaults to SOL) |
| slippageBps | number | No | Slippage tolerance in basis points (default: 300) |
## Example Prompts
### Natural Language Prompts
```text theme={"system"}
"Swap 1 SOL for USDC"
"Exchange 100 USDC for SOL with 1% slippage"
"Trade my BONK tokens for USDC"
"Convert 50 USDT to jitoSOL"
```
### LangChain Tool Prompts
```text theme={"system"}
// Swap SOL for USDC
{
"outputMint": "EPjFWdd5AufqSSqeM2qN1xzybapC8G4wEGGkZwyTDt1v",
"inputAmount": 1
}
// Swap USDC for SOL with custom slippage
{
"outputMint": "So11111111111111111111111111111111111111112",
"inputAmount": 100,
"inputMint": "EPjFWdd5AufqSSqeM2qN1xzybapC8G4wEGGkZwyTDt1v",
"slippageBps": 100
}
// Swap with specific decimals
{
"outputMint": "EPjFWdd5AufqSSqeM2qN1xzybapC8G4wEGGkZwyTDt1v",
"inputAmount": 1000,
"inputMint": "DezXAZ8z7PnrnRJjz3wXBoRgixCa6xjnB7YaB1pPB263",
"inputDecimal": 5
}
```
## Example Implementation
```typescript theme={"system"}
import { SolanaAgentKit } from "solana-agent-kit";
import { PublicKey } from "@solana/web3.js";
async function executeSwaps(agent: SolanaAgentKit) {
// Common token addresses
const USDC = new PublicKey("EPjFWdd5AufqSSqeM2qN1xzybapC8G4wEGGkZwyTDt1v");
const SOL = new PublicKey("So11111111111111111111111111111111111111112");
try {
// Swap SOL for USDC
const swap1 = await agent.methods.trade(
USDC,
1 // 1 SOL
);
console.log("SOL -> USDC swap:", swap1);
// Swap USDC back to SOL
const swap2 = await agent.methods.trade(
SOL,
100, // 100 USDC
USDC,
100 // 1% slippage
);
console.log("USDC -> SOL swap:", swap2);
} catch (error) {
console.error("Swap failed:", error);
}
}
```
## Implementation Details
* Uses Jupiter Exchange for best prices
* Automatic SOL wrapping/unwrapping
* Dynamic compute unit limits
* Auto-calculated priority fees
* Optional referral integration
* Direct route optimization
## Error Handling
```typescript theme={"system"}
try {
const signature = await agent.methods.trade(outputMint, amount, inputMint);
} catch (error) {
if (error.message.includes("insufficient funds")) {
// Handle insufficient balance
} else if (error.message.includes("slippage")) {
// Handle price movement
}
}
```
## Best Practices
1. **Slippage Management**
* Use appropriate slippage for token
* Consider market volatility
* Monitor price impact
* Handle failed transactions
2. **Amount Calculation**
* Account for token decimals
* Check minimum amounts
* Consider fees
* Verify available balance
3. **Error Handling**
* Implement retries
* Monitor transaction status
* Handle timeouts
* Verify swap results
4. **Performance**
* Use direct routes when possible
* Set appropriate compute limits
* Monitor network conditions
* Consider priority fees
## Common Token Addresses
* SOL: `So11111111111111111111111111111111111111112`
* USDC: `EPjFWdd5AufqSSqeM2qN1xzybapC8G4wEGGkZwyTDt1v`
* USDT: `Es9vMFrzaCERmJfrF4H2FYD4KCoNkY11McCe8BenwNYB`
* BONK: `DezXAZ8z7PnrnRJjz3wXBoRgixCa6xjnB7YaB1pPB263`
* jitoSOL: `J1toso1uCk3RLmjorhTtrVwY9HJ7X8V9yYac6Y7kGCPn`
## Response Format
```typescript theme={"system"}
// Successful response
{
status: "success",
message: "Trade executed successfully",
transaction: "5UfgJ5vVZxUxefDGqzqkVLHzHxVTyYH9StYyHKgvHYmXJgqJKxEqy9k4Rz9LpXrHF9kUZB7",
inputAmount: 1,
inputToken: "SOL",
outputToken: "EPjFWdd5AufqSSqeM2qN1xzybapC8G4wEGGkZwyTDt1v"
}
// Error response
{
status: "error",
message: "Error message here",
code: "ERROR_CODE"
}
```
## Related Functions
* `getBalance`: Check token balances
* `fetchPrice`: Get token prices
* `getTokenData`: Get token information
* `transfer`: Transfer tokens
# Launch Token on Pump.fun
Source: https://docs.sendai.fun/docs/v2/integrations/defi-integration/launch_pumpfun
Learn how to launch tokens on Pump.fun with custom metadata and liquidity
Create and launch tokens on Pump.fun with customizable metadata, social links, and initial liquidity pool settings.
## Usage
```typescript theme={"system"}
const result = await agent.methods.launchPumpFunToken(
"Sample Token", // Token name
"SMPL", // Token ticker
"A sample token", // Description
"https://example.com/img", // Image URL
{
twitter: "@sampletoken",
telegram: "t.me/sampletoken",
website: "https://sampletoken.com",
initialLiquiditySOL: 0.1,
slippageBps: 10,
priorityFee: 0.0001
}
);
```
## Parameters
| Parameter | Type | Required | Description |
| --------------------------- | ------ | -------- | -------------------------------- |
| tokenName | string | Yes | Name of the token (max 32 chars) |
| tokenTicker | string | Yes | Token symbol (2-10 chars) |
| description | string | Yes | Token description |
| imageUrl | string | Yes | URL of token image |
| options.twitter | string | No | Twitter handle |
| options.telegram | string | No | Telegram group link |
| options.website | string | No | Website URL |
| options.initialLiquiditySOL | number | No | Initial liquidity (min 0.0001) |
| options.slippageBps | number | No | Slippage tolerance (default: 5) |
| options.priorityFee | number | No | Priority fee (default: 0.00005) |
## Example Prompts
### Natural Language Prompts
```text theme={"system"}
"Launch a new meme token called 'Rocket Dog' with the RDOG ticker"
"Create a token on Pump.fun with 0.1 SOL initial liquidity"
"Deploy a new token with Twitter and Telegram links"
"Launch token with custom image and description on Pump.fun"
```
### LangChain Tool Prompts
```text theme={"system"}
// Basic token launch
{
"tokenName": "Rocket Dog",
"tokenTicker": "RDOG",
"description": "To the moon with man's best friend!",
"imageUrl": "https://example.com/rdog.png"
}
// Advanced launch with socials and liquidity
{
"tokenName": "Sample Token",
"tokenTicker": "SMPL",
"description": "A sample token for demonstration",
"imageUrl": "https://example.com/token.png",
"twitter": "@sampletoken",
"telegram": "t.me/sampletoken",
"website": "https://sampletoken.com",
"initialLiquiditySOL": 0.1
}
```
## Example Implementation
```typescript theme={"system"}
import { SolanaAgentKit } from "solana-agent-kit";
async function launchToken(agent: SolanaAgentKit) {
try {
const result = await agent.methods.launchPumpFunToken(
"Rocket Dog",
"RDOG",
"The fastest dog-themed token on Solana!",
"https://example.com/rdog.png",
{
twitter: "@rocketdogtoken",
telegram: "t.me/rocketdog",
website: "https://rocketdog.io",
initialLiquiditySOL: 0.1,
slippageBps: 10
}
);
console.log("Token launched:", {
mint: result.mint,
metadata: result.metadataUri,
tx: result.signature
});
return result;
} catch (error) {
console.error("Token launch failed:", error);
throw error;
}
}
```
## Response Format
```typescript theme={"system"}
// Successful response
{
status: "success",
signature: "2ZE7Rz...",
mint: "7nxQB...",
metadataUri: "https://arweave.net/...",
message: "Successfully launched token on Pump.fun"
}
// Error response
{
status: "error",
message: "Error message here",
code: "ERROR_CODE"
}
```
## Implementation Details
* Uploads metadata to IPFS
* Creates token mint account
* Initializes liquidity pool
* Configures trading parameters
* Handles token metadata
* Manages social links
## Error Handling
```typescript theme={"system"}
try {
const result = await agent.methods.launchPumpFunToken(...);
} catch (error) {
if (error.message.includes("metadata upload")) {
// Handle metadata issues
} else if (error.message.includes("liquidity")) {
// Handle liquidity issues
}
}
```
## Best Practices
1. **Token Setup**
* Use clear, unique names
* Prepare high-quality images
* Write compelling descriptions
* Verify social links
2. **Liquidity Management**
* Set appropriate initial liquidity
* Consider trading volume
* Monitor pool health
* Plan liquidity strategy
3. **Transaction Handling**
* Use appropriate priority fees
* Set realistic slippage
* Monitor transaction status
* Handle timeouts properly
4. **Metadata Management**
* Use permanent image storage
* Format descriptions properly
* Include all social links
* Verify metadata accuracy
## Common Issues
1. **Image Upload**
* Invalid image format
* File too large
* Temporary URLs
* Missing content type
2. **Transaction Failures**
* Insufficient SOL
* Network congestion
* Invalid parameters
* RPC timeouts
3. **Metadata Issues**
* Invalid social links
* Description too long
* Missing required fields
* Format errors
## Related Functions
* `getBalance`: Check SOL balance
* `fetchMetadata`: Get token metadata
* `trade`: Swap tokens
* `getTokenData`: Get token information
# Manifest Trading Integration
Source: https://docs.sendai.fun/docs/v2/integrations/defi-integration/manifest_market
Learn how to use Manifest protocol for market making and trading
Solana Agent Kit provides comprehensive integration with Manifest protocol for creating markets, placing orders, and managing trades. The integration supports various order types, batch orders, and market management functions.
## Key Features
* Market creation
* Limit order placement
* Batch order execution
* Pattern-based order generation
* Order cancellation
* Fund withdrawal
* LangChain tool integration
## Basic Usage
### Creating a New Market
```typescript theme={"system"}
import { PublicKey } from "@solana/web3.js";
const [signature, marketId] = await agent.methods.manifestCreateMarket(
new PublicKey("So11111111111111111111111111111111111111112"), // SOL
new PublicKey("EPjFWdd5AufqSSqeM2qN1xzybapC8G4wEGGkZwyTDt1v") // USDC
);
```
### Placing a Limit Order
```typescript theme={"system"}
const signature = await agent.methods.limitOrder(
new PublicKey(marketId),
1.5, // quantity
"Buy", // side
25.5 // price
);
```
### Placing Batch Orders
```typescript theme={"system"}
const orders = [
{ quantity: 1, side: "Buy", price: 24.5 },
{ quantity: 0.5, side: "Sell", price: 26.5 }
];
const signature = await agent.methods.batchOrder(
new PublicKey(marketId),
orders
);
```
### Cancelling All Orders
```typescript theme={"system"}
const signature = await agent.methods.cancelAllOrders(
new PublicKey(marketId)
);
```
### Withdrawing Funds
```typescript theme={"system"}
const signature = await agent.methods.withdrawAll(
new PublicKey(marketId)
);
```
## Batch Order Patterns
The integration supports generating orders using patterns:
```typescript theme={"system"}
interface BatchOrderPattern {
side: "Buy" | "Sell";
totalQuantity?: number;
individualQuantity?: number;
numberOfOrders?: number;
priceRange?: {
min?: number;
max?: number;
};
spacing?: {
type: "fixed" | "percentage";
value: number;
};
}
```
### Pattern Examples
1. Percentage-based Spacing:
```typescript theme={"system"}
const pattern = {
side: "Buy",
totalQuantity: 100,
priceRange: { max: 1.0 },
spacing: { type: "percentage", value: 1 },
numberOfOrders: 5
};
```
2. Fixed-price Spacing:
```typescript theme={"system"}
const pattern = {
side: "Sell",
individualQuantity: 10,
priceRange: { min: 50, max: 55 },
spacing: { type: "fixed", value: 1 },
numberOfOrders: 3
};
```
## LangChain Integration
Solana Agent Kit provides several LangChain tools for Manifest trading:
### Create Market Tool
```typescript theme={"system"}
import { SolanaManifestCreateMarket } from 'solana-agent-kit';
const createMarketTool = new SolanaManifestCreateMarket(agent);
// Tool input format (JSON string):
const input = JSON.stringify({
baseMint: "So11111111111111111111111111111111111111112",
quoteMint: "EPjFWdd5AufqSSqeM2qN1xzybapC8G4wEGGkZwyTDt1v"
});
```
### Limit Order Tool
```typescript theme={"system"}
import { SolanaLimitOrderTool } from 'solana-agent-kit';
const limitOrderTool = new SolanaLimitOrderTool(agent);
// Tool input format (JSON string):
const input = JSON.stringify({
marketId: "ENhU8LsaR7vDD2G1CsWcsuSGNrih9Cv5WZEk7q9kPapQ",
quantity: 1.5,
side: "Buy",
price: 25.5
});
```
### Batch Order Tool
```typescript theme={"system"}
import { SolanaBatchOrderTool } from 'solana-agent-kit';
const batchOrderTool = new SolanaBatchOrderTool(agent);
// Tool input format for list-based orders (JSON string):
const listInput = JSON.stringify({
marketId: "ENhU8LsaR7vDD2G1CsWcsuSGNrih9Cv5WZEk7q9kPapQ",
orders: [
{ quantity: 1, side: "Buy", price: 24.5 },
{ quantity: 0.5, side: "Sell", price: 26.5 }
]
});
// Tool input format for pattern-based orders (JSON string):
const patternInput = JSON.stringify({
marketId: "ENhU8LsaR7vDD2G1CsWcsuSGNrih9Cv5WZEk7q9kPapQ",
pattern: {
side: "Buy",
totalQuantity: 100,
priceRange: { max: 1.0 },
spacing: { type: "percentage", value: 1 },
numberOfOrders: 5
}
});
```
## Example Prompts
For LangChain AI tools, here are example prompts:
### Market Creation
```text theme={"system"}
"Create a new SOL/USDC market"
"Setup a trading market for BONK/USDC"
```
### Order Placement
```text theme={"system"}
"Place a limit buy order for 1.5 SOL at $25.5"
"Create 5 buy orders totaling 100 tokens, 1% apart below $1"
"Place sell orders of 10 tokens each between $50-$55"
```
### Market Management
```text theme={"system"}
"Cancel all my orders in the SOL/USDC market"
"Withdraw all funds from the BONK/USDC market"
```
## Important Notes
1. **Order Validation**
* Sell orders must be priced above buy orders
* All orders must include quantity, side, and price
* Batch orders are validated before execution
2. **Pattern Generation**
* Supports both fixed and percentage-based spacing
* Can specify total or individual quantities
* Random order count if not specified (max 8)
3. **Transaction Handling**
* Each order operation returns a transaction signature
* Uses versioned transactions for compatibility
* Includes automatic error handling
## Best Practices
1. **Market Creation**
```typescript theme={"system"}
// Always specify both base and quote tokens
const [signature, marketId] = await agent.methods.manifestCreateMarket(
baseMint,
quoteMint
);
```
2. **Batch Orders**
```typescript theme={"system"}
// Use batch orders instead of multiple single orders
const orders = generateOrdersfromPattern({
side: "Buy",
totalQuantity: 100,
priceRange: { min: 24, max: 25 },
numberOfOrders: 5
});
```
3. **Order Management**
```typescript theme={"system"}
// Cancel orders before withdrawing
await agent.methods.cancelAllOrders(marketId);
await agent.methods.withdrawAll(marketId);
```
## Error Handling
```typescript theme={"system"}
try {
const signature = await agent.methods.batchOrder(marketId, orders);
} catch (error) {
if (error.message.includes("crossed")) {
// Handle invalid order prices
} else if (error.message.includes("insufficient")) {
// Handle insufficient funds
}
}
```
## Technical Details
### Constants
```typescript theme={"system"}
const MANIFEST_PROGRAM_ID = "MNFSTqtC93rEfYHB6hF82sKdZpUDFWkViLByLd1k1Ms";
const FIXED_MANIFEST_HEADER_SIZE = 256;
```
### Order Types
```typescript theme={"system"}
interface OrderParams {
quantity: number;
side: "Buy" | "Sell";
price: number;
}
```
### Transaction Configuration
```typescript theme={"system"}
const TX_OPTIONS = {
skipPreflight: false,
preflightCommitment: "confirmed",
maxRetries: 3
};
```
# Mayan Cross chain Swap
Source: https://docs.sendai.fun/docs/v2/integrations/defi-integration/mayan
Learn how to perform cross-chain token swaps using Mayan Finance
Solana Agent Kit provides integration with Mayan Finance for cross-chain token swaps. The integration supports swapping tokens between different blockchain networks, including Solana and EVM-based chains.
## Key Features
* Cross-chain token swaps
* Support for multiple chains (Solana, Ethereum, etc.)
* Token symbol and address support
* Automatic quote fetching
* Configurable slippage
* ERC20 Permit support
* Jito MEV protection for Solana
* LangChain tool integration
## Basic Usage
### Performing a Cross-Chain Swap
```typescript theme={"system"}
const url = await agent.methods.swap(
"0.1", // amount
"solana", // fromChain
"SOL", // fromToken
"ethereum", // toChain
"USDC", // toToken
"0x1234...", // destination address
10 // slippage in basis points (optional)
);
```
## Input Parameters
### Swap Parameters
```typescript theme={"system"}
interface SwapParams {
amount: string; // Amount to swap
fromChain: string; // Source chain (e.g., "solana", "ethereum")
fromToken: string; // Source token (symbol or address)
toChain: string; // Destination chain
toToken: string; // Destination token (symbol or address)
dstAddr: string; // Destination address
slippageBps?: number; // Optional slippage in basis points
}
```
## Token Input Formats
Tokens can be specified in multiple formats:
1. By Symbol:
```typescript theme={"system"}
fromToken: "SOL"
fromToken: "ETH"
fromToken: "USDC"
```
2. By Address:
```typescript theme={"system"}
// Solana addresses (base58)
fromToken: "So11111111111111111111111111111111111111112" // SOL
fromToken: "EPjFWdd5AufqSSqeM2qN1xzybapC8G4wEGGkZwyTDt1v" // USDC
// EVM addresses (hex)
toToken: "0xa0b86991c6218b36c1d19d4a2e9eb0ce3606eb48" // USDC on Ethereum
```
## LangChain Integration
Solana Agent Kit provides a LangChain tool for cross-chain swaps:
### Cross-Chain Swap Tool
```typescript theme={"system"}
import { SolanaCrossChainSwapTool } from 'solana-agent-kit';
const crossChainSwapTool = new SolanaCrossChainSwapTool(agent);
// Tool input format (JSON string):
const input = JSON.stringify({
amount: "0.1",
fromChain: "solana",
fromToken: "SOL",
toChain: "ethereum",
toToken: "USDC",
dstAddr: "0x1234...",
slippageBps: 10
});
// Tool returns JSON response:
{
status: "success",
message: "Swap executed successfully",
url: "https://explorer.mayan.finance/swap/..."
}
```
## Example Prompts
For LangChain AI tools, here are example prompts:
### Cross-Chain Swaps
```text theme={"system"}
"Swap 0.1 SOL to USDC on Ethereum"
"Transfer 100 USDC from Solana to Ethereum"
"Exchange SOL to ETH with 1% slippage"
```
## Advanced Features
### ERC20 Permit Support
The integration automatically handles ERC20 permits for supported tokens:
```typescript theme={"system"}
// Permit parameters are automatically generated and handled
interface Erc20Permit {
value: bigint;
deadline: number;
v: number;
r: string;
s: string;
}
```
### Jito MEV Protection
For Solana transactions, Jito MEV protection is automatically applied:
```typescript theme={"system"}
interface JitoOptions {
tipLamports: number;
jitoAccount: string;
jitoSendUrl: string;
signAllTransactions: Function;
}
```
## Error Handling
```typescript theme={"system"}
try {
const url = await agent.methods.swap(
amount,
fromChain,
fromToken,
toChain,
toToken,
dstAddr
);
} catch (error) {
if (error.message.includes("Couldn't find token")) {
// Handle invalid token symbol
} else if (error.message.includes("no quote available")) {
// Handle no available route
}
}
```
## Important Notes
1. **Token Resolution**
* Tokens can be specified by symbol or address
* Symbols are automatically resolved to addresses
* Case-insensitive symbol matching
2. **Slippage Protection**
* Default "auto" slippage for optimal execution
* Can be specified in basis points (e.g., 10 = 0.1%)
* Recommended to use higher slippage for volatile tokens
3. **Chain Support**
* Solana \<-> EVM cross-chain swaps
* Multiple EVM chains supported
* Automatic chain ID resolution
4. **Transaction Confirmation**
* Solana transactions wait for confirmation
* EVM transactions return hash immediately
* Explorer URL provided for tracking
## Best Practices
1. **Token Addresses**
```typescript theme={"system"}
// Prefer addresses over symbols for precision
await agent.methods.swap(
"0.1",
"solana",
"So11111111111111111111111111111111111111112", // SOL address
"ethereum",
"0xa0b86991c6218b36c1d19d4a2e9eb0ce3606eb48", // USDC address
dstAddr
);
```
2. **Error Recovery**
```typescript theme={"system"}
try {
const url = await agent.methods.swap(...);
// Wait for explorer API confirmation
await new Promise(resolve => setTimeout(resolve, 3000));
const status = await fetch(`${url}/status`);
} catch (error) {
// Implement retry logic
}
```
3. **Slippage Management**
```typescript theme={"system"}
// Use higher slippage for volatile tokens
const volatileTokenSlippage = 100; // 1%
const stableTokenSlippage = 10; // 0.1%
```
## Technical Details
### Constants
```typescript theme={"system"}
const EXPLORERS = {
MAYAN: "https://explorer.mayan.finance/swap"
};
const CHAIN_IDS = {
ETHEREUM: "1",
SOLANA: "solana"
};
```
### Configuration
```typescript theme={"system"}
// Required for EVM chain swaps
const config = {
ETHEREUM_PRIVATE_KEY: string; // EVM wallet private key
};
```
### API Endpoints
```typescript theme={"system"}
const API = {
QUOTE: "https://sia.mayan.finance/v4/quote",
JITO: "https://price-api.mayan.finance/jito-tips/suggest",
EXPLORER: "https://explorer-api.mayan.finance/v3/swap/trx"
};
```
# Meteora Pool Creation
Source: https://docs.sendai.fun/docs/v2/integrations/defi-integration/meteora
Learn how to create DLMM and Dynamic AMM pools with Meteora
Solana Agent Kit provides integration with Meteora for creating two types of liquidity pools:
1. DLMM (Dynamic Liquidity Market Maker) Pools
2. Dynamic AMM (Automated Market Maker) Pools
## Key Features
* DLMM pool creation with configurable bin steps
* Dynamic AMM pool creation with constant product formula
* Customizable trading fees
* Delayed activation support
* Alpha vault integration
* Price rounding options
* LangChain tool integration
## Pool Types
### DLMM Pools
DLMM pools use a bin-based liquidity provision system with configurable price ranges.
```typescript theme={"system"}
const signature = await agent.methods.meteoraCreateDlmmPool(
tokenAMint, // Token A mint address
tokenBMint, // Token B mint address
20, // Bin step
0.25, // Initial price (tokenA/tokenB)
true, // Price rounding up
20, // Fee in basis points (0.2%)
1, // Activation type (timestamp)
false, // Alpha vault support
undefined // Activation point
);
```
### Dynamic AMM Pools
Dynamic AMM pools use a constant product formula with initial liquidity.
```typescript theme={"system"}
const signature = await agent.methods.meteoraCreateDynamicPool(
tokenAMint, // Token A mint address
tokenBMint, // Token B mint address
tokenAAmount, // Token A amount
tokenBAmount, // Token B amount
2500, // Trade fee numerator (2.5%)
activationPoint, // Optional activation point
false, // Alpha vault support
1 // Activation type (timestamp)
);
```
## Configuration Options
### DLMM Pool Parameters
```typescript theme={"system"}
interface DLMMPoolParams {
tokenAMint: PublicKey; // Token A mint address
tokenBMint: PublicKey; // Token B mint address
binStep: number; // Pool bin step
initialPrice: number; // Initial price ratio
feeBps: number; // Trading fee in basis points
priceRoundingUp?: boolean; // Price rounding direction
activationType?: number; // 0 for slot, 1 for timestamp
activationPoint?: number; // Activation point
hasAlphaVault?: boolean; // Alpha vault support
}
```
### Dynamic Pool Parameters
```typescript theme={"system"}
interface DynamicPoolParams {
tokenAMint: PublicKey; // Token A mint address
tokenBMint: PublicKey; // Token B mint address
tokenAAmount: number; // Token A initial amount
tokenBAmount: number; // Token B initial amount
tradeFeeNumerator: number; // Trade fee numerator
activationType?: number; // 0 for slot, 1 for timestamp
activationPoint?: number; // Activation point
hasAlphaVault?: boolean; // Alpha vault support
}
```
## LangChain Integration
Solana Agent Kit provides LangChain tools for both pool types:
### DLMM Pool Creation Tool
```typescript theme={"system"}
import { SolanaMeteoraCreateDlmmPool } from 'solana-agent-kit';
const createDlmmPoolTool = new SolanaMeteoraCreateDlmmPool(agent);
// Tool input format (JSON string):
const input = JSON.stringify({
tokenAMint: "EPjFWdd5AufqSSqeM2qN1xzybapC8G4wEGGkZwyTDt1v",
tokenBMint: "So11111111111111111111111111111111111111112",
binStep: 20,
initialPrice: 0.25,
feeBps: 20,
priceRoundingUp: true,
activationType: 1,
hasAlphaVault: false
});
```
### Dynamic Pool Creation Tool
```typescript theme={"system"}
import { SolanaMeteoraCreateDynamicPool } from 'solana-agent-kit';
const createDynamicPoolTool = new SolanaMeteoraCreateDynamicPool(agent);
// Tool input format (JSON string):
const input = JSON.stringify({
tokenAMint: "EPjFWdd5AufqSSqeM2qN1xzybapC8G4wEGGkZwyTDt1v",
tokenBMint: "So11111111111111111111111111111111111111112",
tokenAAmount: 1000,
tokenBAmount: 250,
tradeFeeNumerator: 2500,
activationType: 1,
hasAlphaVault: false
});
```
## Example Prompts
For LangChain AI tools, here are example prompts:
### DLMM Pool Creation
```text theme={"system"}
"Create a DLMM pool for SOL/USDC with 0.2% fee"
"Setup a DLMM pool with 20 bin step and initial price of 0.25"
```
### Dynamic Pool Creation
```text theme={"system"}
"Create a Dynamic pool with 1000 USDC and 4 SOL"
"Setup a Dynamic AMM pool with 2.5% trading fee"
```
## Important Notes
1. **Bin Steps (DLMM)**
* Lower bin steps mean tighter price ranges
* Common values: 10, 20, 50
* Affects price precision and liquidity distribution
2. **Price Configuration**
* Initial price is in token A / token B ratio
* Price rounding affects bin placement
* Consider market prices when setting initial price
3. **Fee Structure**
* DLMM: fees in basis points (1 bp = 0.01%)
* Dynamic: fee numerator with 100000 denominator
* Consider market standards when setting fees
4. **Activation Types**
```typescript theme={"system"}
enum ActivationType {
Slot = 0,
Timestamp = 1
}
```
## Best Practices
1. **Token Decimals**
```typescript theme={"system"}
// Always fetch and account for token decimals
const tokenAInfo = await getMint(connection, tokenAMint);
const tokenBInfo = await getMint(connection, tokenBMint);
const decimalsA = tokenAInfo.decimals;
const decimalsB = tokenBInfo.decimals;
```
2. **Price Calculation**
```typescript theme={"system"}
// Calculate price per lamport for DLMM
const pricePerLamport = DLMM.getPricePerLamport(
decimalsA,
decimalsB,
initialPrice
);
```
3. **Amount Conversion**
```typescript theme={"system"}
// Convert human amounts to lamports
const amountLamports = new BN(
new Decimal(amount)
.mul(10 ** decimals)
.toString()
);
```
## Error Handling
```typescript theme={"system"}
try {
const signature = await agent.methods.meteoraCreateDlmmPool(...);
} catch (error) {
if (error.message.includes("invalid mint")) {
// Handle invalid token addresses
} else if (error.message.includes("insufficient balance")) {
// Handle insufficient funds
}
}
```
## Technical Details
### Constants
```typescript theme={"system"}
const DECIMALS = {
USDC: 6,
SOL: 9
};
const COMMON_BIN_STEPS = {
TIGHT: 10,
NORMAL: 20,
WIDE: 50
};
```
### Fee Calculations
```typescript theme={"system"}
const BPS_DENOMINATOR = 10000; // For DLMM
const FEE_DENOMINATOR = 100000; // For Dynamic AMM
// Example: 0.2% fee in DLMM
const feeBps = 20; // 20/10000 = 0.2%
// Example: 2.5% fee in Dynamic AMM
const feeNumerator = 2500; // 2500/100000 = 2.5%
```
### SDK Dependencies
```typescript theme={"system"}
import DLMM from "@meteora-ag/dlmm";
import AmmImpl from "@mercurial-finance/dynamic-amm-sdk";
```
# OKX DEX Integration
Source: https://docs.sendai.fun/docs/v2/integrations/defi-integration/okx
Learn how to use OKX DEX features with Solana Agent Kit
# OKX DEX Integration
Solana Agent Kit provides comprehensive integration with OKX DEX for token swapping, price quotes, and market data. This documentation covers the available actions and tools for interacting with OKX DEX.
## Overview
OKX DEX integration allows you to:
* Fetch chain data and supported tokens
* Get price quotes for token swaps
* Execute token swaps with customizable slippage
* View available liquidity sources
* Create LangChain tools for AI agent integration
## Actions
Actions provide high-level functionality for common OKX DEX operations.
### Chain Data
The `OKX_DEX_CHAIN_DATA` action retrieves information about blockchain networks supported by OKX DEX.
```typescript theme={"system"}
import { SolanaAgentKit } from "solana-agent-kit";
// Example usage
const agent = new SolanaAgentKit(/* config */);
const result = await agent.methods.executeAction("OKX_DEX_CHAIN_DATA", {});
// Result
{
status: "success",
summary: {
chains: [
{
symbol: "SOL",
name: "Solana",
address: "So11111111111111111111111111111111111111112",
},
// Other chains...
],
},
}
```
### Tokens
The `OKX_DEX_TOKENS` action lists all tokens supported by OKX DEX.
```typescript theme={"system"}
const result = await agent.methods.executeAction("OKX_DEX_TOKENS", {});
// Result
{
status: "success",
summary: {
tokens: [
{
symbol: "SOL",
name: "Solana",
address: "So11111111111111111111111111111111111111112",
},
{
symbol: "USDC",
name: "USD Coin",
address: "EPjFWdd5AufqSSqeM2qN1xzybapC8G4wEGGkZwyTDt1v",
},
// Other tokens...
],
},
}
```
### Liquidity
The `OKX_DEX_LIQUIDITY` action retrieves available liquidity sources supported by OKX DEX.
```typescript theme={"system"}
const result = await agent.methods.executeAction("OKX_DEX_LIQUIDITY", {});
// Result
{
status: "success",
summary: {
liquidity: [
{
name: "Orca",
type: "amm",
// Additional details...
},
// Other liquidity sources...
],
},
}
```
### Quote
The `OKX_DEX_QUOTE` action provides price quotes for token swaps.
```typescript theme={"system"}
const result = await agent.methods.executeAction("OKX_DEX_QUOTE", {
fromToken: "sol",
toToken: "usdc",
amount: 0.1,
slippage: "0.001", // Optional, default is 0.001 (0.1%)
});
// Result
{
status: "success",
summary: {
fromToken: "SOL",
toToken: "USDC",
fromAmount: 0.1,
toAmount: 10.5,
exchangeRate: 105,
priceImpact: "0.01%",
},
}
```
### Swap
The `OKX_DEX_SWAP` action executes token swaps on OKX DEX.
```typescript theme={"system"}
const result = await agent.methods.executeAction("OKX_DEX_SWAP", {
fromToken: "sol",
toToken: "usdc",
amount: 0.1,
slippage: "0.001", // Optional, default is 0.001 (0.1%)
});
// Result
{
status: "success",
summary: {
fromToken: "SOL",
toToken: "USDC",
fromAmount: 0.1,
toAmount: 10.5,
exchangeRate: 105,
priceImpact: "0.01%",
txId: "5KtPn3...",
explorerUrl: "https://www.okx.com/web3/explorer/sol/tx/5KtPn3...",
},
}
```
## LangChain Tools
For AI agent integration with LangChain, the following tools are available:
### Get Chain Data Tool
```typescript theme={"system"}
import { createOKXDexGetChainDataTool } from "solana-agent-kit";
const chainDataTool = createOKXDexGetChainDataTool(agent);
// Tool output (JSON string):
{
"chains": [
{
"symbol": "SOL",
"name": "Solana",
"address": "So11111111111111111111111111111111111111112"
}
// Other chains...
]
}
```
### Get Tokens Tool
```typescript theme={"system"}
import { createOKXDexGetTokensTool } from "solana-agent-kit";
const tokensTool = createOKXDexGetTokensTool(agent);
// Tool output (JSON string):
{
"tokens": [
{
"symbol": "SOL",
"name": "Solana",
"address": "So11111111111111111111111111111111111111112"
},
{
"symbol": "USDC",
"name": "USD Coin",
"address": "EPjFWdd5AufqSSqeM2qN1xzybapC8G4wEGGkZwyTDt1v"
}
// Other tokens...
]
}
```
### Get Liquidity Tool
```typescript theme={"system"}
import { createOKXDexGetLiquidityTool } from "solana-agent-kit";
const liquidityTool = createOKXDexGetLiquidityTool(agent);
// Tool output (JSON string):
{
"sources": [
{
"name": "Orca",
"type": "amm"
}
// Other liquidity sources...
]
}
```
### Get Quote Tool
```typescript theme={"system"}
import { createOKXDexGetQuoteTool } from "solana-agent-kit";
const quoteTool = createOKXDexGetQuoteTool(agent);
// Tool input:
{
fromTokenAddress: "So11111111111111111111111111111111111111112",
toTokenAddress: "EPjFWdd5AufqSSqeM2qN1xzybapC8G4wEGGkZwyTDt1v",
amount: "100000000", // 0.1 SOL in lamports
slippage: "0.5" // Optional
}
// Tool output (JSON string):
{
"fromToken": "SOL",
"toToken": "USDC",
"fromAmount": 0.1,
"toAmount": 10.5,
"exchangeRate": 105,
"priceImpact": "0.01%"
}
```
### Execute Swap Tool
```typescript theme={"system"}
import { createOKXDexExecuteSwapTool } from "solana-agent-kit";
const swapTool = createOKXDexExecuteSwapTool(agent);
// Tool input:
{
fromTokenAddress: "So11111111111111111111111111111111111111112",
toTokenAddress: "EPjFWdd5AufqSSqeM2qN1xzybapC8G4wEGGkZwyTDt1v",
amount: "100000000", // 0.1 SOL in lamports
slippage: "0.5", // Optional
autoSlippage: false, // Optional
maxAutoSlippageBps: "100", // Optional
userWalletAddress: "FzwqxL67..." // Optional
}
// Tool output (JSON string):
{
"status": "success",
"summary": {
"fromToken": "SOL",
"toToken": "USDC",
"fromAmount": 0.1,
"toAmount": 10.5,
"exchangeRate": 105,
"priceImpact": "0.01%",
"txId": "5KtPn3...",
"explorerUrl": "https://www.okx.com/web3/explorer/sol/tx/5KtPn3..."
}
}
```
### Confirm Swap Tool
```typescript theme={"system"}
import { createOKXDexConfirmSwapTool, setPendingSwap } from "solana-agent-kit";
// First, set a pending swap
setPendingSwap({
fromTokenAddress: "So11111111111111111111111111111111111111112",
toTokenAddress: "EPjFWdd5AufqSSqeM2qN1xzybapC8G4wEGGkZwyTDt1v",
amount: "100000000",
slippage: "0.5"
});
// Then create and use the confirm tool
const confirmTool = createOKXDexConfirmSwapTool(agent);
// Tool output (JSON string):
{
"status": "success",
"summary": {
"fromToken": "SOL",
"toToken": "USDC",
"fromAmount": 0.1,
"toAmount": 10.5,
"txId": "5KtPn3...",
"explorerUrl": "https://www.okx.com/web3/explorer/sol/tx/5KtPn3..."
}
}
```
## Token Addresses
Here are some common token addresses for Solana:
```typescript theme={"system"}
const TOKEN_ADDRESSES = {
sol: "So11111111111111111111111111111111111111112",
usdc: "EPjFWdd5AufqSSqeM2qN1xzybapC8G4wEGGkZwyTDt1v",
usdt: "Es9vMFrzaCERmJfrF4H2FYD4KCoNkY11McCe8BenwNYB",
wif: "2222222222222222222222222222222222222222222222222222222222222222",
};
```
## Amount Conversion
When working with token amounts, you need to convert between human-readable amounts and base units (like lamports for SOL):
```typescript theme={"system"}
// Convert from human-readable to base units
function toBaseUnits(amount, decimals) {
return (amount * Math.pow(10, decimals)).toString();
}
// For SOL (9 decimals)
const solBaseUnits = toBaseUnits(0.1, 9); // "100000000"
// For USDC (6 decimals)
const usdcBaseUnits = toBaseUnits(10, 6); // "10000000"
```
## Error Handling
All actions and tools include error handling. Here's an example of handling errors:
```typescript theme={"system"}
try {
const result = await agent.methods.executeAction("OKX_DEX_SWAP", {
fromToken: "sol",
toToken: "usdc",
amount: 0.1,
});
if (result.status === "error") {
console.error("Swap failed:", result.message);
// Handle error
} else {
console.log("Swap successful:", result.summary);
// Process success
}
} catch (error) {
console.error("Unexpected error:", error.message);
// Handle unexpected errors
}
```
## Advanced Features
### Auto Slippage
You can enable auto slippage for potentially better swap rates:
```typescript theme={"system"}
const result = await executeSwap(
agent,
fromTokenAddress,
toTokenAddress,
amount,
"0.5", // Default slippage
true, // Enable auto slippage
"100" // Maximum auto slippage in basis points (1%)
);
```
### Custom Wallet Address
You can specify a custom wallet address for the swap:
```typescript theme={"system"}
const result = await executeSwap(
agent,
fromTokenAddress,
toTokenAddress,
amount,
"0.5",
false,
"100",
"your_custom_wallet_address"
);
```
## Integration with AI Agents
For AI agents built with LangChain, you can register these tools:
```typescript theme={"system"}
import { createOpenAI } from "langchain/chat_models/openai";
import { AgentExecutor, createStructuredChatAgent } from "langchain/agents";
// Create LLM
const llm = createOpenAI({
temperature: 0,
modelName: "gpt-4",
});
// Create tools
const tools = [
createOKXDexGetTokensTool(agent),
createOKXDexGetQuoteTool(agent),
createOKXDexExecuteSwapTool(agent),
];
// Create agent
const agent = createStructuredChatAgent({
llm,
tools,
});
const agentExecutor = new AgentExecutor({
agent,
tools,
});
// Run agent
const result = await agentExecutor.invoke({
input: "I want to swap 0.1 SOL to USDC",
});
```
## Best Practices
1. **Amount Validation**: Always verify that amounts are positive and within acceptable ranges.
2. **Slippage Control**: Use appropriate slippage values depending on token volatility.
3. **Error Handling**: Implement comprehensive error handling for all operations.
4. **Gas Considerations**: Make sure your wallet has enough SOL for transaction fees.
5. **User Confirmation**: For UIs, always show and confirm quotes before executing swaps.
## Troubleshooting
Common issues and their solutions:
1. **Insufficient Funds**: Make sure your wallet has enough tokens for the swap.
2. **Price Impact Too High**: Try reducing the amount or increasing slippage.
3. **Invalid Token Address**: Double-check token addresses or use predefined constants.
4. **Failed Transaction**: Check chain congestion and try again with higher slippage.
## Resources
* [OKX DEX Documentation](https://www.okx.com/web3/dex)
* [Solana Agent Kit Documentation](https://github.com/sendaifun/solana-agent-kit)
* [Solana Explorer](https://explorer.solana.com/)
* [OKX DEX Explorer](https://www.okx.com/web3/explorer/sol)
# OpenBook Market Creation
Source: https://docs.sendai.fun/docs/v2/integrations/defi-integration/openbook_market
Create and configure markets on OpenBook DEX
Create new trading markets on OpenBook DEX with customizable parameters for lot size and tick size. Supports integration with Raydium AMM v4.
## Usage
```typescript theme={"system"}
const signatures = await agent.methods.openbookCreateMarket(
new PublicKey("base-token-mint"), // Base token
new PublicKey("quote-token-mint"), // Quote token
1, // Lot size
0.01 // Tick size
);
```
## Parameters
| Parameter | Type | Required | Default | Description |
| --------- | --------- | -------- | ------- | ------------------------ |
| baseMint | PublicKey | Yes | - | Base token mint address |
| quoteMint | PublicKey | Yes | - | Quote token mint address |
| lotSize | number | No | 1 | Minimum order size |
| tickSize | number | No | 0.01 | Minimum price increment |
## Example Prompts
### Natural Language Prompts
```text theme={"system"}
"Create a new USDC/SOL market on OpenBook"
"Setup trading pair for my token with 0.1 tick size"
"Create market with custom lot size of 100"
"Initialize OpenBook DEX market for token pair"
```
### LangChain Tool Prompts
```text theme={"system"}
// Basic market creation
{
"baseMint": "EPjFWdd5AufqSSqeM2qN1xzybapC8G4wEGGkZwyTDt1v",
"quoteMint": "So11111111111111111111111111111111111111112"
}
// Custom configuration
{
"baseMint": "EPjFWdd5AufqSSqeM2qN1xzybapC8G4wEGGkZwyTDt1v",
"quoteMint": "So11111111111111111111111111111111111111112",
"lotSize": 100,
"tickSize": 0.1
}
```
## Example Implementation
```typescript theme={"system"}
import { SolanaAgentKit } from "solana-agent-kit";
import { PublicKey } from "@solana/web3.js";
async function createTradingMarket(agent: SolanaAgentKit) {
try {
// Create USDC/SOL market
const signatures = await agent.methods.openbookCreateMarket(
new PublicKey("EPjFWdd5AufqSSqeM2qN1xzybapC8G4wEGGkZwyTDt1v"), // USDC
new PublicKey("So11111111111111111111111111111111111111112"), // SOL
1, // 1 unit minimum order
0.01 // $0.01 minimum price increment
);
console.log("Market created:", signatures);
return signatures;
} catch (error) {
console.error("Market creation failed:", error);
throw error;
}
}
```
## Market Configuration
### Lot Size
* Determines minimum order size
* Must be positive number
* Affects order book granularity
* Consider token decimals
### Tick Size
* Sets price increment
* Must be positive number
* Affects price precision
* Balance precision vs liquidity
## Implementation Details
* Uses Raydium SDK for market creation
* Supports standard SPL tokens
* Sequential transaction execution
* Multiple signature requirements
## Error Handling
```typescript theme={"system"}
try {
const signatures = await agent.methods.openbookCreateMarket(...);
} catch (error) {
if (error.message.includes("TOKEN_PROGRAM_ID")) {
// Handle token program mismatch
} else if (error.message.includes("decimals")) {
// Handle decimal configuration issues
}
}
```
## Best Practices
1. **Market Configuration**
* Choose appropriate lot sizes
* Set reasonable tick sizes
* Consider token decimals
* Plan for volume
2. **Token Compatibility**
* Verify token programs
* Check token standards
* Validate decimals
* Test with small amounts
3. **Transaction Management**
* Handle multiple signatures
* Monitor confirmations
* Implement retries
* Log market details
4. **Integration**
* Plan Raydium integration
* Consider AMM v4 usage
* Test order flow
* Monitor market health
## Common Issues
1. **Token Program**
* Incompatible token standards
* Wrong program IDs
* Missing approvals
* Invalid mints
2. **Configuration**
* Invalid lot sizes
* Inappropriate tick sizes
* Decimal mismatches
* Parameter conflicts
3. **Transaction**
* Signature failures
* RPC timeouts
* Network congestion
* Balance issues
## Common Token Addresses
* USDC: `EPjFWdd5AufqSSqeM2qN1xzybapC8G4wEGGkZwyTDt1v`
* SOL: `So11111111111111111111111111111111111111112`
* USDT: `Es9vMFrzaCERmJfrF4H2FYD4KCoNkY11McCe8BenwNYB`
* RAY: `4k3Dyjzvzp8eMZWUXbBCjEvwSkkk59S5iCNLY3QrkX6R`
## Related Functions
* `raydiumCreateAmmV4`: Create AMM with market
* `getBalance`: Check token balances
* `trade`: Execute trades
* `createTokenAccount`: Setup accounts
## Notes for Raydium Integration
When creating markets for Raydium AMM v4:
1. Create OpenBook market first
2. Use market ID for AMM creation
3. Ensure token program compatibility
4. Consider fee configurations
# Orca Whirlpool Integration
Source: https://docs.sendai.fun/docs/v2/integrations/defi-integration/orca_whirlpool
Learn how to interact with Orca Whirlpools for concentrated liquidity
Interact with Orca's Whirlpool protocol for concentrated liquidity positions. Manage positions, provide liquidity, and create pools with customizable price ranges.
## Core Features
1. Position Management
* Create centered positions
* Create single-sided positions
* Close positions
* Fetch position data
2. Liquidity Provision
* Symmetric ranges
* Custom price ranges
* Single-token deposits
* Multiple fee tiers
## Usage
### Create Centered Position
```typescript theme={"system"}
const result = await agent.methods.orcaOpenCenteredPositionWithLiquidity(
new PublicKey("whirlpool-address"),
500, // 5% range (±2.5%)
new PublicKey("token-mint"),
new Decimal(100) // Amount to deposit
);
```
### Create Single-Sided Position
```typescript theme={"system"}
const result = await agent.methods.orcaOpenSingleSidedPosition(
new PublicKey("whirlpool-address"),
250, // 2.5% from current price
500, // 5% width
new PublicKey("token-mint"),
new Decimal(100) // Amount to deposit
);
```
### Close Position
```typescript theme={"system"}
const signature = await agent.methods.orcaClosePosition(
new PublicKey("position-mint-address")
);
```
### Fetch Positions
```typescript theme={"system"}
const positions = await agent.methods.orcaFetchPositions();
```
## Example Prompts
### Natural Language Prompts
```text theme={"system"}
"Create a centered liquidity position with 5% range in SOL/USDC pool"
"Open a single-sided USDC position 2.5% above current price"
"Close my whirlpool position"
"Check all my active liquidity positions"
```
### LangChain Tool Prompts
#### Centered Position
```text theme={"system"}
{
"whirlpoolAddress": "whirlpool_address",
"priceOffsetBps": 500,
"inputTokenMint": "EPjFWdd5AufqSSqeM2qN1xzybapC8G4wEGGkZwyTDt1v",
"inputAmount": 1000
}
```
#### Single-Sided Position
```text theme={"system"}
{
"whirlpoolAddress": "whirlpool_address",
"distanceFromCurrentPriceBps": 250,
"widthBps": 500,
"inputTokenMint": "EPjFWdd5AufqSSqeM2qN1xzybapC8G4wEGGkZwyTDt1v",
"inputAmount": 1000
}
```
## Fee Tiers
```typescript theme={"system"}
const FEE_TIERS = {
1: 1, // 0.01% fee
2: 2, // 0.02% fee
4: 4, // 0.04% fee
5: 8, // 0.05% fee
16: 16, // 0.16% fee
30: 64, // 0.30% fee
65: 96, // 0.65% fee
100: 128 // 1.00% fee
};
```
## Implementation Details
### Centered Position
```typescript theme={"system"}
interface CenteredPositionParams {
whirlpoolAddress: PublicKey; // Pool address
priceOffsetBps: number; // Range width (one side)
inputTokenMint: PublicKey; // Deposit token
inputAmount: Decimal; // Amount to deposit
}
// Features
- Symmetric ranges around current price
- Automatic price calculation
- Slippage protection (1%)
- Token extension support
```
### Single-Sided Position
```typescript theme={"system"}
interface SingleSidedParams {
whirlpoolAddress: PublicKey; // Pool address
distanceFromCurrentPriceBps: number; // Starting point
widthBps: number; // Range width
inputTokenMint: PublicKey; // Deposit token
inputAmount: Decimal; // Amount to deposit
}
// Features
- Custom price ranges
- Direction detection
- Tick initialization
- Automatic calculations
```
### Position Data
```typescript theme={"system"}
interface PositionInfo {
whirlpoolAddress: string;
positionInRange: boolean;
distanceFromCenterBps: number;
}
// Available data
- Pool identification
- Range status
- Price metrics
```
## Error Handling
```typescript theme={"system"}
try {
const position = await agent.methods.orcaOpenCenteredPositionWithLiquidity(...);
} catch (error) {
if (error.message.includes("slippage")) {
// Handle price movement
} else if (error.message.includes("liquidity")) {
// Handle liquidity issues
}
}
```
## Best Practices
1. **Position Creation**
* Monitor price ranges
* Consider fee tiers
* Verify token amounts
* Check slippage
2. **Range Selection**
* Analyze volatility
* Consider trading volume
* Monitor price trends
* Balance risk/reward
3. **Position Management**
* Monitor in-range status
* Track fee earnings
* Rebalance when needed
* Plan exit strategy
4. **Performance**
* Use price oracles
* Batch transactions
* Monitor gas costs
* Handle timeouts
## Common Issues
1. **Price Range**
* Out of bounds
* Too narrow
* Asymmetric ranges
* Price movement
2. **Liquidity**
* Insufficient funds
* Unbalanced tokens
* High slippage
* Pool constraints
3. **Technical**
* Invalid addresses
* Tick spacing
* Transaction failure
* RPC errors
## Common Token Addresses
* USDC: `EPjFWdd5AufqSSqeM2qN1xzybapC8G4wEGGkZwyTDt1v`
* SOL: `So11111111111111111111111111111111111111112`
* ORCA: `orcaEKTdK7LKz57vaAYr9QeNsVEPfiu6QeMU1kektZE`
* USDT: `Es9vMFrzaCERmJfrF4H2FYD4KCoNkY11McCe8BenwNYB`
## Related Functions
* `orcaFetchPositions`: Get position data
* `orcaClosePosition`: Close positions
* `getBalance`: Check token balances
* `getTokenData`: Get token information
# Pyth Price Feeds
Source: https://docs.sendai.fun/docs/v2/integrations/defi-integration/pyth
Fetch real-time price data from Pyth Network oracles
Fetch real-time price data from Pyth Network's decentralized oracle network. Access price feeds for various crypto assets with support for symbol lookup and price formatting.
## Core Features
1. Price Feed Management
* Symbol-based feed lookup
* Price feed ID resolution
* Real-time price fetching
* Decimal adjustment
2. Price Operations
* Multi-symbol support
* Price scaling
* Error handling
* Format conversion
## Usage
### Get Price Feed ID
```typescript theme={"system"}
// Get feed ID by token symbol
const feedId = await agent.methods.getPythPriceFeedID("SOL");
console.log("SOL Price Feed ID:", feedId);
```
### Fetch Current Price
```typescript theme={"system"}
// Fetch current price using feed ID
const price = await agent.methods.getPythPrice(feedId);
console.log("Current Price:", price);
// Or chain the operations
const symbol = "SOL";
const feedId = await agent.methods.getPythPriceFeedID(symbol);
const price = await agent.methods.getPythPrice(feedId);
```
## Example Prompts
### Natural Language Prompts
```text theme={"system"}
"Get the current SOL price from Pyth"
"Check ETH price using Pyth oracle"
"Fetch BTC/USD price feed"
"Look up price feed ID for USDC"
```
### LangChain Tool Prompts
#### Fetch Price
```text theme={"system"}
{
"tokenSymbol": "SOL"
}
```
#### Direct Feed Query
```text theme={"system"}
{
"priceFeedId": "H6ARHf6YXhGYeQfUzQNGk6rDNnLBQKrenN712K4AQJEG"
}
```
## Implementation Details
### Price Feed ID Lookup
```typescript theme={"system"}
interface PythPriceFeedIDItem {
id: string;
attributes: {
base: string;
quote: string;
asset_type: string;
};
}
// Features
- Case-insensitive matching
- Multiple feed handling
- Asset type filtering
- Error recovery
```
### Price Fetching
```typescript theme={"system"}
interface PythPrice {
price: {
price: string;
expo: number;
};
}
// Features
- Decimal adjustment
- Price scaling
- Format handling
- BN precision
```
## Response Formats
### Price Feed ID Response
```typescript theme={"system"}
{
status: "success",
feedId: "H6ARHf6YXhGYeQfUzQNGk6rDNnLBQKrenN712K4AQJEG"
}
```
### Price Response
```typescript theme={"system"}
{
status: "success",
price: "23.45",
message: "Current price: $23.45"
}
```
## Error Handling
```typescript theme={"system"}
try {
const price = await agent.methods.getPythPrice(feedId);
} catch (error) {
if (error.message.includes("No price feed")) {
// Handle missing feed
} else if (error.message.includes("HTTP error")) {
// Handle network issues
}
}
```
## Best Practices
1. **Feed ID Management**
* Cache common feeds
* Validate symbols
* Handle multiple matches
* Monitor updates
2. **Price Fetching**
* Handle decimals properly
* Validate responses
* Consider staleness
* Format consistently
3. **Error Handling**
* Implement retries
* Validate inputs
* Check feed status
* Log errors
4. **Performance**
* Cache feed IDs
* Batch requests
* Monitor latency
* Handle timeouts
## Common Issues
1. **Feed Lookup**
* Invalid symbols
* Multiple matches
* Missing feeds
* Network errors
2. **Price Fetching**
* Stale prices
* Decimal errors
* Format issues
* Connection problems
3. **Data Quality**
* Price accuracy
* Update frequency
* Feed reliability
* Data consistency
## Common Price Feeds
| Symbol | Feed ID (Mainnet) |
| -------- | -------------------------------------------- |
| SOL/USD | H6ARHf6YXhGYeQfUzQNGk6rDNnLBQKrenN712K4AQJEG |
| BTC/USD | GVXRSBjFk6e6J3NbVPXohDJetcTjaeeuykUpbQF8UoMU |
| ETH/USD | JBu1AL4obBcCMqKBBxhpWCNUt136ijcuMZLFvTP7iWdB |
| USDC/USD | Gnt27xtC473ZT2Mw5u8wZ68Z3gULkSTb5DuxJy7eJotD |
## Price Update Frequency
* Most feeds update every 400ms
* Updates depend on market conditions
* Consider confidence intervals
* Monitor update timestamps
## Integration Tips
1. **Price Monitoring**
```typescript theme={"system"}
// Regular price checks
setInterval(async () => {
const price = await agent.methods.getPythPrice(feedId);
console.log(`Current price: $${price}`);
}, 5000);
```
2. **Error Recovery**
```typescript theme={"system"}
async function getPriceWithRetry(feedId: string, retries = 3) {
for (let i = 0; i < retries; i++) {
try {
return await agent.methods.getPythPrice(feedId);
} catch (error) {
if (i === retries - 1) throw error;
await new Promise(r => setTimeout(r, 1000));
}
}
}
```
## Related Functions
* `getTokenData`: Get token information
* `trade`: Execute trades
* `fetchMarketData`: Get market info
* `calculatePositionValue`: Value positions
# Ranger Protocol
Source: https://docs.sendai.fun/docs/v2/integrations/defi-integration/ranger
Learn how to interact with Ranger Protocol for perpetual trading operations
Interact with Ranger Protocol to execute perpetual trading operations on Solana. Ranger provides a Smart Order Router (SOR) API that allows users to open, close, increase, and decrease positions across various venues like Flash, Jupiter, Drift, and Adrena.
## Usage
```typescript theme={"system"}
// Open a new perpetual position
const signature = await agent.methods.openPerpTradeRanger({
symbol: "SOL",
side: "Long",
size: 1.0,
collateral: 10.0,
apiKey: "YOUR_API_KEY"
});
// Close an existing position
const signature = await agent.methods.closePerpTradeRanger({
symbol: "SOL",
side: "Long",
apiKey: "YOUR_API_KEY"
});
```
## Methods
### openPerpTrade
Open a new perpetual trading position using Ranger SOR API.
#### Parameters
| Parameter | Type | Required | Description |
| ---------- | ----------------- | -------- | ---------------------------------------- |
| symbol | string | Yes | Trading pair symbol (e.g., "SOL", "BTC") |
| side | "Long" \| "Short" | Yes | Position direction |
| size | number | Yes | Position size in tokens |
| collateral | number | Yes | Collateral amount in USDC |
| apiKey | string | Yes | Ranger API key |
#### Example
```typescript theme={"system"}
const signature = await agent.methods.openPerpTradeRanger({
symbol: "SOL",
side: "Long",
size: 1.0,
collateral: 10.0,
apiKey: "YOUR_API_KEY"
});
```
### closePerpTrade
Close an existing perpetual trading position.
#### Parameters
| Parameter | Type | Required | Description |
| --------- | ----------------- | -------- | ---------------------------------------- |
| symbol | string | Yes | Trading pair symbol (e.g., "SOL", "BTC") |
| side | "Long" \| "Short" | Yes | Position direction |
| apiKey | string | Yes | Ranger API key |
#### Example
```typescript theme={"system"}
const signature = await agent.methods.closePerpTradeRanger({
symbol: "SOL",
side: "Long",
apiKey: "YOUR_API_KEY"
});
```
### increasePerpPosition
Increase the size of an existing perpetual position.
#### Parameters
| Parameter | Type | Required | Description |
| ---------- | ----------------- | -------- | ---------------------------------------- |
| symbol | string | Yes | Trading pair symbol (e.g., "SOL", "BTC") |
| side | "Long" \| "Short" | Yes | Position direction |
| size | number | Yes | Additional position size |
| collateral | number | Yes | Additional collateral in USDC |
| apiKey | string | Yes | Ranger API key |
#### Example
```typescript theme={"system"}
const signature = await agent.methods.increasePerpPositionRanger({
symbol: "SOL",
side: "Long",
size: 0.5,
collateral: 5.0,
apiKey: "YOUR_API_KEY"
});
```
### decreasePerpPosition
Decrease the size of an existing perpetual position.
#### Parameters
| Parameter | Type | Required | Description |
| --------- | ----------------- | -------- | ---------------------------------------- |
| symbol | string | Yes | Trading pair symbol (e.g., "SOL", "BTC") |
| side | "Long" \| "Short" | Yes | Position direction |
| size | number | Yes | Size to decrease by |
| apiKey | string | Yes | Ranger API key |
#### Example
```typescript theme={"system"}
const signature = await agent.methods.decreasePerpPositionRanger({
symbol: "SOL",
side: "Long",
size: 0.5,
apiKey: "YOUR_API_KEY"
});
```
### withdrawBalance
Withdraw available balance from Ranger.
#### Parameters
| Parameter | Type | Required | Description |
| --------- | ------ | -------- | --------------------------- |
| symbol | string | Yes | Token symbol (e.g., "USDC") |
| amount | number | Yes | Amount to withdraw |
| apiKey | string | Yes | Ranger API key |
#### Example
```typescript theme={"system"}
const signature = await agent.methods.withdrawBalanceRanger({
symbol: "USDC",
amount: 10.0,
apiKey: "YOUR_API_KEY"
});
```
### withdrawCollateral
Withdraw collateral from an existing position.
#### Parameters
| Parameter | Type | Required | Description |
| ---------- | ----------------- | -------- | ---------------------------------------- |
| symbol | string | Yes | Trading pair symbol (e.g., "SOL", "BTC") |
| side | "Long" \| "Short" | Yes | Position direction |
| collateral | number | Yes | Collateral amount to withdraw in USDC |
| apiKey | string | Yes | Ranger API key |
#### Example
```typescript theme={"system"}
const signature = await agent.methods.withdrawCollateralRanger({
symbol: "SOL",
side: "Long",
collateral: 2.0,
apiKey: "YOUR_API_KEY"
});
```
## Example Implementation
```typescript theme={"system"}
import { SolanaAgentKit } from "solana-agent-kit";
import { PublicKey } from "@solana/web3.js";
async function rangerOperations(agent: SolanaAgentKit) {
try {
const apiKey = "YOUR_API_KEY";
// Open a new long position on SOL
const openTx = await agent.methods.openPerpTradeRanger({
symbol: "SOL",
side: "Long",
size: 1.0,
collateral: 10.0,
apiKey
});
console.log("Open position transaction:", openTx);
// Increase the position
const increaseTx = await agent.methods.increasePerpPositionRanger({
symbol: "SOL",
side: "Long",
size: 0.5,
collateral: 5.0,
apiKey
});
console.log("Increase position transaction:", increaseTx);
// Decrease the position
const decreaseTx = await agent.methods.decreasePerpPositionRanger({
symbol: "SOL",
side: "Long",
size: 0.5,
apiKey
});
console.log("Decrease position transaction:", decreaseTx);
// Close the position
const closeTx = await agent.methods.closePerpTradeRanger({
symbol: "SOL",
side: "Long",
apiKey
});
console.log("Close position transaction:", closeTx);
// Withdraw balance
const withdrawTx = await agent.methods.withdrawBalanceRanger({
symbol: "USDC",
amount: 10.0,
apiKey
});
console.log("Withdraw balance transaction:", withdrawTx);
} catch (error) {
console.error("Ranger operations failed:", error);
}
}
```
## Implementation Details
* **Smart Order Router (SOR)**: Ranger's SOR optimizes trade execution across multiple venues.
* **Multiple Venues**: Supports trading across various platforms including Flash, Jupiter, Drift, and Adrena.
* **Position Management**: Complete toolkit for opening, closing, increasing, and decreasing perpetual positions.
* **Collateral Management**: Functions for adding and withdrawing collateral from positions.
* **Data Access**: Comprehensive data access for positions, quotes, trade history, and market metrics.
## About Ranger Protocol
Ranger is a protocol designed to provide optimized perpetual trading on Solana. It offers a Smart Order Router (SOR) that routes orders across various trading venues to achieve the best execution. Key features include:
1. **Cross-venue execution**: Trade across multiple venues with a single API
2. **Capital efficiency**: Optimize collateral usage across positions
3. **Low slippage**: Smart routing to minimize price impact
4. **Advanced position management**: Sophisticated tools for managing perpetual positions
5. **Rich market data**: Access to funding rates, liquidation data, and other market metrics
## Error Handling
```typescript theme={"system"}
try {
const signature = await agent.methods.openPerpTradeRanger({
symbol: "SOL",
side: "Long",
size: 1.0,
collateral: 10.0,
apiKey: "YOUR_API_KEY"
});
} catch (error) {
if (error.message.includes("insufficient funds")) {
// Handle insufficient balance
} else if (error.message.includes("slippage")) {
// Handle price movement
}
}
```
## Best Practices
1. **API Key Management**
* Securely store and manage your Ranger API key
* Never expose your API key in client-side code
* Implement proper scoping and permissions for API keys
2. **Position Sizing**
* Use appropriate position sizes relative to your capital
* Consider market volatility when determining leverage
* Monitor positions regularly to manage risk
3. **Collateral Management**
* Maintain sufficient collateral to avoid liquidations
* Use the withdrawCollateral function judiciously
* Monitor health factors for positions
4. **Error Handling**
* Implement robust error handling for all API calls
* Include retry logic for temporary failures
* Monitor transaction status until confirmed
## Common Market Symbols
* SOL-PERP
* BTC-PERP
* ETH-PERP
* BONK-PERP
* JTO-PERP
## Response Format
```typescript theme={"system"}
// Successful response for data query
{
status: "success",
message: "Data fetched successfully",
positions: [
{
symbol: "SOL",
side: "Long",
size: 1.0,
collateral: 10.0,
entryPrice: 150.25,
liquidationPrice: 135.5,
pnl: 0.45,
// ...
},
// ...
]
}
// Successful response for transaction
{
status: "success",
message: "Transaction executed successfully",
signature: "5UfgJ5vVZxUxefDGqzqkVLHzHxVTyYH9StYyHKgvHYmXJgqJKxEqy9k4Rz9LpXrHF9kUZB7",
meta: {
venues: ["Flash"],
fees: 0.0045,
// ...
}
}
// Error response
{
status: "error",
message: "Error message here"
}
```
## Related Functions
* `getBalance`: Check token balances
* `getFundingRateArbs`: Get funding rate arbitrage opportunities
* `getLiquidationsLatest`: Get the latest liquidation events
* `getFundingRatesAccumulated`: Get accumulated funding rates
* `getBorrowRatesAccumulated`: Get accumulated borrow rates
# Raydium Pools & Launchlab
Source: https://docs.sendai.fun/docs/v2/integrations/defi-integration/raydium_pools
Create liquidity pools and launch tokens on Raydium using AMM V4, CLMM, CPMM, and Launchlab
Create and manage different types of liquidity pools on Raydium, including AMM V4 (Legacy), Concentrated Liquidity (CLMM), Constant Product (CPMM) pools, and launch tokens using Raydium Launchlab.
## Pool Types & Token Launch
### 1. AMM V4 (Legacy)
* Requires OpenBook marketID
* Traditional AMM model
* Supports standard SPL tokens
### 2. CLMM (Concentrated Liquidity)
* Custom liquidity ranges
* Increased capital efficiency
* Supports price range specification
### 3. CPMM (Constant Product)
* Newest pool type
* Supports Token-2022 standard
* No OpenBook market requirement
### 4. Launchlab Token
* Token creation platform
* Built-in token launch capabilities
* Automatic migration options (AMM/CPMM)
* Integrated buy functionality
## Usage
### AMM V4
```typescript theme={"system"}
const signature = await agent.methods.raydiumCreateAmmV4(
new PublicKey("market-id"),
new BN(baseAmount),
new BN(quoteAmount),
new BN(startTime)
);
```
### CLMM
```typescript theme={"system"}
const signature = await agent.methods.raydiumCreateClmm(
new PublicKey("mint1"),
new PublicKey("mint2"),
new PublicKey("config-id"),
new Decimal(initialPrice),
new BN(startTime)
);
```
### CPMM
```typescript theme={"system"}
const signature = await agent.methods.raydiumCreateCpmm(
new PublicKey("mint1"),
new PublicKey("mint2"),
new PublicKey("config-id"),
new BN(mintAAmount),
new BN(mintBAmount),
new BN(startTime)
);
```
### Launchlab Token
```typescript theme={"system"}
const result = await agent.methods.raydiumCreateLaunchlabToken({
name: "My Token",
symbol: "MTK",
decimals: 9,
supply: 1000000,
uri: "https://example.com/metadata.json",
migrateType: "amm",
buyAmount: new BN(1000000),
createOnly: false,
slippageBps: 100
});
```
## Example Prompts
### Natural Language Prompts
```text theme={"system"}
"Create a Raydium CPMM pool for USDC/SOL pair"
"Setup concentrated liquidity pool with custom ranges"
"Launch AMM V4 pool with OpenBook market integration"
"Initialize CLMM pool with specific initial price"
"Create a new token on Raydium Launchlab with 1M supply"
"Launch token with automatic AMM migration"
"Create launchlab token and buy 0.1 SOL worth immediately"
```
### LangChain Tool Prompts
#### AMM V4
```text theme={"system"}
{
"marketId": "9xQFzA...",
"baseAmount": "1000000000",
"quoteAmount": "1000000000",
"startTime": "0"
}
```
#### CLMM
```text theme={"system"}
{
"mint1": "EPjFWdd5AufqSSqeM2qN1xzybapC8G4wEGGkZwyTDt1v",
"mint2": "So11111111111111111111111111111111111111112",
"configId": "6VxuT...",
"initialPrice": "24.5",
"startTime": "0"
}
```
#### CPMM
```text theme={"system"}
{
"mint1": "EPjFWdd5AufqSSqeM2qN1xzybapC8G4wEGGkZwyTDt1v",
"mint2": "So11111111111111111111111111111111111111112",
"configId": "5VxuT...",
"mintAAmount": "1000000000",
"mintBAmount": "1000000000",
"startTime": "0"
}
```
#### Launchlab Token
```text theme={"system"}
{
"name": "My Awesome Token",
"symbol": "MAT",
"decimals": 9,
"supply": 1000000,
"uri": "https://example.com/token-metadata.json",
"migrateType": "amm",
"buyAmount": 1000000,
"createOnly": false,
"slippageBps": 100
}
```
## Pool-Specific Details
### AMM V4
```typescript theme={"system"}
// Parameters
interface AmmV4Params {
marketId: PublicKey; // OpenBook market ID
baseAmount: BN; // Initial base token amount
quoteAmount: BN; // Initial quote token amount
startTime: BN; // Pool start time
}
// Constraints
- Requires OpenBook market
- Only supports TOKEN_PROGRAM_ID mints
- Minimum liquidity requirements
```
### CLMM
```typescript theme={"system"}
// Parameters
interface ClmmParams {
mint1: PublicKey; // First token mint
mint2: PublicKey; // Second token mint
configId: PublicKey; // Configuration ID
initialPrice: Decimal; // Initial pool price
startTime: BN; // Pool start time
}
// Configuration includes
- Pool info
- Index
- Protocol fee rate
- Trade fee rate
- Tick spacing
- Fund fee rate
```
### CPMM
```typescript theme={"system"}
// Parameters
interface CpmmParams {
mint1: PublicKey; // First token mint
mint2: PublicKey; // Second token mint
configId: PublicKey; // Configuration ID
mintAAmount: BN; // Initial amount of token A
mintBAmount: BN; // Initial amount of token B
startTime: BN; // Pool start time
}
// Features
- Supports Token-2022
- No market ID required
- Configurable fees
```
### Launchlab Token
```typescript theme={"system"}
// Parameters
interface LaunchlabTokenParams {
name: string; // Token name
symbol: string; // Token symbol
decimals?: number; // Token decimals (default: 6)
supply?: number; // Initial supply (default: LaunchpadPoolInitParam.supply)
uri: string; // Metadata URI
platformId?: string; // Platform ID (default: Raydium platform)
migrateType?: "amm" | "cpmm"; // Migration type (default: "amm")
txVersion?: TxVersion; // Transaction version (default: V0)
slippageBps?: number; // Slippage in basis points (default: 100)
buyAmount?: BN; // Buy amount in lamports (default: 0)
createOnly: boolean; // Create only or create and buy
}
// Features
- Integrated token creation and launch
- Automatic migration to AMM or CPMM
- Built-in buy functionality
- Configurable slippage protection
- Custom platform support
```
## Implementation Details
### Common Features
* Automatic mint verification
* Decimal handling
* Fee configuration
* Transaction versioning
### Pool-Specific Features
* AMM V4: OpenBook integration
* CLMM: Tick range management
* CPMM: Token-2022 support
* Launchlab: Token creation and launch automation
### Launchlab Token Features
* **Token Creation**: Generates new token mint with custom parameters
* **Metadata Support**: Links to off-chain metadata via URI
* **Migration Options**: Automatic pool creation with AMM or CPMM
* **Instant Buy**: Optional immediate token purchase upon creation
* **Platform Integration**: Supports custom platform IDs
* **Slippage Protection**: Configurable slippage tolerance
## Error Handling
```typescript theme={"system"}
try {
const pool = await agent.methods.raydiumCreate[PoolType](...);
} catch (error) {
if (error.message.includes("insufficient liquidity")) {
// Handle liquidity issues
} else if (error.message.includes("invalid market")) {
// Handle market validation issues
} else if (error.message.includes("Launchpad config not found")) {
// Handle launchlab configuration issues
}
}
```
## Best Practices
1. **Pool Type Selection**
* Use CPMM for Token-2022
* Use CLMM for efficient ranges
* Use AMM V4 for OpenBook integration
* Use Launchlab for new token launches
2. **Initial Liquidity**
* Calculate appropriate amounts
* Consider token decimals
* Monitor price impact
* Verify token balances
3. **Configuration**
* Set appropriate fees
* Choose tick spacing
* Plan start time
* Consider trading volume
4. **Launchlab Token Setup**
* Prepare metadata JSON with proper schema
* Choose appropriate decimals (6-9 recommended)
* Set realistic initial supply
* Configure migration type based on use case
* Test with small buy amounts first
5. **Security**
* Validate all addresses
* Check token programs
* Verify configurations
* Monitor transactions
* Secure metadata hosting
## Common Issues
1. **Setup Issues**
* Invalid market ID
* Insufficient liquidity
* Wrong token program
* Incorrect decimals
* Missing metadata URI
2. **Transaction Failures**
* Network congestion
* Invalid parameters
* Configuration errors
* Insufficient funds
* Slippage exceeded
3. **Permission Issues**
* Missing approvals
* Wrong signers
* Invalid authority
* Program restrictions
4. **Launchlab Specific Issues**
* Invalid metadata format
* Unreachable URI
* Configuration mismatch
* Platform ID errors
* Supply calculation errors
## Metadata Schema for Launchlab Tokens
```json theme={"system"}
{
"name": "Token Name",
"symbol": "TOKEN",
"description": "Token description",
"image": "https://example.com/image.png",
"external_url": "https://example.com",
"attributes": [
{
"trait_type": "Category",
"value": "DeFi"
}
],
"properties": {
"files": [
{
"uri": "https://example.com/image.png",
"type": "image/png"
}
],
"category": "image"
}
}
```
## Common Token Addresses
* USDC: `EPjFWdd5AufqSSqeM2qN1xzybapC8G4wEGGkZwyTDt1v`
* SOL: `So11111111111111111111111111111111111111112`
* USDT: `Es9vMFrzaCERmJfrF4H2FYD4KCoNkY11McCe8BenwNYB`
* RAY: `4k3Dyjzvzp8eMZWUXbBCjEvwSkkk59S5iCNLY3QrkX6R`
## Migration Types
### AMM Migration
* Creates traditional AMM pool
* Suitable for most use cases
* Higher liquidity requirements
* OpenBook market integration
### CPMM Migration
* Creates constant product pool
* Lower barriers to entry
* Token-2022 support
* No market ID requirement
* Faster setup process
# Sanctum
Source: https://docs.sendai.fun/docs/v2/integrations/defi-integration/sanctum
Learn how to interact with Sanctum for LST (Liquid Staking Token) operations
Interact with Sanctum to manage Liquid Staking Tokens (LSTs) on Solana. Sanctum provides a unified liquidity layer for LSTs, allowing users to add liquidity, swap between different LSTs, and access information about APYs, prices, and TVL.
## Usage
```typescript theme={"system"}
// Get APY for different LSTs
const apys = await agent.methods.sanctumGetLstApy([
"INF",
"pwrsol",
"mSoLzYCxHdYgdzU16g5QSh3i5K3z3KZK7ytfqcJm7So",
"laineSOL"
]);
// Swap between LSTs
const signature = await agent.methods.sanctumSwapLst(
"So11111111111111111111111111111111111111112", // Input LST mint
"1000000000", // Amount (1 SOL)
"900000000", // Quoted amount
5000, // Priority fee
"bSo13r4TkiE4KumL71LsHTPpL2euBYLFx6h9HP3piy1" // Output LST mint
);
// Add liquidity to Sanctum pool
const signature = await agent.methods.sanctumAddLiquidity(
"So11111111111111111111111111111111111111112", // LST mint
"1000000000", // Amount (1 SOL)
"900000000", // Quoted amount
5000 // Priority fee
);
```
## Methods
### getLstApy
Get the APY (Annual Percentage Yield) for specified LSTs on Sanctum.
#### Parameters
| Parameter | Type | Required | Description |
| --------- | --------- | -------- | -------------------------------------- |
| inputs | string\[] | Yes | Array of LST mint addresses or symbols |
#### Example
```typescript theme={"system"}
const apys = await agent.methods.sanctumGetLstApy([
"INF",
"pwrsol",
"mSoLzYCxHdYgdzU16g5QSh3i5K3z3KZK7ytfqcJm7So",
"laineSOL"
]);
```
### getLstPrice
Get the current price of specified LSTs on Sanctum.
#### Parameters
| Parameter | Type | Required | Description |
| --------- | --------- | -------- | -------------------------------------- |
| inputs | string\[] | Yes | Array of LST mint addresses or symbols |
#### Example
```typescript theme={"system"}
const prices = await agent.methods.sanctumGetLstPrice([
"INF",
"pwrsol",
"mSoLzYCxHdYgdzU16g5QSh3i5K3z3KZK7ytfqcJm7So",
"laineSOL"
]);
```
### getLstTvl
Get the Total Value Locked (TVL) for specified LSTs on Sanctum.
#### Parameters
| Parameter | Type | Required | Description |
| --------- | --------- | -------- | -------------------------------------- |
| inputs | string\[] | Yes | Array of LST mint addresses or symbols |
#### Example
```typescript theme={"system"}
const tvl = await agent.methods.sanctumGetLstTvl([
"INF",
"pwrsol",
"mSoLzYCxHdYgdzU16g5QSh3i5K3z3KZK7ytfqcJm7So",
"laineSOL"
]);
```
### getOwnedLst
Get all LSTs owned by the current wallet that are supported by Sanctum.
#### Parameters
None
#### Example
```typescript theme={"system"}
const ownedLsts = await agent.methods.sanctumGetOwnedLst();
```
### swapLst
Swap one LST for another using Sanctum's unified liquidity layer.
#### Parameters
| Parameter | Type | Required | Description |
| ------------- | ------ | -------- | ---------------------------------- |
| inputLstMint | string | Yes | Input LST mint address |
| amount | string | Yes | Amount to swap (in smallest units) |
| quotedAmount | string | Yes | Expected output amount |
| priorityFee | number | Yes | Priority fee for the transaction |
| outputLstMint | string | Yes | Output LST mint address |
#### Example
```typescript theme={"system"}
const signature = await agent.methods.sanctumSwapLst(
"So11111111111111111111111111111111111111112", // Input LST mint
"1000000000", // Amount (1 SOL)
"900000000", // Quoted amount
5000, // Priority fee
"bSo13r4TkiE4KumL71LsHTPpL2euBYLFx6h9HP3piy1" // Output LST mint
);
```
### addLiquidity
Add liquidity to a Sanctum pool.
#### Parameters
| Parameter | Type | Required | Description |
| ------------ | ------ | -------- | --------------------------------- |
| lstMint | string | Yes | LST mint address |
| amount | string | Yes | Amount to add (in smallest units) |
| quotedAmount | string | Yes | Expected INF token amount |
| priorityFee | number | Yes | Priority fee for the transaction |
#### Example
```typescript theme={"system"}
const signature = await agent.methods.sanctumAddLiquidity(
"So11111111111111111111111111111111111111112", // LST mint
"1000000000", // Amount (1 SOL)
"900000000", // Quoted amount
5000 // Priority fee
);
```
### removeLiquidity
Remove liquidity from a Sanctum pool.
#### Parameters
| Parameter | Type | Required | Description |
| ------------ | ------ | -------- | ------------------------------------ |
| lstMint | string | Yes | LST mint address |
| amount | string | Yes | Amount to remove (in smallest units) |
| quotedAmount | string | Yes | Expected INF token to burn |
| priorityFee | number | Yes | Priority fee for the transaction |
#### Example
```typescript theme={"system"}
const signature = await agent.methods.sanctumRemoveLiquidity(
"So11111111111111111111111111111111111111112", // LST mint
"1000000000", // Amount (1 SOL)
"900000000", // Quoted amount
5000 // Priority fee
);
```
## Example Implementation
```typescript theme={"system"}
import { SolanaAgentKit } from "solana-agent-kit";
import { PublicKey } from "@solana/web3.js";
async function sanctumOperations(agent: SolanaAgentKit) {
try {
// Get APY for different LSTs
const apys = await agent.methods.sanctumGetLstApy([
"INF",
"pwrsol",
"mSoLzYCxHdYgdzU16g5QSh3i5K3z3KZK7ytfqcJm7So",
"laineSOL"
]);
console.log("LST APYs:", apys);
// Get prices for different LSTs
const prices = await agent.methods.sanctumGetLstPrice([
"INF",
"pwrsol",
"mSoLzYCxHdYgdzU16g5QSh3i5K3z3KZK7ytfqcJm7So",
"laineSOL"
]);
console.log("LST Prices:", prices);
// Get TVL for different LSTs
const tvl = await agent.methods.sanctumGetLstTvl([
"INF",
"pwrsol",
"mSoLzYCxHdYgdzU16g5QSh3i5K3z3KZK7ytfqcJm7So",
"laineSOL"
]);
console.log("LST TVL:", tvl);
// Get owned LSTs
const ownedLsts = await agent.methods.sanctumGetOwnedLst();
console.log("Owned LSTs:", ownedLsts);
// Add liquidity to a Sanctum pool
const addLiquidityTx = await agent.methods.sanctumAddLiquidity(
"So11111111111111111111111111111111111111112", // SOL mint
"1000000000", // 1 SOL
"900000000", // Quoted amount
5000 // Priority fee
);
console.log("Add liquidity transaction:", addLiquidityTx);
// Swap LSTs
const swapTx = await agent.methods.sanctumSwapLst(
"So11111111111111111111111111111111111111112", // SOL mint
"1000000000", // 1 SOL
"900000000", // Quoted amount
5000, // Priority fee
"bSo13r4TkiE4KumL71LsHTPpL2euBYLFx6h9HP3piy1" // bSOL mint
);
console.log("Swap LST transaction:", swapTx);
// Remove liquidity from a Sanctum pool
const removeLiquidityTx = await agent.methods.sanctumRemoveLiquidity(
"So11111111111111111111111111111111111111112", // SOL mint
"1000000000", // 1 SOL
"900000000", // Quoted amount
5000 // Priority fee
);
console.log("Remove liquidity transaction:", removeLiquidityTx);
} catch (error) {
console.error("Sanctum operations failed:", error);
}
}
```
## Implementation Details
* **Sanctum Reserve**: Provides instant liquidity between LSTs and SOL.
* **Sanctum Router**: Enables direct swaps between different LSTs.
* **Infinity Pools**: Unified LST liquidity pools with low slippage and high efficiency.
* **Customized LSTs**: Support for validator-specific LSTs with unique properties and rewards.
* **APY and TVL data**: Comprehensive data on LST performance and liquidity.
## About Sanctum Finance
Sanctum is a Solana-based protocol designed to act as a unified liquidity layer for Liquid Staking Tokens (LSTs). It addresses the fragmentation and inefficiencies associated with multiple LSTs in the ecosystem by providing:
1. **Deep liquidity** for all LSTs from day one
2. **Simple swapping** between different LSTs
3. **Instant liquidity** without waiting for unstaking periods
4. **Validator-specific LSTs** with custom APYs and features
5. **Low fees** and minimal slippage for all operations
## Error Handling
```typescript theme={"system"}
try {
const signature = await agent.methods.sanctumswapLst(inputLstMint, amount, quotedAmount, priorityFee, outputLstMint);
} catch (error) {
if (error.message.includes("insufficient funds")) {
// Handle insufficient balance
} else if (error.message.includes("slippage")) {
// Handle price movement
}
}
```
## Best Practices
1. **Priority Fees**
* Use appropriate priority fees based on network congestion
* Consider higher fees during peak usage times
* Monitor transaction confirmation times
2. **Amount Calculation**
* Be aware that LSTs typically use 9 decimals (like SOL)
* Account for slippage in swap operations
* Verify quoted amounts before transactions
3. **LST Selection**
* Consider APY differences between LSTs
* Research validator-specific LSTs for special features
* Monitor TVL for liquidity depth
4. **Error Handling**
* Implement retries for failed transactions
* Handle slippage errors appropriately
* Monitor transaction status until confirmed
## Common LST Addresses
* SOL: `So11111111111111111111111111111111111111112`
* mSOL: `mSoLzYCxHdYgdzU16g5QSh3i5K3z3KZK7ytfqcJm7So`
* jitoSOL: `J1toso1uCk3RLmjorhTtrVwY9HJ7X8V9yYac6Y7kGCPn`
* bSOL: `bSo13r4TkiE4KumL71LsHTPpL2euBYLFx6h9HP3piy1`
* INF: `infnNBxGXvNnkQnGLNsENH4QbPQYmgmG65nPPqRHGLX`
## Response Format
```typescript theme={"system"}
// Successful response for data query
{
status: "success",
message: "Data fetched successfully",
apys: {
"INF": 0.06542961909093714,
"mSoLzYCxHdYgdzU16g5QSh3i5K3z3KZK7ytfqcJm7So": 0.08143705823579084,
// ...
}
}
// Successful response for transaction
{
status: "success",
message: "Transaction executed successfully",
transaction: "5UfgJ5vVZxUxefDGqzqkVLHzHxVTyYH9StYyHKgvHYmXJgqJKxEqy9k4Rz9LpXrHF9kUZB7"
}
// Error response
{
status: "error",
message: "Error message here"
}
```
## Related Functions
* `getBalance`: Check token balances
* `trade`: Swap tokens using Jupiter
* `getTokenData`: Get token information
* `transfer`: Transfer tokens
# Solana Name Service (SNS)
Source: https://docs.sendai.fun/docs/v2/integrations/defi-integration/sns
Register and manage your .SOL domains using SNS
Register, resolve, and manage .SOL domains using the Solana Name Service. The documentation includes domain name registrations, resolution, and management functions.
## Core Features
1. Domain Management
* Register new domains
* Resolve domains to addresses
* Get primary domains
* List registered domains
2. Domain Operations
* Custom space allocation
* Domain resolution
* Multi-TLD support
* Primary domain lookup
## Usage
### Register Domain
```typescript theme={"system"}
const signature = await agent.methods.registerDomain(
"mydomain", // Domain name (without .sol)
1 // Space in KB (optional)
);
```
### Resolve Domain
```typescript theme={"system"}
const address = await agent.methods.resolveSolDomain("mydomain.sol");
console.log("Owner:", address.toString());
```
### Get Primary Domain
```typescript theme={"system"}
const domain = await agent.methods.getPrimaryDomain(
new PublicKey("owner-address")
);
```
### List All Domains
```typescript theme={"system"}
const domains = await agent.methods.getAllRegisteredAllDomains();
console.log("Registered domains:", domains);
```
## Example Prompts
### Natural Language Prompts
```text theme={"system"}
"Register mydomain.sol with 2KB storage"
"Look up the owner of vitalik.sol"
"Get the primary domain for this wallet"
"Find all registered .sol domains"
```
### LangChain Tool Prompts
#### Register Domain
```text theme={"system"}
{
"name": "mydomain",
"spaceKB": 2
}
```
#### Resolve Domain
```text theme={"system"}
{
"domain": "vitalik.sol"
}
```
## Implementation Details
### Domain Registration
```typescript theme={"system"}
interface RegistrationParams {
name: string; // Domain name
spaceKB?: number; // Storage space (max 10KB)
}
// Features
- Automatic USDC payment
- Space validation
- Transaction bundling
- Associated token handling
```
### Domain Resolution
```typescript theme={"system"}
interface ResolutionParams {
domain: string; // Domain to resolve
}
// Features
- .sol suffix handling
- Error recovery
- Stale check
- Multi-TLD support
```
### Primary Domain
```typescript theme={"system"}
interface PrimaryDomainResponse {
reverse: string; // Domain name
stale: boolean; // Staleness status
}
// Features
- Staleness check
- Error handling
- Reverse lookup
```
## Error Handling
```typescript theme={"system"}
try {
const result = await agent.methods.registerDomain("mydomain");
} catch (error) {
if (error.message.includes("Maximum domain size")) {
// Handle size limit exceeded
} else if (error.message.includes("insufficient funds")) {
// Handle payment issues
}
}
```
## Best Practices
1. **Domain Registration**
* Choose appropriate space
* Verify domain availability
* Check USDC balance
* Plan for renewals
2. **Domain Resolution**
* Handle missing domains
* Check staleness
* Implement caching
* Validate inputs
3. **Domain Management**
* Monitor expiration
* Update records
* Backup settings
* Regular validation
4. **Performance**
* Cache resolutions
* Batch operations
* Handle timeouts
* Monitor errors
## Common Issues
1. **Registration**
* Insufficient USDC
* Name taken
* Invalid characters
* Space limits
2. **Resolution**
* Stale records
* Invalid domains
* Missing records
* Network issues
3. **Management**
* Expired domains
* Update failures
* Permission issues
* Sync problems
## Response Formats
### Registration Response
```typescript theme={"system"}
{
status: "success",
message: "Domain registered successfully",
transaction: "5UfgJ5vVZxUx...",
domain: "mydomain.sol",
spaceKB: 1
}
```
### Resolution Response
```typescript theme={"system"}
{
status: "success",
message: "Domain resolved successfully",
publicKey: "7nxQB..."
}
```
## Space Allocation Guide
| Use Case | Recommended Space |
| ------------ | ----------------- |
| Basic Domain | 1KB |
| With Records | 2KB |
| Full Profile | 5KB |
| Maximum | 10KB |
## Related Functions
* `getBalance`: Check USDC balance
* `transfer`: Transfer domains
* `createAssociatedTokenAccount`: Setup USDC
* `getAllDomainsTLDs`: List available TLDs
## Notes
1. **Registration Cost**
* Based on name length
* Space allocation fee
* USDC payment required
* Renewal considerations
2. **Resolution Process**
* Caching recommended
* Handle timeouts
* Validate responses
* Multiple attempts
3. **Management Tips**
* Regular validation
* Backup records
* Monitor expiration
* Update settings
# SolutioFi Token Management
Source: https://docs.sendai.fun/docs/v2/integrations/defi-integration/solutiofi
Learn how to manage tokens using SolutioFi protocol integration
Solana Agent Kit provides comprehensive integration with SolutioFi protocol for token management operations, including burning tokens, closing accounts, merging multiple tokens, and spreading tokens across different assets.
## Key Features
* Token burning
* Account closure
* Token merging
* Token spreading
* Priority fee management
* Transaction batching
* LangChain tool integration
## Basic Usage
### Burning Tokens
```typescript theme={"system"}
const signatures = await agent.methods.burnTokens([
"EPjFWdd5AufqSSqeM2qN1xzybapC8G4wEGGkZwyTDt1v", // USDC
"So11111111111111111111111111111111111111112" // SOL
]);
```
### Closing Accounts
```typescript theme={"system"}
const signatures = await agent.methods.closeAccounts([
"EPjFWdd5AufqSSqeM2qN1xzybapC8G4wEGGkZwyTDt1v", // USDC
"So11111111111111111111111111111111111111112" // SOL
]);
```
### Merging Tokens
```typescript theme={"system"}
const signatures = await agent.methods.mergeTokens(
[
{
mint: "EPjFWdd5AufqSSqeM2qN1xzybapC8G4wEGGkZwyTDt1v",
inputAmount: "100",
slippage: "1",
onlyDirectRoutes: true
}
],
"So11111111111111111111111111111111111111112",
"normal"
);
```
### Spreading Tokens
```typescript theme={"system"}
const signatures = await agent.methods.spreadToken(
{
mint: "EPjFWdd5AufqSSqeM2qN1xzybapC8G4wEGGkZwyTDt1v",
inputAmount: "1000",
slippage: "1",
onlyDirectRoutes: true
},
[
{
mint: "So11111111111111111111111111111111111111112",
percentage: 50
},
{
mint: "mSoLzYCxHdYgdzU16g5QSh3i5K3z3KZK7ytfqcJm7So",
percentage: 50
}
],
"normal"
);
```
## Input Types
### Input Asset Structure
```typescript theme={"system"}
interface InputAssetStruct {
mint: string; // Token mint address
inputAmount: string; // Amount to process
slippage: string; // Slippage tolerance
onlyDirectRoutes: boolean; // Use only direct routes
}
```
### Target Token Structure
```typescript theme={"system"}
interface TargetTokenStruct {
mint: string; // Token mint address
percentage: number; // Allocation percentage
}
```
### Priority Fee Levels
```typescript theme={"system"}
type PriorityFee = "fast" | "normal" | "slow";
```
## LangChain Integration
Solana Agent Kit provides several LangChain tools for SolutioFi operations:
### Burn Tokens Tool
```typescript theme={"system"}
import { SolanaBurnTokensTool } from 'solana-agent-kit';
const burnTokensTool = new SolanaBurnTokensTool(agent);
// Tool input format (JSON string):
const input = JSON.stringify({
mints: [
"EPjFWdd5AufqSSqeM2qN1xzybapC8G4wEGGkZwyTDt1v",
"So11111111111111111111111111111111111111112"
]
});
```
### Close Accounts Tool
```typescript theme={"system"}
import { SolanaCloseAccountsTool } from 'solana-agent-kit';
const closeAccountsTool = new SolanaCloseAccountsTool(agent);
// Tool input format (JSON string):
const input = JSON.stringify({
mints: [
"EPjFWdd5AufqSSqeM2qN1xzybapC8G4wEGGkZwyTDt1v",
"So11111111111111111111111111111111111111112"
]
});
```
### Merge Tokens Tool
```typescript theme={"system"}
import { SolanaMergeTokensTool } from 'solana-agent-kit';
const mergeTokensTool = new SolanaMergeTokensTool(agent);
// Tool input format (JSON string):
const input = JSON.stringify({
inputAssets: [{
mint: "EPjFWdd5AufqSSqeM2qN1xzybapC8G4wEGGkZwyTDt1v",
inputAmount: "100",
slippage: "1",
onlyDirectRoutes: true
}],
outputMint: "So11111111111111111111111111111111111111112",
priorityFee: "normal"
});
```
### Spread Token Tool
```typescript theme={"system"}
import { SolanaSpreadTokenTool } from 'solana-agent-kit';
const spreadTokenTool = new SolanaSpreadTokenTool(agent);
// Tool input format (JSON string):
const input = JSON.stringify({
inputAsset: {
mint: "EPjFWdd5AufqSSqeM2qN1xzybapC8G4wEGGkZwyTDt1v",
inputAmount: "1000",
slippage: "1",
onlyDirectRoutes: true
},
targetTokens: [
{
mint: "So11111111111111111111111111111111111111112",
percentage: 50
},
{
mint: "mSoLzYCxHdYgdzU16g5QSh3i5K3z3KZK7ytfqcJm7So",
percentage: 50
}
],
priorityFee: "normal"
});
```
## Example Prompts
For LangChain AI tools, here are example prompts:
### Token Management
```text theme={"system"}
"Burn these unused token accounts"
"Close all empty token accounts"
"Merge multiple USDC accounts into one"
"Split 1000 USDC equally between SOL and mSOL"
```
## Important Notes
1. **API Key Configuration**
* Required for all operations
* Set via SOLUTIOFI\_API\_KEY in config
* Client authentication required before use
2. **Transaction Batching**
* Operations may generate multiple transactions
* All transactions are signed and sent sequentially
* Failed transactions are skipped
3. **Priority Fees**
* Three levels available: fast, normal, slow
* Affects transaction processing speed
* Higher fees for faster processing
## Best Practices
1. **Error Handling**
```typescript theme={"system"}
try {
const signatures = await agent.methods.burnTokens(mints);
// Check each signature for success
} catch (error) {
if (error.message.includes("API key")) {
// Handle authentication issues
} else if (error.message.includes("insufficient")) {
// Handle insufficient balance
}
}
```
2. **Transaction Management**
```typescript theme={"system"}
// Process multiple transactions
const signatures = [];
for (const tx of transactions) {
try {
const signature = await sendAndConfirm(tx);
signatures.push(signature);
} catch (error) {
continue; // Skip failed transactions
}
}
```
3. **Input Validation**
```typescript theme={"system"}
// Validate percentage allocations
const totalPercentage = targetTokens.reduce(
(sum, token) => sum + token.percentage,
0
);
if (totalPercentage !== 100) {
throw new Error("Total percentage must equal 100");
}
```
## Technical Details
### Client Initialization
```typescript theme={"system"}
const client = new SolutioFi({
apiKey: process.env.SOLUTIOFI_API_KEY
});
await client.authenticate();
```
### Transaction Options
```typescript theme={"system"}
const TX_OPTIONS = {
skipPreflight: false,
preflightCommitment: "processed"
};
```
### Common Token Addresses
```typescript theme={"system"}
const TOKENS = {
SOL: "So11111111111111111111111111111111111111112",
USDC: "EPjFWdd5AufqSSqeM2qN1xzybapC8G4wEGGkZwyTDt1v",
mSOL: "mSoLzYCxHdYgdzU16g5QSh3i5K3z3KZK7ytfqcJm7So"
};
```
# Switchboard Feed Simulation
Source: https://docs.sendai.fun/docs/v2/integrations/defi-integration/switchboard
Learn how to simulate Switchboard oracle price feeds
Solana Agent Kit provides integration with Switchboard for simulating oracle price feeds. This integration allows you to fetch simulated price data for any Switchboard feed on mainnet.
## Key Features
* Price feed simulation
* Customizable Crossbar endpoint
* Mainnet feed support
* LangChain tool integration
* Error handling and validation
## Basic Usage
### Simulating a Price Feed
```typescript theme={"system"}
const result = await agent.methods.simulateSwitchboardFeed(
"GvDMxPzN1sCj7L26YDK2HnMRXEQmQ2aemov8YBtPS7vR", // Feed public key
"https://crossbar.switchboard.xyz" // Optional Crossbar URL
);
```
## Input Parameters
### Feed Simulation Parameters
```typescript theme={"system"}
interface SimulateFeedParams {
feed: string; // Feed public key (hash)
crossbarUrl?: string; // Optional Crossbar URL
}
```
### Response Type
```typescript theme={"system"}
interface SwitchboardSimulateFeedResponse {
status: "success" | "error";
feed?: string; // Feed public key
value?: number; // Simulated feed value
message?: string; // Error message if status is "error"
code?: string; // Error code if status is "error"
}
```
## LangChain Integration
Solana Agent Kit provides a LangChain tool for feed simulation:
### Simulate Feed Tool
```typescript theme={"system"}
import { SolanaSwitchboardSimulateFeed } from 'solana-agent-kit';
const simulateFeedTool = new SolanaSwitchboardSimulateFeed(agent);
// Tool input format (JSON string):
const input = JSON.stringify({
feed: "GvDMxPzN1sCj7L26YDK2HnMRXEQmQ2aemov8YBtPS7vR",
crossbarUrl: "https://crossbar.switchboard.xyz" // Optional
});
// Tool returns JSON response:
{
status: "success",
feed: "GvDMxPzN1sCj7L26YDK2HnMRXEQmQ2aemov8YBtPS7vR",
value: 1234567
}
```
## Example Prompts
For LangChain AI tools, here are example prompts:
### Feed Simulation
```text theme={"system"}
"Simulate the SOL/USD price feed"
"Get the current BTC price from Switchboard"
"Check the ETH/USD oracle feed"
```
## Important Notes
1. **Feed Public Keys**
* Must be valid Switchboard feed addresses
* Only mainnet feeds are supported
* Feed hash must be base58 encoded
2. **Crossbar Configuration**
* Default URL: [https://crossbar.switchboard.xyz](https://crossbar.switchboard.xyz)
* Custom URLs must be valid Crossbar instances
* SSL validation is enabled by default
3. **Response Handling**
* Values are returned as integers
* Empty results indicate invalid feed hash
* Network errors are propagated
## Best Practices
1. **Error Handling**
```typescript theme={"system"}
try {
const result = await agent.methods.simulateSwitchboardFeed(feed);
if (!result) {
// Handle empty result
}
} catch (error) {
if (error.message.includes("feed hash")) {
// Handle invalid feed address
} else if (error.message.includes("network")) {
// Handle connection issues
}
}
```
2. **Feed Validation**
```typescript theme={"system"}
function isValidFeedAddress(feed: string): boolean {
try {
return feed.length === 44 || feed.length === 43;
} catch {
return false;
}
}
```
3. **Response Processing**
```typescript theme={"system"}
// Convert response to number
const value = Number.parseInt(result);
if (isNaN(value)) {
throw new Error("Invalid feed response");
}
```
## Technical Details
### Constants
```typescript theme={"system"}
const SWITCHBOARD_DEFAULT_CROSSBAR = "https://crossbar.switchboard.xyz";
```
### CrossbarClient Configuration
```typescript theme={"system"}
const crossbar = new CrossbarClient(crossbarUrl, true); // SSL enabled
```
### Common Feed Addresses
```typescript theme={"system"}
const FEEDS = {
SOL_USD: "GvDMxPzN1sCj7L26YDK2HnMRXEQmQ2aemov8YBtPS7vR",
BTC_USD: "8SXvChNYFhRq4EZuZvnhjrB3jJRQCv4k3P4W6hesH3Ee",
ETH_USD: "HNStfhaLnqwF2ZtJUizaA9uHqgE6QK6tZkoySdJ5XoZF"
};
```
### Network Configuration
```typescript theme={"system"}
const NETWORK_CONFIG = {
CHAIN: "mainnet",
MAX_RETRIES: 3,
TIMEOUT: 5000
};
```
## Error Messages
Common error messages and their meanings:
```typescript theme={"system"}
const ERROR_MESSAGES = {
INVALID_FEED: "Did you provide the right mainnet feed hash?",
EMPTY_RESULT: "No results returned from simulation",
NETWORK_ERROR: "Failed to connect to Crossbar service"
};
```
## Examples
1. **Basic Feed Simulation**
```typescript theme={"system"}
const value = await agent.methods.simulateSwitchboardFeed(
FEEDS.SOL_USD
);
console.log(`Current SOL price: $${value}`);
```
2. **Custom Crossbar Instance**
```typescript theme={"system"}
const value = await agent.methods.simulateSwitchboardFeed(
FEEDS.BTC_USD,
"https://my-crossbar.example.com"
);
```
3. **Error Handling**
```typescript theme={"system"}
try {
const value = await agent.methods.simulateSwitchboardFeed(feed);
console.log(`Feed value: ${value}`);
} catch (error) {
console.error(`Simulation failed: ${error.message}`);
}
```
# Voltr Vault Integration
Source: https://docs.sendai.fun/docs/v2/integrations/defi-integration/voltr
Learn how to interact with Voltr vaults for deposits, withdrawals, and position management
Solana Agent Kit provides comprehensive integration with Voltr vaults for managing deposits, withdrawals, and viewing position values. The integration supports both Token Program and Token-2022 assets.
## Key Features
* Strategy deposits
* Strategy withdrawals
* Position value tracking
* Token-2022 support
* Remaining accounts handling
* LangChain tool integration
## Basic Usage
### Getting Position Values
```typescript theme={"system"}
const values = await agent.methods.voltrGetPositionValues(
new PublicKey("vault_address")
);
```
### Depositing into a Strategy
```typescript theme={"system"}
const signature = await agent.methods.voltrDepositStrategy(
new BN("1000000"), // Amount in base units
new PublicKey("vault_address"),
new PublicKey("strategy_address")
);
```
### Withdrawing from a Strategy
```typescript theme={"system"}
const signature = await agent.methods.voltrWithdrawStrategy(
new BN("1000000"), // Amount in base units
new PublicKey("vault_address"),
new PublicKey("strategy_address")
);
```
## Input Parameters
### Strategy Operation Parameters
```typescript theme={"system"}
interface StrategyParams {
depositAmount?: BN; // Amount to deposit
withdrawAmount?: BN; // Amount to withdraw
vault: PublicKey; // Vault address
strategy: PublicKey; // Strategy address
}
```
### Remaining Accounts Structure
```typescript theme={"system"}
interface RemainingAccount {
pubkey: string; // Account public key
isSigner: boolean; // Is signer flag
isWritable: boolean; // Is writable flag
}
```
## LangChain Integration
Solana Agent Kit provides several LangChain tools for Voltr operations:
### Get Position Values Tool
```typescript theme={"system"}
import { SolanaVoltrGetPositionValues } from 'solana-agent-kit';
const getPositionTool = new SolanaVoltrGetPositionValues(agent);
// Tool input: vault address as string
const input = "vault_address";
// Tool returns JSON string with position values
```
### Deposit Strategy Tool
```typescript theme={"system"}
import { SolanaVoltrDepositStrategy } from 'solana-agent-kit';
const depositTool = new SolanaVoltrDepositStrategy(agent);
// Tool input format (JSON string):
const input = JSON.stringify({
depositAmount: "1000000",
vault: "vault_address",
strategy: "strategy_address"
});
// Tool returns JSON response:
{
status: "success",
message: "Deposited 1000000 into strategy successfully",
transaction: "transaction_signature"
}
```
### Withdraw Strategy Tool
```typescript theme={"system"}
import { SolanaVoltrWithdrawStrategy } from 'solana-agent-kit';
const withdrawTool = new SolanaVoltrWithdrawStrategy(agent);
// Tool input format (JSON string):
const input = JSON.stringify({
withdrawAmount: "1000000",
vault: "vault_address",
strategy: "strategy_address"
});
// Tool returns JSON response:
{
status: "success",
message: "Withdrew 1000000 from strategy successfully",
transaction: "transaction_signature"
}
```
## Example Prompts
For LangChain AI tools, here are example prompts:
### Position Management
```text theme={"system"}
"Get current position values for vault [address]"
"Deposit 1000 USDC into strategy [address]"
"Withdraw 500 SOL from vault strategy"
```
## Important Notes
1. **Token Programs**
* Supports both Token Program and Token-2022
* Automatically detects token program type
* Validates program compatibility
2. **Amount Handling**
* All amounts must be in base units (lamports)
* Use BN.js for precise number handling
* Consider token decimals when calculating amounts
3. **Remaining Accounts**
* Fetched automatically from Voltr API
* Required for strategy operations
* Includes instruction discriminators
## Best Practices
1. **Error Handling**
```typescript theme={"system"}
try {
const signature = await agent.methods.voltrDepositStrategy(
amount,
vault,
strategy
);
} catch (error) {
if (error.message.includes("Invalid asset")) {
// Handle invalid token program
} else if (error.message.includes("insufficient")) {
// Handle insufficient funds
}
}
```
2. **Amount Calculation**
```typescript theme={"system"}
// Convert from human readable to base units
function toBaseUnits(amount: number, decimals: number): BN {
return new BN(amount * Math.pow(10, decimals));
}
```
3. **Transaction Monitoring**
```typescript theme={"system"}
// Monitor transaction status
const signature = await agent.methods.voltrDepositStrategy(...);
await agent.methods.connection.confirmTransaction(signature);
```
## Technical Details
### Constants
```typescript theme={"system"}
const TOKEN_PROGRAMS = {
LEGACY: TOKEN_PROGRAM_ID,
TOKEN_2022: TOKEN_2022_PROGRAM_ID
};
```
### Voltr Client Configuration
```typescript theme={"system"}
const client = new VoltrClient(connection, wallet);
```
### API Endpoints
```typescript theme={"system"}
const VOLTR_API = {
REMAINING_ACCOUNTS: "https://voltr.xyz/api/remaining-accounts"
};
```
### Transaction Options
```typescript theme={"system"}
const TX_OPTIONS = {
skipPreflight: false,
preflightCommitment: "confirmed"
};
```
## Implementation Examples
1. **Full Deposit Flow**
```typescript theme={"system"}
// 1. Get vault account
const vaultAccount = await client.fetchVaultAccount(vault);
// 2. Verify token program
const assetTokenProgram = await getTokenProgram(vaultAccount.asset.mint);
// 3. Get remaining accounts
const { remainingAccounts } = await fetchRemainingAccounts(vault, strategy);
// 4. Create and send transaction
const ix = await client.createDepositStrategyIx({...});
const signature = await sendAndConfirmTransaction(tx, [wallet]);
```
2. **Position Value Check**
```typescript theme={"system"}
// Get position and total values
const values = await client.getPositionAndTotalValuesForVault(vault);
console.log(`Total Value: ${values.totalValue}`);
values.positions.forEach(pos => {
console.log(`Strategy ${pos.strategy}: ${pos.value}`);
});
```
3. **Withdrawal with Amount Validation**
```typescript theme={"system"}
// Check available balance before withdrawal
const position = await client.getPositionValue(vault, strategy);
if (withdrawAmount.gt(position)) {
throw new Error("Insufficient balance in strategy");
}
const signature = await agent.methods.voltrWithdrawStrategy(...);
```
# Wormhole Integration
Source: https://docs.sendai.fun/docs/v2/integrations/defi-integration/wormhole
Learn how to use Wormhole for cross-chain operations with Solana Agent Kit
# Wormhole Integration
Solana Agent Kit provides comprehensive integration with Wormhole protocol for cross-chain operations, enabling token transfers, USDC transfers via Circle's CCTP (Cross-Chain Transfer Protocol), and wrapped token creation across multiple blockchains.
## Overview
The Wormhole integration enables:
* Transfer of tokens from Solana to other supported chains
* USDC transfers via Circle's CCTP
* Creation of wrapped token versions on destination chains
* Querying supported chains and networks
## Supported Chains
Wormhole supports multiple blockchains across different networks:
**Mainnet:**
* Solana
* Ethereum
* Avalanche
* Optimism
* Arbitrum
* Base
* Polygon
* Sui
* Aptos
**Testnet:**
* Solana
* Sepolia (Ethereum testnet)
* Avalanche testnet
* OptimismSepolia
* ArbitrumSepolia
* BaseSepolia
* Polygon testnet
## Prerequisites
To use the Wormhole integration, you need to set up environment variables for the chains you plan to interact with:
```env theme={"system"}
# Solana configuration
SOLANA_PRIVATE_KEY=your_solana_private_key
# EVM configuration (Ethereum, Arbitrum, Optimism, etc.)
ETH_PRIVATE_KEY=your_ethereum_private_key
# Optional configurations for other chains
SUI_MNEMONIC=your_sui_mnemonic
APTOS_PRIVATE_KEY=your_aptos_private_key
```
## Core Functions
### Token Transfer
Transfer tokens from Solana to other supported chains:
```typescript theme={"system"}
import { SolanaAgentKit } from "solana-agent-kit";
const agent = new SolanaAgentKit(/* config */);
const result = await agent.methods.tokenTransfer({
destinationChain: "Ethereum",
network: "Mainnet",
transferAmount: "0.1",
tokenAddress: "EPjFWdd5AufqSSqeM2qN1xzybapC8G4wEGGkZwyTDt1v" // USDC on Solana
});
```
#### Token Transfer Parameters
| Parameter | Type | Description |
| ------------------ | ------ | ------------------------------------------------- |
| `destinationChain` | string | Target blockchain (e.g., "Ethereum", "Avalanche") |
| `network` | string | "Mainnet", "Testnet", or "Devnet" |
| `transferAmount` | string | Amount to transfer (in human-readable format) |
| `tokenAddress` | string | Address of the token on Solana to transfer |
### CCTP Transfer
Transfer USDC via Circle's Cross-Chain Transfer Protocol:
```typescript theme={"system"}
const result = await agent.methods.cctpTransfer({
destinationChain: "Ethereum",
transferAmount: "10",
network: "Mainnet"
});
```
#### CCTP Transfer Parameters
| Parameter | Type | Description |
| ------------------ | ------ | -------------------------------------------- |
| `destinationChain` | string | Target blockchain (e.g., "Ethereum", "Base") |
| `transferAmount` | string | Amount of USDC to transfer |
| `network` | string | "Mainnet" or "Testnet" (default: "Mainnet") |
### Create Wrapped Token
Create a wrapped version of a Solana token on another chain:
```typescript theme={"system"}
const result = await agent.methods.createWrappedToken({
destinationChain: "Ethereum",
tokenAddress: "EPjFWdd5AufqSSqeM2qN1xzybapC8G4wEGGkZwyTDt1v", // USDC on Solana
network: "Mainnet"
});
```
#### Wrapped Token Parameters
| Parameter | Type | Description |
| ------------------ | ------ | ---------------------------------------- |
| `destinationChain` | string | Target blockchain for the wrapped token |
| `tokenAddress` | string | Address of token on Solana to be wrapped |
| `network` | string | "Mainnet", "Testnet", or "Devnet" |
### Get Supported Chains
Retrieve a list of chains supported by Wormhole:
```typescript theme={"system"}
const supportedChains = await agent.methods.getWormholeSupportedChains();
```
## LangChain Tools
The integration provides LangChain tools for AI agent integration:
### Token Transfer Tool
```typescript theme={"system"}
import { TokenTransferTool } from "solana-agent-kit";
const tokenTransferTool = new TokenTransferTool(agent);
// Tool input (JSON string):
const input = JSON.stringify({
destinationChain: "Ethereum",
network: "Mainnet",
transferAmount: "0.1",
tokenAddress: "EPjFWdd5AufqSSqeM2qN1xzybapC8G4wEGGkZwyTDt1v"
});
```
### CCTP Transfer Tool
```typescript theme={"system"}
import { CctpTransferTool } from "solana-agent-kit";
const cctpTransferTool = new CctpTransferTool(agent);
// Tool input (JSON string):
const input = JSON.stringify({
destinationChain: "Ethereum",
transferAmount: "10",
network: "Mainnet"
});
```
### Create Wrapped Token Tool
```typescript theme={"system"}
import { CreateWrappedTokenTool } from "solana-agent-kit";
const createWrappedTokenTool = new CreateWrappedTokenTool(agent);
// Tool input (JSON string):
const input = JSON.stringify({
destinationChain: "Ethereum",
tokenAddress: "EPjFWdd5AufqSSqeM2qN1xzybapC8G4wEGGkZwyTDt1v",
network: "Mainnet"
});
```
### Get Supported Chains Tool
```typescript theme={"system"}
import { GetWormholeSupportedChainsTool } from "solana-agent-kit";
const supportedChainsTool = new GetWormholeSupportedChainsTool(agent);
// No input required
```
## Response Types
### Token Transfer Response
```typescript theme={"system"}
interface TokenTransferResponse {
success: boolean;
status?: string;
sourceChain?: string;
destinationChain?: string;
amount?: string;
token?: string;
sourceTransaction?: string;
destinationTransaction?: string;
error?: string;
}
```
### CCTP Transfer Response
```typescript theme={"system"}
interface CctpTransferResponse {
success: boolean;
status?: string;
sourceChain?: string;
destinationChain?: string;
amount?: string;
sourceTransaction?: string[];
attestation?: string[];
destinationTransaction?: string[];
automatic?: boolean;
error?: string;
}
```
### Create Wrapped Token Response
```typescript theme={"system"}
interface CreateWrappedTokenResponse {
success: boolean;
wrappedToken?: {
chain: string;
address: string;
};
attestationTxid?: string;
error?: string;
}
```
## Implementation Details
### Token Transfer Process
1. Initialize the Wormhole SDK with supported blockchain adapters
2. Get chain contexts for source (Solana) and destination chains
3. Create signers for both chains
4. Determine token decimals and convert amount to base units
5. Create and send token bridge transfer transaction
6. Wait for attestation from Wormhole guardians
7. Complete the transfer on the destination chain
### CCTP Transfer Process
1. Initialize the Wormhole SDK with supported blockchain adapters
2. Get chain contexts for source (Solana) and destination chains
3. Create signers for both chains
4. Parse the transfer amount to correct decimal precision
5. Create a USDC transfer object with specified parameters
6. Initiate the transfer on the source chain
7. Wait for the Circle attestation
8. Complete the transfer on the destination chain
### Wrapped Token Creation Process
1. Check if the token is already wrapped on the destination chain
2. If not wrapped, create an attestation on the source chain
3. Wait for the attestation to be processed by Wormhole guardians
4. Submit the attestation to the destination chain
5. Poll for the wrapped token to be available
## Error Handling
All functions include comprehensive error handling:
```typescript theme={"system"}
try {
const result = await agent.methods.tokenTransfer({
destinationChain: "Ethereum",
network: "Mainnet",
transferAmount: "0.1",
tokenAddress: "EPjFWdd5AufqSSqeM2qN1xzybapC8G4wEGGkZwyTDt1v"
});
if (!result.success) {
console.error("Transfer failed:", result.error);
// Handle error
}
} catch (error) {
console.error("Unexpected error:", error);
// Handle unexpected errors
}
```
## Common Tokens
Common token addresses on Solana:
```typescript theme={"system"}
const TOKENS = {
USDC: "EPjFWdd5AufqSSqeM2qN1xzybapC8G4wEGGkZwyTDt1v",
USDT: "Es9vMFrzaCERmJfrF4H2FYD4KCoNkY11McCe8BenwNYB",
SOL: "So11111111111111111111111111111111111111112" // Wrapped SOL
};
```
## Advanced Features
### Manual vs Automatic Mode
For CCTP transfers, you can choose between manual and automatic mode:
```typescript theme={"system"}
// Manual mode (default)
const result = await agent.methods.cctpTransfer({
destinationChain: "Ethereum",
transferAmount: "10",
network: "Mainnet",
automatic: false // Manual mode
});
// Automatic mode with relayers
const resultAuto = await agent.methods.cctpTransfer({
destinationChain: "Ethereum",
transferAmount: "10",
network: "Mainnet",
automatic: true, // Automatic mode
nativeGasAmount: "0.01" // Gas for relayers
});
```
### Checking If Token Is Already Wrapped
Before creating a wrapped token, you can check if it already exists:
```typescript theme={"system"}
import { isTokenWrapped } from "solana-agent-kit";
const wrapped = await isTokenWrapped(
wormholeInstance,
"Solana",
"Ethereum",
"EPjFWdd5AufqSSqeM2qN1xzybapC8G4wEGGkZwyTDt1v"
);
if (wrapped) {
console.log("Token is already wrapped:", wrapped);
} else {
// Create wrapped token
}
```
## Utility Functions
### Getting Token Decimals
```typescript theme={"system"}
import { getTokenDecimals } from "solana-agent-kit";
const decimals = await getTokenDecimals(
wormholeInstance,
tokenId,
sourceChain
);
```
### Getting Signers
```typescript theme={"system"}
import { getSigner } from "solana-agent-kit";
const { chain, signer, address } = await getSigner(
chainContext,
gasLimit // Optional for EVM chains
);
```
## Troubleshooting
### Common Issues
1. **Missing Environment Variables**: Ensure all required private keys are set
2. **Insufficient Funds**: Make sure your wallet has enough tokens for the transfer
3. **VAA Not Found**: Increase timeout for waiting for VAAs
4. **Transaction Failures**: Check chain congestion and try again later
### Debugging Tips
1. Enable verbose logging for more detailed information
2. Check transaction status on blockchain explorers
3. Verify token addresses and chain identifiers
4. Test on testnets before using mainnet
## Resources
* [Wormhole Documentation](https://docs.wormhole.com/)
* [Circle CCTP Documentation](https://developers.circle.com/stablecoins/docs/cctp-getting-started)
* [Solana Agent Kit Documentation](https://github.com/sendaifun/solana-agent-kit)
# Crossmint
Source: https://docs.sendai.fun/docs/v2/integrations/misc/crossmint
Purchase physical products from Amazon and Shopify using Solana USDC
Solana Agent Kit provides integration with Crossmint for purchasing physical products from Amazon and Shopify using Solana USDC. The integration supports creating orders, managing shipping addresses, and confirming order status.
## Key Features
* **Physical Product Purchases**: Buy products from Amazon and Shopify
* **Solana USDC Payments**: Pay with USDC on Solana blockchain
* **Order Management**: Create, track, and confirm orders
* **Shipping Integration**: Handle physical addresses and delivery
* **Real-time Status**: Monitor order progress and payment status
## Basic Usage
### Create an Amazon Order
```typescript theme={"system"}
const result = await agent.methods.executeAction("CROSSMINT_CHECKOUT", {
productLocator: "B08N5WRWNW",
shippingAddress: {
name: "John Doe",
line1: "123 Main St",
city: "New York",
state: "NY",
postalCode: "10001",
country: "US"
},
userEmail: "john@example.com"
});
```
### Confirm Order Status
```typescript theme={"system"}
const confirmation = await agent.methods.executeAction("CROSSMINT_CONFIRM_ORDER", {
orderId: "order_123",
retryUptoConfirmation: true
});
```
## Parameters
### Checkout Parameters
```typescript theme={"system"}
interface CheckoutParams {
productLocator: string; // Amazon ASIN or product URL
shippingAddress: {
name: string; // Recipient name
line1: string; // Address line 1
line2?: string; // Address line 2 (optional)
city: string; // City
state: string; // State (required for US)
postalCode: string; // Postal/ZIP code
country: string; // Country code (default: "US")
};
userEmail: string; // User's email address
}
```
### Confirm Order Parameters
```typescript theme={"system"}
interface ConfirmOrderParams {
orderId: string; // Order ID to confirm
retryUptoConfirmation?: boolean; // Retry until confirmation (default: false)
}
```
## Example Prompts
### Natural Language Prompts
```text theme={"system"}
"Buy this Amazon product B08N5WRWNW and ship it to John Doe in New York"
"Order an Amazon item using USDC and confirm the purchase"
"Create a Crossmint order for Amazon product with shipping address"
"Check the status of my Crossmint order order_123"
"Confirm my Amazon order and retry until completion"
```
### LangChain Tool Prompts
#### Create Order
```text theme={"system"}
{
"productLocator": "B08N5WRWNW",
"shippingAddress": {
"name": "John Doe",
"line1": "123 Main St",
"city": "New York",
"state": "NY",
"postalCode": "10001",
"country": "US"
},
"userEmail": "john@example.com"
}
```
#### Confirm Order
```text theme={"system"}
{
"orderId": "order_abc123",
"retryUptoConfirmation": true
}
```
## Implementation Details
### Order Creation Flow
```typescript theme={"system"}
// 1. Create order request
const orderData = {
recipient: {
email: userEmail,
physicalAddress: shippingAddress
},
payment: {
method: "solana",
currency: "usdc",
payerAddress: agent.wallet.publicKey.toBase58()
},
lineItems: [
{
productLocator: `amazon:${productLocator}`
}
]
};
// 2. Submit to Crossmint API
const response = await fetch(`${CROSSMINT_PRODUCTION_API_URL}/orders`, {
method: "POST",
headers: {
"Content-Type": "application/json",
"X-API-KEY": apiKey
},
body: JSON.stringify(orderData)
});
// 3. Sign and send transaction
const tx = VersionedTransaction.deserialize(bs58.decode(serializedTransaction));
const signedTx = await agent.wallet.signTransaction(tx);
const signature = await agent.connection.sendTransaction(signedTx);
```
### Order Status Polling
```typescript theme={"system"}
// Poll for order completion
const pollInterval = setInterval(async () => {
const order = await checkOrderStatus();
if (order.payment.status === "completed") {
clearInterval(pollInterval);
return { success: true, status: "completed", order };
}
}, 3000); // Poll every 3 seconds
// Timeout after 2 minutes
setTimeout(() => {
clearInterval(pollInterval);
return { success: false, error: "Payment confirmation timeout" };
}, 120000);
```
## Payment Methods
### Supported Currencies
* **USDC**: Primary payment method on Solana
* **SOL**: Alternative payment option
### Payment Flow
1. **Quote Generation**: Get pricing in USDC
2. **Transaction Creation**: Generate Solana transaction
3. **Transaction Signing**: Sign with user wallet
4. **Payment Execution**: Submit to Solana network
5. **Order Confirmation**: Verify payment completion
## Shipping Configuration
### Supported Regions
* **United States**: Full support with state validation
* **International**: Limited support (check with Crossmint)
### Address Validation
```typescript theme={"system"}
const shippingAddress = {
name: "John Doe", // Required
line1: "123 Main St", // Required
line2: "Apt 4B", // Optional
city: "New York", // Required
state: "NY", // Required for US
postalCode: "10001", // Required
country: "US" // Required
};
```
## Error Handling
```typescript theme={"system"}
try {
const result = await agent.methods.executeAction("CROSSMINT_CHECKOUT", {
productLocator,
shippingAddress,
userEmail
});
} catch (error) {
if (error.message.includes("CROSSMINT_API_KEY")) {
// Handle missing API key
} else if (error.message.includes("insufficient funds")) {
// Handle insufficient USDC balance
} else if (error.message.includes("invalid address")) {
// Handle shipping address validation errors
}
}
```
## Best Practices
1. **API Key Management**
* Store API key securely in agent config
* Use environment variables for production
* Never expose API keys in client-side code
2. **Address Validation**
* Validate shipping addresses before submission
* Include all required fields
* Use standardized country codes
3. **Order Tracking**
* Store order IDs for future reference
* Implement polling for order confirmation
* Handle timeout scenarios gracefully
4. **Payment Management**
* Verify USDC balance before ordering
* Handle transaction failures appropriately
* Monitor payment status regularly
## Common Issues
1. **API Configuration**
* Missing or invalid API key
* Incorrect API endpoint
* Authentication failures
2. **Payment Issues**
* Insufficient USDC balance
* Transaction signing failures
* Network connectivity problems
3. **Shipping Problems**
* Invalid shipping addresses
* Unsupported shipping regions
* Missing required address fields
4. **Order Status**
* Payment confirmation delays
* Order processing timeouts
* Status polling failures
## Response Formats
### Successful Order Creation
```typescript theme={"system"}
{
status: "success",
order: {
orderId: "order_abc123",
phase: "payment",
quote: {
totalPrice: {
amount: "29.99",
currency: "usdc"
}
},
payment: {
status: "completed",
method: "solana",
currency: "usdc"
}
},
message: "Order created successfully",
signature: "5UfgJ5vVZxUxefDGqzqkVLHzHxVTyYH9StYyHKgvHYmXJgqJKxEqy9k4Rz9LpXrHF9kUZB7"
}
```
### Order Confirmation
```typescript theme={"system"}
{
status: "success",
order: {
orderId: "order_abc123",
payment: {
status: "completed"
},
delivery: {
status: "in-progress"
}
},
message: "Order confirmed successfully"
}
```
### Error Response
```typescript theme={"system"}
{
status: "error",
message: "CROSSMINT_API_KEY is not set in agent config"
}
```
## Order Lifecycle
1. **Quote**: Initial price calculation
2. **Payment**: USDC payment processing
3. **Delivery**: Physical product fulfillment
4. **Completed**: Order fulfilled and delivered
## Configuration
### Environment Setup
```typescript theme={"system"}
const agent = new SolanaAgentKit(
wallet,
"YOUR_RPC_URL",
{
OTHER_API_KEYS: {
CROSSMINT_API_KEY: "your-crossmint-api-key"
}
}
);
```
### API Endpoints
```typescript theme={"system"}
// Production
const CROSSMINT_PRODUCTION_API_URL = "https://www.crossmint.com/api/2022-06-09";
// Staging
const CROSSMINT_STAGING_API_URL = "https://staging.crossmint.com/api/2022-06-09";
```
## Product Locators
### Amazon Products
```typescript theme={"system"}
// Use ASIN (Amazon Standard Identification Number)
productLocator: "B08N5WRWNW"
// Or full Amazon URL
productLocator: "https://www.amazon.com/dp/B08N5WRWNW"
```
### Shopify Products
```typescript theme={"system"}
// Use URL with variant ID
productLocator: "shopify:https://store.com/product:variant-id"
```
## Related Functions
* `getBalance`: Check USDC balance
* `transfer`: Transfer tokens
* `trade`: Swap tokens for USDC
* `fetchPrice`: Get current token prices
## Resources
* [Crossmint Documentation](https://docs.crossmint.com)
* [Crossmint API Reference](https://docs.crossmint.com/api-reference)
* [Solana Agent Kit Documentation](https://docs.sendai.fun)
* [USDC on Solana](https://solana.com/usdc)
# 3Land NFT Integration
Source: https://docs.sendai.fun/docs/v2/integrations/nft-management/3land_create_manage
Create and manage NFT collections on 3.land
Create and manage NFT collections on 3.land platform using Solana Agent Kit. This integration enables collection creation, NFT minting, and listing management.
## Core Features
1. **Collection Management**
* Create collections
* Set collection metadata
* Configure royalties
* Manage listings
2. **NFT Creation**
* Single edition minting
* Trait management
* Price configuration
* Multiple payment options
## Collection Creation
```typescript theme={"system"}
const collectionOpts: CreateCollectionOptions = {
collectionName: "My Collection",
collectionSymbol: "MYCOL",
collectionDescription: "A unique collection",
mainImageUrl: "https://example.com/image.png",
coverImageUrl: "https://example.com/cover.png" // Optional
};
const tx = await agent.methods.create3LandCollection(
optionsWithBase58,
collectionOpts
);
```
### Collection Parameters
| Parameter | Type | Required | Description |
| --------------------- | ------ | -------- | -------------------------- |
| collectionName | string | Yes | Collection name |
| collectionSymbol | string | Yes | Collection symbol |
| collectionDescription | string | Yes | Collection description |
| mainImageUrl | string | Yes | Main collection image |
| coverImageUrl | string | No | Cover image for collection |
## NFT Creation
```typescript theme={"system"}
const createItemOptions: CreateSingleOptions = {
itemName: "My NFT",
sellerFee: 500, // 5%
itemAmount: 100,
itemDescription: "Unique NFT",
traits: [
{ trait_type: "Background", value: "Blue" }
],
price: 100000000, // 0.1 SOL
mainImageUrl: "https://example.com/nft.png"
};
const tx = await agent.methods.create3LandNft(
optionsWithBase58,
collectionAccount,
createItemOptions,
isMainnet
);
```
### NFT Parameters
| Parameter | Type | Required | Description |
| ------------ | -------- | -------- | --------------------------------- |
| itemName | string | Yes | NFT name |
| sellerFee | number | Yes | Royalty percentage (basis points) |
| itemAmount | number | Yes | Edition size |
| traits | Trait\[] | Yes | NFT attributes |
| price | number | Yes | Listing price |
| mainImageUrl | string | Yes | NFT image URL |
| splHash | string | No | SPL token for payment |
## Example Prompts
### Natural Language Prompts
```text theme={"system"}
"Create a new NFT collection called 'Awesome Art'"
"Mint an NFT in my collection with 5% royalties"
"List NFT for 0.1 SOL with traits"
"Create collection with cover image"
```
### LangChain Tool Prompts
#### Create Collection
```text theme={"system"}
{
"privateKey": "your-private-key",
"isMainnet": false,
"collectionSymbol": "AWESOME",
"collectionName": "Awesome Art",
"collectionDescription": "A unique collection",
"mainImageUrl": "https://example.com/image.png"
}
```
#### Create NFT
```text theme={"system"}
{
"privateKey": "your-private-key",
"collectionAccount": "collection-address",
"itemName": "Awesome NFT #1",
"sellerFee": 500,
"itemAmount": 1,
"itemDescription": "Unique piece",
"traits": [
{"trait_type": "Background", "value": "Blue"}
],
"price": 100000000,
"mainImageUrl": "https://example.com/nft.png",
"isMainnet": false
}
```
## Implementation Details
### Store Initialization
```typescript theme={"system"}
interface StoreInitOptions {
privateKey: string;
isMainnet: boolean;
}
const store = {
mainnet: "AmQNs2kgw4LvS9sm6yE9JJ4Hs3JpVu65eyx9pxMG2xA",
devnet: "GyPCu89S63P9NcCQAtuSJesiefhhgpGWrNVJs4bF2cSK"
};
```
### Trait Structure
```typescript theme={"system"}
interface Trait {
trait_type: string;
value: string;
}
```
## Error Handling
```typescript theme={"system"}
try {
const tx = await agent.methods.create3LandNft(...);
} catch (error) {
if (error.message.includes("Collection account")) {
// Handle missing collection
} else if (error.message.includes("Invalid price")) {
// Handle price issues
}
}
```
## Best Practices
1. **Collection Setup**
* Plan collection structure
* Prepare metadata
* Configure royalties
* Test on devnet
2. **NFT Creation**
* Use high-quality images
* Set appropriate prices
* Define clear traits
* Monitor transactions
3. **Asset Management**
* Store images permanently
* Back up metadata
* Track transactions
* Monitor listings
4. **Security**
* Secure private keys
* Validate inputs
* Check transactions
* Monitor permissions
## Common Issues
1. **Creation Failures**
* Invalid metadata
* Image issues
* Network errors
* Price formatting
2. **Collection Management**
* Missing accounts
* Invalid permissions
* Configuration errors
* Metadata issues
3. **Transaction Issues**
* Network congestion
* Invalid signatures
* Fee calculation
* Timeout errors
## Response Format
### Success Response
```typescript theme={"system"}
{
status: "success",
message: "Created Collection successfully",
transaction: "transaction-signature"
}
```
### Error Response
```typescript theme={"system"}
{
status: "error",
message: "Error message",
code: "ERROR_CODE"
}
```
## Development Tips
1. **Local Testing**
* Use devnet first
* Test all parameters
* Verify metadata
* Check transactions
2. **Asset Preparation**
* Optimize images
* Format metadata
* Validate URLs
* Check sizes
3. **Deployment**
* Verify network
* Check balances
* Monitor status
* Track listings
## Related Functions
* `getCollectionDetails`: Get collection info
* `updateCollection`: Update collection
* `getNftDetails`: Get NFT info
* `updateNft`: Update NFT metadata
## Resources
* [3Land Documentation](https://docs.3.land)
* [Solana NFT Standards](https://docs.metaplex.com)
* [Asset Requirements](https://docs.3.land/assets)
* [API Reference](https://docs.3.land/api)
# Deploy NFT Collection
Source: https://docs.sendai.fun/docs/v2/integrations/nft-management/deploy_collection
Learn how to deploy NFT collections on Solana
Deploy a new NFT collection on Solana with customizable parameters including name, metadata URI, and royalties.
## Usage
```typescript theme={"system"}
const collection = await agent.methods.deployCollection({
name: "My Collection",
uri: "https://arweave.net/collection.json",
royaltyBasisPoints: 500 // 5% royalty
});
console.log("Collection Address:", collection.collectionAddress.toString());
```
## Parameters
| Parameter | Type | Required | Description |
| ------------------ | ------ | -------- | --------------------------------------------- |
| name | string | Yes | Name of the collection |
| uri | string | Yes | Metadata URI for the collection |
| royaltyBasisPoints | number | No | Royalty percentage in basis points (100 = 1%) |
## Example Prompts
### Natural Language Prompts
```text theme={"system"}
"Create a new NFT collection called 'Awesome Art' with 5% royalties"
"Deploy an NFT collection with metadata from my Arweave URI"
"Launch a collection named 'Pixel Warriors' with 7.5% creator royalties"
"Create a free collection with no royalties for my community"
```
### LangChain Tool Prompts
```text theme={"system"}
// Basic collection deployment
{
"name": "Awesome Art",
"uri": "https://arweave.net/collection.json"
}
// Collection with royalties
{
"name": "Pixel Warriors",
"uri": "https://arweave.net/metadata.json",
"royaltyBasisPoints": 750
}
// Community collection without royalties
{
"name": "Community Collection",
"uri": "https://arweave.net/community.json",
"royaltyBasisPoints": 0
}
```
## Example Implementation
```typescript theme={"system"}
import { SolanaAgentKit } from "solana-agent-kit";
async function deployArtCollection(agent: SolanaAgentKit) {
try {
const collection = await agent.methods.deployCollection({
name: "Digital Art Collection",
uri: "https://arweave.net/art-collection.json",
royaltyBasisPoints: 500 // 5% royalty
});
console.log("Collection deployed:", {
address: collection.collectionAddress.toString(),
name: "Digital Art Collection"
});
return collection;
} catch (error) {
console.error("Collection deployment failed:", error);
throw error;
}
}
```
## Metadata Format
Your collection URI should point to a JSON file with this structure:
```json theme={"system"}
{
"name": "My Collection",
"symbol": "MYCOL",
"description": "A unique collection of digital art",
"image": "https://arweave.net/collection-image.png",
"external_url": "https://example.com",
"properties": {
"files": [
{
"uri": "https://arweave.net/collection-image.png",
"type": "image/png"
}
]
}
}
```
## Implementation Details
* Creates verified collection with Metaplex standards
* Supports custom royalty configurations
* Automatically handles token program initialization
* Supports collection-wide metadata
* Uses Metaplex's certified collection standard
## Error Handling
```typescript theme={"system"}
try {
const collection = await agent.methods.deployCollection(options);
} catch (error) {
if (error.message.includes("invalid uri")) {
// Handle metadata issues
} else if (error.message.includes("insufficient funds")) {
// Handle balance issues
}
}
```
## Best Practices
1. **Metadata Preparation**
* Host metadata on permanent storage (e.g., Arweave)
* Include high-quality collection image
* Provide comprehensive description
* Include all required properties
2. **Royalty Configuration**
* Consider market standards
* Plan distribution model
* Document royalty splits
* Verify basis points calculation
3. **Collection Management**
* Save collection address securely
* Document deployment details
* Plan update strategy
* Consider governance
4. **Technical Considerations**
* Verify metadata before deployment
* Test with small transactions
* Monitor network conditions
* Use reliable RPC endpoints
## Response Format
```typescript theme={"system"}
// Successful response
{
status: "success",
message: "Collection deployed successfully",
collectionAddress: "7nE9GvcwsqzYxmJLSrYmSB1V1YoJWVK1KWzAcWAzjXkN",
name: "My Collection"
}
// Error response
{
status: "error",
message: "Error message here",
code: "ERROR_CODE"
}
```
## Related Functions
* `mintNFT`: Mint NFTs to the collection
* `getBalance`: Check wallet balance
* `transfer`: Transfer NFTs
* `fetchMetadata`: Get collection metadata
## Common Issues
1. **Metadata Issues**
* Invalid URI format
* Missing required fields
* Temporary storage links
* Incorrect file types
2. **Transaction Failures**
* Insufficient funds
* Network congestion
* RPC node issues
* Invalid parameters
3. **Royalty Configuration**
* Invalid basis points
* Missing creator addresses
* Incorrect percentages
* Verification failures
# Magic Eden NFT Marketplace
Source: https://docs.sendai.fun/docs/v2/integrations/nft-management/magiceden
Complete guide for interacting with Magic Eden marketplace - listing, bidding, and discovering NFTs
Comprehensive guide for interacting with Magic Eden, the leading Solana NFT marketplace. This covers listing NFTs, placing bids, fetching collection data, and discovering popular collections.
## Features Overview
### 1. NFT Trading
* **List NFTs**: Put your NFTs up for sale
* **Bid on NFTs**: Place bids on listed NFTs
* **Auction House Integration**: Support for custom auction houses
### 2. Collection Analytics
* **Collection Stats**: Floor price, volume, listings count
* **Collection Listings**: Browse available NFTs in collections
* **Popular Collections**: Discover trending collections
### 3. Market Intelligence
* **Real-time Data**: Live pricing and availability
* **Historical Analytics**: Volume and price trends
* **Rarity Information**: NFT attributes and rarity scores
## Setup Requirements
### API Key Configuration
```typescript theme={"system"}
// Required for trading operations (listing, bidding)
agent.config.MAGIC_EDEN_API_KEY = "your-api-key-here";
// Optional for read-only operations (stats, listings)
// Read operations work without API key but may have rate limits
```
## Core Functionality
### 1. List NFT for Sale
```typescript theme={"system"}
const result = await agent.methods.listMagicEdenNFT({
tokenMint: "NFT_MINT_ADDRESS",
tokenAccount: "TOKEN_ACCOUNT_ADDRESS",
price: 1.5, // Price in SOL
auctionHouseAddress: "OPTIONAL_AUCTION_HOUSE", // Optional
sellerReferral: "OPTIONAL_REFERRAL_ADDRESS" // Optional
});
```
### 2. Bid on NFT
```typescript theme={"system"}
const result = await agent.methods.bidOnMagicEdenNFT({
tokenMint: "NFT_MINT_ADDRESS",
price: 0.8, // Bid price in SOL
auctionHouseAddress: "OPTIONAL_AUCTION_HOUSE" // Optional
});
```
### 3. Get Collection Listings
```typescript theme={"system"}
const listings = await agent.methods.getMagicEdenCollectionListings({
collectionSymbol: "degenape", // Collection symbol
limit: 20, // Number of listings to fetch (1-100)
min_price: 0.1, // Minimum price filter
max_price: 10.0, // Maximum price filter
sort: "listPrice", // Sort by: "listPrice" or "updatedAt"
sort_direction: "asc" // "asc" or "desc"
});
```
### 4. Get Collection Statistics
```typescript theme={"system"}
const stats = await agent.methods.getMagicEdenCollectionStats({
collectionSymbol: "degenape",
timeWindow: "24h" // Options: "24h", "7d", "30d", "all"
});
```
### 5. Get Popular Collections
```typescript theme={"system"}
const popular = await agent.methods.getPopularMagicEdenCollections({
timeRange: "1d" // Options: "1h", "1d", "7d", "30d"
});
```
## Example Prompts
### Natural Language Prompts
```text theme={"system"}
"List my NFT for 2.5 SOL on Magic Eden"
"Bid 1.2 SOL on this DeGods NFT: [mint-address]"
"Show me the cheapest Okay Bears listings"
"Get stats for the SMB collection"
"What are the most popular NFT collections today?"
"Find NFTs under 1 SOL in the Solana Monkey Business collection"
```
### LangChain Tool Prompts
#### List NFT
```json theme={"system"}
{
"tokenMint": "7BgBvyjrZX1YKz4oh9mjb8ZScatkkwb8DzFx7LoiVkM3",
"tokenAccount": "ATokenAccount1234567890123456789012345678901234",
"price": 2.5,
"auctionHouseAddress": "E8cU1WiRWjanGxmn96ewBgk9vPTcL6AEZ1t6F6fkgUWe",
"sellerReferral": "RefAccount1234567890123456789012345678901234"
}
```
#### Bid on NFT
```json theme={"system"}
{
"tokenMint": "7BgBvyjrZX1YKz4oh9mjb8ZScatkkwb8DzFx7LoiVkM3",
"price": 1.8,
"auctionHouseAddress": "E8cU1WiRWjanGxmn96ewBgk9vPTcL6AEZ1t6F6fkgUWe"
}
```
#### Get Collection Listings
```json theme={"system"}
{
"collectionSymbol": "degenape",
"limit": 50,
"min_price": 0.5,
"max_price": 5.0,
"sort": "listPrice",
"sort_direction": "asc"
}
```
#### Get Collection Stats
```json theme={"system"}
{
"collectionSymbol": "okay_bears",
"timeWindow": "7d"
}
```
#### Get Popular Collections
```json theme={"system"}
{
"timeRange": "24h"
}
```
## Response Formats
### List NFT Response
```typescript theme={"system"}
{
status: "success",
message: "NFT listed successfully",
signature: "transaction_signature_hash"
}
```
### Bid Response
```typescript theme={"system"}
{
status: "success",
message: "Bid placed successfully",
signature: "transaction_signature_hash"
}
```
### Collection Listings Response
```typescript theme={"system"}
{
status: "success",
message: "Collection listings fetched successfully",
listings: [
{
pdaAddress: "PDA_ADDRESS",
auctionHouse: "AUCTION_HOUSE_ADDRESS",
tokenAddress: "TOKEN_ADDRESS",
tokenMint: "TOKEN_MINT",
seller: "SELLER_ADDRESS",
sellerReferral: "REFERRAL_ADDRESS",
tokenSize: 1,
price: 1.5, // SOL
rarity: {},
extra: {
img: "https://image-url.com/nft.png"
},
expiry: 1640995200,
token: {
mintAddress: "MINT_ADDRESS",
owner: "OWNER_ADDRESS",
supply: 1,
collection: "COLLECTION_ADDRESS",
name: "NFT Name",
updateAuthority: "UPDATE_AUTHORITY",
primarySaleHappened: true,
sellerFeeBasisPoints: 500,
image: "https://image-url.com/nft.png",
animationUrl: "https://animation-url.com/nft.mp4",
externalUrl: "https://external-url.com",
attributes: [
{
trait_type: "Background",
value: "Blue"
}
],
properties: {
category: "image",
files: [
{
uri: "https://image-url.com/nft.png",
type: "image/png"
}
],
creators: [
{
address: "CREATOR_ADDRESS",
share: 100
}
]
}
},
listingSource: "magiceden_v2"
}
]
}
```
### Collection Stats Response
```typescript theme={"system"}
{
status: "success",
message: "Collection stats fetched successfully",
stats: {
symbol: "degenape",
floorPrice: 2.5, // SOL
listedCount: 157,
avgPrice24hr: 3.2, // SOL
volumeAll: 45678.9 // SOL
}
}
```
### Popular Collections Response
```typescript theme={"system"}
{
status: "success",
message: "Popular collections fetched successfully",
collections: [
{
symbol: "degenape",
name: "Degenerate Ape Academy",
description: "A collection of 10,000 unique apes",
image: "https://collection-image.com/ape.png",
floorPrice: 2.5, // SOL
volumeAll: 123456.78, // SOL
hasCNFTs: false
}
]
}
```
## Advanced Features
### Auction House Integration
```typescript theme={"system"}
// Custom auction house for specific collections or marketplaces
const customAuctionHouse = "E8cU1WiRWjanGxmn96ewBgk9vPTcL6AEZ1t6F6fkgUWe";
// List with custom auction house
await agent.methods.listMagicEdenNFT({
tokenMint: "NFT_MINT",
tokenAccount: "TOKEN_ACCOUNT",
price: 1.5,
auctionHouseAddress: customAuctionHouse
});
```
### Referral System
```typescript theme={"system"}
// Earn referral fees on sales
const referralAddress = "YOUR_REFERRAL_ADDRESS";
await agent.methods.listMagicEdenNFT({
tokenMint: "NFT_MINT",
tokenAccount: "TOKEN_ACCOUNT",
price: 1.5,
sellerReferral: referralAddress // Seller referral
});
await agent.methods.bidOnMagicEdenNFT({
tokenMint: "NFT_MINT",
price: 1.2,
buyerReferral: referralAddress // Buyer referral
});
```
### Advanced Filtering
```typescript theme={"system"}
// Filter listings by price range and sort options
const expensiveListings = await agent.methods.getMagicEdenCollectionListings({
collectionSymbol: "degods",
min_price: 50.0, // Only NFTs above 50 SOL
max_price: 1000.0,
sort: "listPrice",
sort_direction: "desc", // Most expensive first
limit: 10
});
// Recently listed items
const recentListings = await agent.methods.getMagicEdenCollectionListings({
collectionSymbol: "solana_monkey_business",
sort: "updatedAt",
sort_direction: "desc", // Most recent first
limit: 20
});
```
## Error Handling
### Common Error Scenarios
```typescript theme={"system"}
try {
const result = await agent.methods.listMagicEdenNFT({...});
} catch (error) {
if (error.message.includes("Magic Eden API key is required")) {
// Handle missing API key
} else if (error.message.includes("Invalid response")) {
// Handle API response errors
} else if (error.message.includes("insufficient funds")) {
// Handle insufficient balance
}
}
```
### Error Types
1. **Authentication Errors**
* Missing or invalid API key
* Expired authentication
2. **Validation Errors**
* Invalid token mint address
* Invalid price (negative or zero)
* Missing required parameters
3. **Transaction Errors**
* Insufficient SOL balance
* NFT not owned by wallet
* Network congestion
4. **API Errors**
* Rate limiting
* Service unavailable
* Invalid collection symbol
## Best Practices
### 1. Listing Strategy
```typescript theme={"system"}
// Check collection floor price before listing
const stats = await agent.methods.getMagicEdenCollectionStats({
collectionSymbol: "collection_name"
});
const floorPrice = stats.stats.floorPrice;
const listPrice = floorPrice * 0.95; // List 5% below floor
await agent.methods.listMagicEdenNFT({
tokenMint: "NFT_MINT",
tokenAccount: "TOKEN_ACCOUNT",
price: listPrice
});
```
### 2. Bidding Strategy
```typescript theme={"system"}
// Research recent sales before bidding
const listings = await agent.methods.getMagicEdenCollectionListings({
collectionSymbol: "collection_name",
sort: "listPrice",
sort_direction: "asc",
limit: 10
});
// Bid on the cheapest listing
const cheapestListing = listings.listings[0];
const bidPrice = cheapestListing.price * 0.9; // Bid 10% below asking
await agent.methods.bidOnMagicEdenNFT({
tokenMint: cheapestListing.tokenMint,
price: bidPrice
});
```
### 3. Market Analysis
```typescript theme={"system"}
// Compare popular collections
const popular = await agent.methods.getPopularMagicEdenCollections({
timeRange: "7d"
});
// Analyze each collection
for (const collection of popular.collections) {
const stats = await agent.methods.getMagicEdenCollectionStats({
collectionSymbol: collection.symbol,
timeWindow: "7d"
});
console.log(`${collection.name}: Floor ${stats.stats.floorPrice} SOL, Volume ${stats.stats.volumeAll} SOL`);
}
```
## Security Considerations
### 1. NFT Ownership Verification
```typescript theme={"system"}
// Always verify you own the NFT before listing
// The tokenAccount must be owned by your wallet
```
### 2. Price Validation
```typescript theme={"system"}
// Implement price checks to avoid listing errors
const minPrice = 0.001; // Minimum 0.001 SOL
const maxPrice = 1000; // Maximum 1000 SOL
if (price < minPrice || price > maxPrice) {
throw new Error("Price out of acceptable range");
}
```
### 3. API Key Security
```typescript theme={"system"}
// Never expose API keys in client-side code
// Use environment variables for API key storage
process.env.MAGIC_EDEN_API_KEY
```
## Rate Limits & Performance
### API Rate Limits
* **With API Key**: Higher rate limits for authenticated requests
* **Without API Key**: Limited requests for public endpoints
* **Recommended**: Use API key for production applications
### Optimization Tips
```typescript theme={"system"}
// Batch collection data requests
const collections = ["degods", "okay_bears", "degenape"];
const statsPromises = collections.map(symbol =>
agent.methods.getMagicEdenCollectionStats({ collectionSymbol: symbol })
);
const allStats = await Promise.all(statsPromises);
```
## Popular Collection Symbols
### Top Solana NFT Collections
* `degods` - DeGods
* `okay_bears` - Okay Bears
* `degenape` - Degenerate Ape Academy
* `solana_monkey_business` - Solana Monkey Business
* `thugbirdz` - Thugbirdz
* `shadowy_super_coder` - Shadowy Super Coders
* `galactic_geckos` - Galactic Geckos
* `aurory` - Aurory
* `famous_fox_federation` - Famous Fox Federation
* `bold_badgers` - Bold Badgers
### Finding Collection Symbols
```typescript theme={"system"}
// Use popular collections endpoint to discover symbols
const popular = await agent.methods.getPopularMagicEdenCollections({
timeRange: "7d"
});
// Each collection object contains the symbol field
popular.collections.forEach(collection => {
console.log(`Name: ${collection.name}, Symbol: ${collection.symbol}`);
});
```
## Integration Examples
### Trading Bot Example
```typescript theme={"system"}
// Simple arbitrage detection
async function findArbitrageOpportunities() {
const collections = ["degods", "okay_bears"];
for (const symbol of collections) {
const stats = await agent.methods.getMagicEdenCollectionStats({
collectionSymbol: symbol
});
const listings = await agent.methods.getMagicEdenCollectionListings({
collectionSymbol: symbol,
limit: 5,
sort: "listPrice",
sort_direction: "asc"
});
const cheapest = listings.listings[0];
const floorPrice = stats.stats.floorPrice;
// If cheapest listing is significantly below floor
if (cheapest.price < floorPrice * 0.8) {
console.log(`Opportunity found: ${symbol} listed at ${cheapest.price} SOL (floor: ${floorPrice} SOL)`);
}
}
}
```
### Portfolio Tracker Example
```typescript theme={"system"}
// Track your listed NFTs
async function trackListings(ownedNfts: string[]) {
for (const tokenMint of ownedNfts) {
// Check if NFT is listed by looking through collection listings
// This requires knowing which collection each NFT belongs to
}
}
```
# Mint NFT
Source: https://docs.sendai.fun/docs/v2/integrations/nft-management/mint_nft
Learn how to mint NFTs into collections on Solana
Mint new NFTs into existing collections on Solana. Support both self-minting and minting to specific recipients with custom metadata.
## Usage
```typescript theme={"system"}
// Mint to your own wallet
const nft = await agent.methods.mintNFT(
new PublicKey("collection-address"),
{
name: "My NFT",
uri: "https://arweave.net/nft.json"
}
);
// Mint to a recipient
const nft = await agent.methods.mintNFT(
new PublicKey("collection-address"),
{
name: "Gift NFT",
uri: "https://arweave.net/gift.json"
},
new PublicKey("recipient-address")
);
```
## Parameters
| Parameter | Type | Required | Description |
| -------------- | --------- | -------- | -------------------------------------- |
| collectionMint | PublicKey | Yes | Collection address to mint into |
| metadata.name | string | Yes | Name of the NFT |
| metadata.uri | string | Yes | Metadata URI for the NFT |
| recipient | PublicKey | No | Recipient address (defaults to minter) |
## Example Prompts
### Natural Language Prompts
```text theme={"system"}
"Mint a new NFT called 'Awesome Art #1' in my collection"
"Create NFT with metadata from arweave and send it to wallet address"
"Mint NFT as a gift to recipient 9aUn5swQzUTRanaaTwmszxiv89cvFwUCjEBv1vZCoT1u"
"Add new NFT to my collection with name 'Rare Item #42'"
```
### LangChain Tool Prompts
```text theme={"system"}
// Basic NFT mint to own wallet
{
"collectionMint": "J1S9H3QjnRtBbbuD4HjPV6RpRhwuk4zKbxsnCHuTgh9w",
"name": "Awesome Art #1",
"uri": "https://arweave.net/nft.json"
}
// Mint NFT to specific recipient
{
"collectionMint": "J1S9H3QjnRtBbbuD4HjPV6RpRhwuk4zKbxsnCHuTgh9w",
"name": "Gift NFT #1",
"uri": "https://arweave.net/gift.json",
"recipient": "9aUn5swQzUTRanaaTwmszxiv89cvFwUCjEBv1vZCoT1u"
}
```
## Example Implementation
```typescript theme={"system"}
import { SolanaAgentKit } from "solana-agent-kit";
import { PublicKey } from "@solana/web3.js";
async function mintCollectionNFTs(agent: SolanaAgentKit) {
// Collection address
const collection = new PublicKey("collection-address");
// Mint to own wallet
const nft1 = await agent.methods.mintNFT(
collection,
{
name: "My NFT #1",
uri: "https://arweave.net/nft1.json"
}
);
console.log("Minted NFT:", nft1.mint.toString());
// Mint to recipient
const recipient = new PublicKey("recipient-address");
const nft2 = await agent.methods.mintNFT(
collection,
{
name: "Gift NFT #1",
uri: "https://arweave.net/nft2.json"
},
recipient
);
console.log("Minted gift NFT:", nft2.mint.toString());
}
```
## Metadata Format
Your NFT metadata URI should point to a JSON file with this structure:
```json theme={"system"}
{
"name": "NFT Name",
"symbol": "SYMBOL",
"description": "NFT description",
"image": "https://arweave.net/nft-image.png",
"attributes": [
{
"trait_type": "Background",
"value": "Blue"
}
],
"properties": {
"files": [
{
"uri": "https://arweave.net/nft-image.png",
"type": "image/png"
}
]
}
}
```
## Implementation Details
* Verifies collection membership
* Handles metadata on-chain
* Supports custom recipient addresses
* Creates associated token accounts
* Manages NFT minting authority
## Error Handling
```typescript theme={"system"}
try {
const nft = await agent.methods.mintNFT(collection, metadata, recipient);
} catch (error) {
if (error.message.includes("collection not found")) {
// Handle invalid collection
} else if (error.message.includes("metadata")) {
// Handle metadata issues
}
}
```
## Best Practices
1. **Metadata Management**
* Use permanent storage (Arweave)
* Include high-quality images
* Validate metadata format
* Follow collection standards
2. **Collection Verification**
* Verify collection existence
* Check minting authority
* Validate collection standards
* Monitor supply limits
3. **Recipient Management**
* Validate recipient addresses
* Create token accounts
* Handle transfer failures
* Confirm receipt
4. **Technical Considerations**
* Monitor network status
* Handle rate limits
* Implement retries
* Log transactions
## Response Format
```typescript theme={"system"}
// Successful response
{
status: "success",
message: "NFT minted successfully",
mintAddress: "7nE9GvcwsqzYxmJLSrYmSB1V1YoJWVK1KWzAcWAzjXkN",
metadata: {
name: "My NFT",
uri: "https://arweave.net/nft.json"
},
recipient: "recipient-address"
}
// Error response
{
status: "error",
message: "Error message here",
code: "ERROR_CODE"
}
```
## Related Functions
* `deployCollection`: Create new collections
* `transfer`: Transfer NFTs
* `getBalance`: Check NFT ownership
* `fetchMetadata`: Get NFT metadata
# Tensor NFT Marketplace
Source: https://docs.sendai.fun/docs/v2/integrations/nft-management/tensor_nft
List and manage NFTs on Tensor Trade
Interact with Tensor Trade marketplace to list and manage NFTs. This implementation provides functionality for listing NFTs for sale and canceling existing listings.
## Core Features
1. **Listing Management**
* List NFTs for sale
* Cancel listings
* Price setting
* Ownership verification
2. **Token Account**
* Associated token validation
* Ownership checks
* Balance verification
* Account creation
## Usage
### List NFT for Sale
```typescript theme={"system"}
// List NFT
const signature = await agent.methods.tensorListNFT(
new PublicKey("nft-mint-address"),
1.5 // Price in SOL
);
```
### Cancel Listing
```typescript theme={"system"}
// Cancel listing
const signature = await agent.methods.tensorCancelListing(
new PublicKey("nft-mint-address")
);
```
## Example Prompts
### Natural Language Prompts
```text theme={"system"}
"List my NFT for 2 SOL on Tensor"
"Cancel my NFT listing on Tensor"
"Put NFT up for sale at 1.5 SOL"
"Remove NFT listing from marketplace"
```
### LangChain Tool Prompts
#### List NFT
```text theme={"system"}
{
"nftMint": "nft-mint-address",
"price": 1.5
}
```
#### Cancel Listing
```text theme={"system"}
{
"nftMint": "nft-mint-address"
}
```
## Implementation Details
### Listing Process
```typescript theme={"system"}
interface ListingParams {
nftMint: PublicKey; // NFT mint address
nftSource: PublicKey; // Token account
owner: PublicKey; // Owner address
price: BN; // Price in lamports
tokenProgram: PublicKey; // Token program ID
payer: PublicKey; // Transaction payer
}
// Price conversion
const priceInLamports = new BN(price * 1e9);
```
### Ownership Verification
```typescript theme={"system"}
// Get Associated Token Account
const ata = await getAssociatedTokenAddress(
nftMint,
ownerAddress
);
// Verify ownership
const tokenAccount = await getAccount(
connection,
ata
);
if (!tokenAccount || tokenAccount.amount <= 0) {
throw new Error("NFT not owned");
}
```
## Error Handling
```typescript theme={"system"}
try {
const tx = await agent.methods.tensorListNFT(mint, price);
} catch (error) {
if (error.message.includes("NFT not found")) {
// Handle missing NFT
} else if (error.message.includes("Invalid mint")) {
// Handle invalid address
}
}
```
## Best Practices
1. **Listing Management**
* Verify ownership first
* Check token accounts
* Validate prices
* Monitor transactions
2. **Token Handling**
* Verify mint addresses
* Check balances
* Validate accounts
* Handle permissions
3. **Transaction Processing**
* Build transactions properly
* Include all signers
* Handle timeouts
* Monitor status
## Common Issues
1. **Listing Issues**
* Invalid mint address
* NFT not owned
* Price formatting
* Account mismatch
2. **Cancellation Issues**
* Listing not found
* Permission denied
* Network errors
* Transaction failures
3. **Account Issues**
* Missing ATA
* Zero balance
* Wrong owner
* Program mismatch
## Response Format
### Success Response
```typescript theme={"system"}
{
status: "success",
message: "NFT listed successfully",
transaction: "transaction-signature",
price: 1.5,
nftMint: "mint-address"
}
```
### Error Response
```typescript theme={"system"}
{
status: "error",
message: "Error message",
code: "ERROR_CODE"
}
```
## SDK Integration
### TensorSwap SDK Setup
```typescript theme={"system"}
const provider = new AnchorProvider(
connection,
wallet,
AnchorProvider.defaultOptions()
);
const tensorSwapSdk = new TensorSwapSDK({ provider });
```
### Transaction Building
```typescript theme={"system"}
// Build transaction
const { tx } = await tensorSwapSdk.list(params);
// Create and send transaction
const transaction = new Transaction();
transaction.add(...tx.ixs);
return await connection.sendTransaction(
transaction,
[wallet, ...tx.extraSigners]
);
```
## Advanced Features
1. **Custom Token Programs**
* SPL Token support
* Program validation
* Account creation
* Balance management
2. **Authorization**
* Auth data handling
* Permission checks
* Signature validation
* Access control
3. **Price Management**
* Lamport conversion
* Price validation
* Fee calculation
* Slippage protection
## Resources
* [Tensor Documentation](https://docs.tensor.trade)
* [TensorSwap SDK](https://github.com/tensor-oss/tensorswap-sdk)
* [SPL Token](https://spl.solana.com/token)
* [Solana Web3.js](https://solana-labs.github.io/solana-web3.js)
# Elfa AI Integration
Source: https://docs.sendai.fun/docs/v2/integrations/non-financial/elfa_ai
Learn how to use Elfa AI features with Solana Agent Kit for social media intelligence
Solana Agent Kit provides integration with Elfa AI for retrieving social media intelligence, market data, and trend analysis from platforms like Twitter. This documentation covers the available functions and tools for interacting with Elfa AI API.
## Overview
Elfa AI integration enables access to:
* Smart mentions detection
* Top mentions by ticker symbol
* Keyword-based mentions search
* Trending tokens analysis
* Twitter account statistics
* API key status monitoring
## Configuration
Before using Elfa AI integration, you need to configure your API key in the Solana Agent Kit:
```typescript theme={"system"}
import { SolanaAgentKit } from "solana-agent-kit";
const agent = new SolanaAgentKit(
privateKey,
rpcUrl,
{
ELFA_AI_API_KEY: "your_elfa_ai_api_key"
}
);
```
## Core Functions
The integration provides several core functions for interacting with the Elfa AI API:
### API Health Check
```typescript theme={"system"}
const pingResult = await agent.methods.pingElfaAiApi();
// Returns: { message: "pong" }
```
### API Key Status
```typescript theme={"system"}
const keyStatus = await agent.methods.getElfaAiApiKeyStatus();
// Returns detailed information about API key status including usage limits
```
### Smart Mentions
Retrieve tweets from smart accounts with high engagement:
```typescript theme={"system"}
const smartMentions = await agent.methods.getSmartMentions(
100, // limit
0 // offset
);
```
Example response:
```json theme={"system"}
{
"success": true,
"data": [
{
"id": "611245869",
"type": "post",
"content": "In my opinion, it's a great time to add $ETH.",
"originalUrl": "/EricTrump/status/1886541132903133230",
"likeCount": 48036,
"quoteCount": 3103,
"replyCount": 8900,
"repostCount": 7981,
"viewCount": 5660995,
"mentionedAt": "2025-02-03T22:23:50.000Z",
"account": {
"id": 83583,
"username": "EricTrump",
"followerCount": 5500559,
"isVerified": true
}
}
],
"metadata": {
"total": 6,
"limit": 100,
"offset": 0
}
}
```
### Top Mentions by Ticker
Retrieve top tweets for a specific ticker symbol:
```typescript theme={"system"}
const topMentions = await agent.methods.getTopMentionsByTicker(
"SOL", // ticker
"1h", // timeWindow
1, // page
10, // pageSize
false // includeAccountDetails
);
```
Example response:
```json theme={"system"}
{
"success": true,
"data": {
"data": [
{
"id": 612200471,
"twitter_id": "1886663937518645714",
"content": "Same story for $SOL - looks like a failed breakdown.",
"mentioned_at": "2025-02-04T06:31:49+00:00",
"type": "post",
"metrics": {
"like_count": 45,
"reply_count": 6,
"repost_count": 7,
"view_count": 1744
}
}
],
"total": 12,
"page": 1,
"pageSize": 10
}
}
```
### Search Mentions by Keywords
Search for tweets containing specific keywords within a date range:
```typescript theme={"system"}
const searchResults = await agent.methods.searchMentionsByKeywords(
"ai, agent", // comma-separated keywords
1622505600, // from timestamp
1625097600, // to timestamp
20 // limit
);
```
Example response:
```json theme={"system"}
{
"success": true,
"data": [
{
"id": 612258820,
"twitter_id": "1886671035048845535",
"content": "The Move AI Hackathon 🛠️\n\nUnlock limitless possibilities...",
"mentioned_at": "2025-02-04T07:00:02+00:00",
"type": "quote",
"metrics": {
"like_count": 1,
"reply_count": 0,
"repost_count": 0,
"view_count": 0
}
}
],
"metadata": {
"total": 1875,
"cursor": "FGluY2x1ZGVfY29udGV4d..."
}
}
```
### Trending Tokens
Get tokens trending in social media discussions:
```typescript theme={"system"}
const trendingTokens = await agent.methods.getTrendingTokens();
```
Example response:
```json theme={"system"}
{
"success": true,
"data": {
"total": 5,
"page": 1,
"pageSize": 5,
"data": [
{
"token": "eth",
"current_count": 916,
"previous_count": 377,
"change_percent": 142.97
},
{
"token": "btc",
"current_count": 580,
"previous_count": 458,
"change_percent": 26.64
}
]
}
}
```
### Twitter Account Smart Stats
Get engagement and influence metrics for a Twitter account:
```typescript theme={"system"}
const accountStats = await agent.methods.getSmartTwitterAccountStats("elonmusk");
```
Example response:
```json theme={"system"}
{
"success": true,
"data": {
"smartFollowingCount": 5913,
"averageEngagement": 30714784.98833819,
"followerEngagementRatio": 0.1423006675490259
}
}
```
## LangChain Tools
For AI agent integration with LangChain, the following tools are available:
### Ping Tool
```typescript theme={"system"}
import { ElfaPingTool } from "solana-agent-kit";
const pingTool = new ElfaPingTool(agent);
```
### API Key Status Tool
```typescript theme={"system"}
import { ElfaApiKeyStatusTool } from "solana-agent-kit";
const apiKeyStatusTool = new ElfaApiKeyStatusTool(agent);
```
### Smart Mentions Tool
```typescript theme={"system"}
import { ElfaGetMentionsTool } from "solana-agent-kit";
const smartMentionsTool = new ElfaGetMentionsTool(agent);
// Tool input (JSON string):
const input = JSON.stringify({
limit: 100,
offset: 0
});
```
### Top Mentions Tool
```typescript theme={"system"}
import { ElfaGetTopMentionsTool } from "solana-agent-kit";
const topMentionsTool = new ElfaGetTopMentionsTool(agent);
// Tool input (JSON string):
const input = JSON.stringify({
ticker: "SOL",
timeWindow: "1h",
page: 1,
pageSize: 10,
includeAccountDetails: false
});
```
### Search Mentions Tool
```typescript theme={"system"}
import { ElfaSearchMentionsTool } from "solana-agent-kit";
const searchMentionsTool = new ElfaSearchMentionsTool(agent);
// Tool input (JSON string):
const input = JSON.stringify({
keywords: "ai, agent",
from: 1622505600,
to: 1625097600,
limit: 20
});
```
### Trending Tokens Tool
```typescript theme={"system"}
import { ElfaTrendingTokensTool } from "solana-agent-kit";
const trendingTokensTool = new ElfaTrendingTokensTool(agent);
```
### Account Smart Stats Tool
```typescript theme={"system"}
import { ElfaAccountSmartStatsTool } from "solana-agent-kit";
const accountStatsTool = new ElfaAccountSmartStatsTool(agent);
// Tool input: username as string
const input = "elonmusk";
```
## Action Definitions
In addition to functions and tools, Solana Agent Kit provides actions for interacting with Elfa AI:
### Ping Action
```typescript theme={"system"}
const pingResult = await agent.methods.executeAction("ELFA_PING_ACTION", {});
```
### API Key Status Action
```typescript theme={"system"}
const keyStatus = await agent.methods.executeAction("ELFA_API_KEY_STATUS_ACTION", {});
```
### Smart Mentions Action
```typescript theme={"system"}
const smartMentions = await agent.methods.executeAction("ELFA_GET_SMART_MENTIONS_ACTION", {
limit: 100,
offset: 0
});
```
### Top Mentions Action
```typescript theme={"system"}
const topMentions = await agent.methods.executeAction("ELFA_GET_TOP_MENTIONS_BY_TICKER_ACTION", {
ticker: "SOL",
timeWindow: "1h",
page: 1,
pageSize: 10,
includeAccountDetails: false
});
```
### Search Mentions Action
```typescript theme={"system"}
const searchResults = await agent.methods.executeAction("ELFA_SEARCH_MENTIONS_BY_KEYWORDS_ACTION", {
keywords: "ai, agent",
from: 1622505600,
to: 1625097600,
limit: 20
});
```
### Trending Tokens Action
```typescript theme={"system"}
const trendingTokens = await agent.methods.executeAction("ELFA_TRENDING_TOKENS_ACTION", {});
```
### Account Smart Stats Action
```typescript theme={"system"}
const accountStats = await agent.methods.executeAction("ELFA_SMART_TWITTER_ACCOUNT_STATS_ACTION", {
username: "elonmusk"
});
```
## Parameter Details
### Time Windows
The following time windows are supported for various endpoints:
* `1h` - Last hour
* `24h` - Last 24 hours
* `7d` - Last 7 days
* `14d` - Last 14 days
* `30d` - Last 30 days
### Pagination
Most endpoints support pagination with the following parameters:
* `limit` or `pageSize` - Number of results per page
* `offset` or `page` - Page number or offset for results
* `cursor` - For cursor-based pagination (used in search endpoints)
## Error Handling
All functions and tools include error handling. Here's an example of handling errors:
```typescript theme={"system"}
try {
const result = await agent.methods.getTopMentionsByTicker("SOL");
if (!result.success) {
console.error("API error:", result.error);
// Handle error
} else {
console.log("Top mentions:", result.data);
// Process data
}
} catch (error) {
console.error("Exception:", error.message);
// Handle exception
}
```
## Utility Functions
The integration includes several utility functions:
### Create Axios Instance
```typescript theme={"system"}
function createAxiosInstance(apiKey: string): AxiosInstance {
return axios.create({
baseURL: "https://api.elfa.ai",
headers: {
"x-elfa-api-key": apiKey,
"Content-Type": "application/json",
},
});
}
```
## Integration with AI Agents
For AI agents built with LangChain, you can register these tools:
```typescript theme={"system"}
import {
ElfaPingTool,
ElfaGetTopMentionsTool,
ElfaTrendingTokensTool
} from "solana-agent-kit";
import { OpenAI } from "langchain/llms/openai";
import { initializeAgentExecutorWithOptions } from "langchain/agents";
// Create LangChain tools
const tools = [
new ElfaPingTool(agent),
new ElfaGetTopMentionsTool(agent),
new ElfaTrendingTokensTool(agent)
];
// Create LLM
const model = new OpenAI({ temperature: 0 });
// Create agent
const executor = await initializeAgentExecutorWithOptions(
tools,
model,
{
agentType: "structured-chat-zero-shot-react-description",
}
);
// Execute agent
const result = await executor.call({
input: "What are the trending tokens today?"
});
```
## Best Practices
1. **Rate Limiting**: Monitor your API usage through the key status endpoint
2. **Data Freshness**: Social media data can become stale quickly, consider time windows carefully
3. **Error Handling**: Implement comprehensive error handling for all API calls
4. **Pagination**: For large datasets, implement pagination to avoid timeouts
5. **Date Ranges**: For search queries, use reasonable date ranges to optimize performance
## Resources
* [Elfa AI Website](https://elfa.ai)
* [Elfa AI API Documentation](https://docs.elfa.ai)
* [Solana Agent Kit Documentation](https://github.com/sendaifun/solana-agent-kit)
# Gib Work Task Creation
Source: https://docs.sendai.fun/docs/v2/integrations/non-financial/gibwork_bounties
Create and manage bounties on Gib Work platform
Create and manage bounties on the Gib Work platform using SPL tokens for payment. Post tasks, set requirements, and manage payments through an integrated system.
## Core Features
1. Task Management
* Create bounties
* Set requirements
* Tag categorization
* Token payments
2. Payment Options
* Multiple SPL tokens
* Customizable amounts
* Secure escrow
* Transaction verification
## Usage
```typescript theme={"system"}
const response = await agent.methods.createGibworkTask(
"Build Solana dApp", // title
"Create a React frontend for Solana", // content
"Rust and React experience required", // requirements
["solana", "rust", "react"], // tags
new PublicKey("token-mint-address"), // payment token
100 // amount
);
```
## Parameters
| Parameter | Type | Required | Description |
| ---------------- | --------- | -------- | -------------------- |
| title | string | Yes | Task title |
| content | string | Yes | Task description |
| requirements | string | Yes | Task requirements |
| tags | string\[] | Yes | Task categories |
| tokenMintAddress | PublicKey | Yes | Payment token mint |
| tokenAmount | number | Yes | Payment amount |
| payer | PublicKey | No | Custom payer address |
## Example Prompts
### Natural Language Prompts
```text theme={"system"}
"Create a Solana development task for 100 USDC"
"Post a bounty for smart contract audit"
"Create new task with USDC payment"
"Add development bounty with requirements"
```
### LangChain Tool Prompts
```text theme={"system"}
// Basic task creation
{
"title": "Build Solana dApp",
"content": "Create a React frontend for Solana",
"requirements": "Rust and React experience required",
"tags": ["solana", "rust", "react"],
"tokenMintAddress": "EPjFWdd5AufqSSqeM2qN1xzybapC8G4wEGGkZwyTDt1v",
"amount": 100
}
// Task with custom payer
{
"title": "Smart Contract Audit",
"content": "Audit Solana smart contract",
"requirements": "Security audit experience",
"tags": ["audit", "security"],
"tokenMintAddress": "EPjFWdd5AufqSSqeM2qN1xzybapC8G4wEGGkZwyTDt1v",
"amount": 500,
"payer": "custom-wallet-address"
}
```
## Response Format
```typescript theme={"system"}
// Success response
{
status: "success",
taskId: "task_123",
signature: "3YKpM1..."
}
// Error response
{
status: "error",
message: "Failed to create task",
code: "CREATE_TASK_ERROR"
}
```
## Implementation Details
### Task Creation Process
```typescript theme={"system"}
interface TaskCreationParams {
title: string; // Task title
content: string; // Description
requirements: string; // Requirements
tags: string[]; // Categories
payer: string; // Payer address
token: {
mintAddress: string; // Token mint
amount: number; // Payment amount
};
}
// Features
- Transaction versioning
- Payment verification
- Tag validation
- Response handling
```
## Error Handling
```typescript theme={"system"}
try {
const task = await agent.methods.createGibworkTask(...);
} catch (error) {
if (error.message.includes("insufficient funds")) {
// Handle payment issues
} else if (error.message.includes("invalid token")) {
// Handle token validation
}
}
```
## Best Practices
1. **Task Creation**
* Clear descriptions
* Specific requirements
* Appropriate tags
* Fair pricing
2. **Payment Setup**
* Verify token balance
* Consider fees
* Set reasonable amounts
* Check approvals
3. **Content Management**
* Detailed descriptions
* Clear requirements
* Relevant tags
* Regular updates
4. **Security**
* Verify transactions
* Check permissions
* Monitor tasks
* Track payments
## Common Issues
1. **Task Creation**
* Missing information
* Invalid tokens
* Insufficient funds
* Network issues
2. **Payment**
* Token approval
* Balance issues
* Transaction failures
* Fee calculation
3. **Validation**
* Tag limits
* Content length
* Token support
* Payer verification
## Common Token Addresses
* USDC: `EPjFWdd5AufqSSqeM2qN1xzybapC8G4wEGGkZwyTDt1v`
* USDT: `Es9vMFrzaCERmJfrF4H2FYD4KCoNkY11McCe8BenwNYB`
* BONK: `DezXAZ8z7PnrnRJjz3wXBoRgixCa6xjnB7YaB1pPB263`
## Task Management Tips
1. **Description Writing**
* Be specific
* Include deliverables
* Set timelines
* Define scope
2. **Payment Planning**
* Market rates
* Token stability
* Payment schedule
* Fee consideration
3. **Task Monitoring**
* Track submissions
* Review progress
* Update status
* Manage payments
## Related Functions
* `getBalance`: Check token balance
* `approveToken`: Setup payments
* `updateTask`: Modify tasks
* `getTasks`: List tasks
# Jupiter SOL Staking
Source: https://docs.sendai.fun/docs/v2/integrations/solana-blinks/jupsol_staking
Stake SOL tokens to receive jupSOL through Jupiter Protocol
Stake SOL tokens to receive jupSOL through Jupiter's liquid staking protocol. Earn staking rewards while maintaining liquidity through the jupSOL token.
## Core Features
1. Staking Operations
* SOL to jupSOL conversion
* Liquid staking rewards
* Transaction verification
* Automatic rewards
2. Key Benefits
* Liquid staking
* Automatic compounding
* No unbonding period
* Protocol security
## Usage
```typescript theme={"system"}
// Stake SOL and receive jupSOL
const signature = await agent.methods.stake(
1.5 // Amount of SOL to stake
);
```
## Parameters
| Parameter | Type | Required | Description |
| --------- | ------ | -------- | ---------------------- |
| amount | number | Yes | Amount of SOL to stake |
## Example Prompts
### Natural Language Prompts
```text theme={"system"}
"Stake 1 SOL for jupSOL"
"Convert my SOL to jupSOL"
"Stake 2.5 SOL with Jupiter"
"Get jupSOL by staking 0.5 SOL"
```
### LangChain Tool Prompts
```text theme={"system"}
// Basic staking
{
"amount": 1.5
}
// Minimum stake
{
"amount": 0.1
}
```
## Implementation Details
### Staking Process
```typescript theme={"system"}
interface StakeParams {
amount: number; // SOL amount
account: string; // Wallet address
}
// Features
- Versioned transactions
- Blockhash handling
- Confirmation tracking
- Retry logic
```
## Response Format
```typescript theme={"system"}
// Success response
{
status: "success",
signature: "5KtPn3...",
message: "Successfully staked 1.5 SOL for jupSOL"
}
// Error response
{
status: "error",
message: "jupSOL staking failed: insufficient funds"
}
```
## Error Handling
```typescript theme={"system"}
try {
const signature = await agent.methods.stake(amount);
} catch (error) {
if (error.message.includes("insufficient funds")) {
// Handle insufficient balance
} else if (error.message.includes("transaction")) {
// Handle transaction issues
}
}
```
## Best Practices
1. **Staking Management**
* Verify SOL balance
* Consider fees
* Monitor transactions
* Track rewards
2. **Transaction Handling**
* Monitor confirmations
* Implement retries
* Handle timeouts
* Verify success
3. **Balance Management**
* Track SOL/jupSOL ratio
* Monitor rewards
* Consider fees
* Plan exits
4. **Security**
* Verify transactions
* Check approvals
* Monitor positions
* Track changes
## Common Issues
1. **Staking**
* Insufficient SOL
* Network congestion
* Transaction failures
* Price impact
2. **Transaction**
* Failed confirmations
* Timeout issues
* Network errors
* Version conflicts
3. **Balance**
* Sync delays
* Fee calculation
* Reward tracking
* Rate updates
## Technical Details
### Token Addresses
```typescript theme={"system"}
const SOL_MINT = "So11111111111111111111111111111111111111112";
const JUPSOL_MINT = "jupSoLaHXQiZZTSfEWMTRRgpnyFm8f6sZdosWBjx93v";
```
### Transaction Flow
1. **Preparation**
```typescript theme={"system"}
const txn = VersionedTransaction.deserialize(
Buffer.from(data.transaction, "base64")
);
```
2. **Signing**
```typescript theme={"system"}
txn.message.recentBlockhash = blockhash;
txn.sign([agent.methods.wallet]);
```
3. **Confirmation**
```typescript theme={"system"}
await connection.confirmTransaction({
signature,
blockhash,
lastValidBlockHeight
});
```
## Protocol Features
1. **Liquid Staking**
* Immediate liquidity
* No lockup period
* Tradeable token
* Compound rewards
2. **Security**
* Audited protocol
* Multi-validator system
* Emergency withdrawals
* Risk management
3. **Rewards**
* Automatic compounding
* Real-time accrual
* No claim required
* Performance tracking
## Related Functions
* `getBalance`: Check SOL balance
* `getJupSolBalance`: Check jupSOL balance
* `trade`: Trade jupSOL
* `unstake`: Convert back to SOL
## Notes
1. **Minimum Stake**
* Consider network fees
* Account for slippage
* Monitor minimums
* Track changes
2. **Performance**
* Monitor APY
* Track rewards
* Compare rates
* Assess fees
3. **Exit Strategy**
* No unbonding period
* Instant liquidity
* Market impact
* Fee consideration
# Lulo USDC Lending
Source: https://docs.sendai.fun/docs/v2/integrations/solana-blinks/lulo
Earn yield by lending USDC through Lulo protocol
Lend USDC tokens to earn yield through Lulo protocol. This integration provides automated yield optimization and simplified lending operations.
## Core Features
1. Lending Operations
* USDC deposits
* Yield generation
* APY tracking
* Account management
2. Account Features
* Real-time APY
* Interest tracking
* Total value monitoring
* Protocol settings
## Usage
```typescript theme={"system"}
// Lend USDC
const signature = await agent.methods.lendAssets(100); // Lend 100 USDC
// Get account details
const details: LuloAccountDetailsResponse = {
totalValue: 100.5,
interestEarned: 0.5,
realtimeApy: 5.2,
settings: {
owner: "wallet-address",
allowedProtocols: null,
homebase: null,
minimumRate: "4.8"
}
};
```
## Example Prompts
### Natural Language Prompts
```text theme={"system"}
"Lend 100 USDC to earn yield"
"Deposit USDC into Lulo for interest"
"Start earning yield on my USDC"
"Put my USDC to work in Lulo"
```
### LangChain Tool Prompts
```text theme={"system"}
// Basic lending
{
"amount": 100
}
// Alternative format
"100" // Direct amount input
```
## Response Formats
### Lending Response
```typescript theme={"system"}
{
status: "success",
message: "Asset lent successfully",
transaction: "5UfgJ5vVZxUx...",
amount: 100
}
```
### Account Details
```typescript theme={"system"}
interface LuloAccountDetailsResponse {
totalValue: number; // Total value in USDC
interestEarned: number; // Total interest earned
realtimeApy: number; // Current APY
settings: {
owner: string; // Wallet address
allowedProtocols: string | null;
homebase: string | null;
minimumRate: string; // Minimum acceptable APY
}
}
```
## Implementation Details
### Lending Process
```typescript theme={"system"}
// Parameters
interface LendParams {
amount: number; // USDC amount
symbol: string; // Always "USDC"
account: string; // Wallet address
}
// Features
- Transaction versioning
- Blockhash handling
- Confirmation tracking
- Retry logic
```
## Error Handling
```typescript theme={"system"}
try {
const signature = await agent.methods.lendAssets(amount);
} catch (error) {
if (error.message.includes("insufficient funds")) {
// Handle insufficient balance
} else if (error.message.includes("slippage")) {
// Handle price movement
}
}
```
## Best Practices
1. **Amount Management**
* Verify USDC balance
* Consider gas fees
* Set reasonable amounts
* Monitor minimums
2. **Transaction Handling**
* Monitor confirmations
* Implement retries
* Handle timeouts
* Verify success
3. **Yield Optimization**
* Monitor APY changes
* Track interest earned
* Consider lock periods
* Compare rates
4. **Security**
* Verify transactions
* Check approvals
* Monitor positions
* Regular audits
## Common Issues
1. **Transaction Failures**
* Insufficient funds
* Network congestion
* Invalid parameters
* Timeout issues
2. **Yield Related**
* APY fluctuations
* Interest calculation
* Rate changes
* Protocol updates
3. **Account Issues**
* Access problems
* Balance sync
* Setting updates
* Protocol limits
## Protocol Features
1. **Yield Generation**
* Automated optimization
* Best APY routing
* Compound interest
* Protocol diversity
2. **Security**
* Audited contracts
* Risk management
* Fund protection
* Regular updates
3. **Management**
* Account dashboard
* Performance tracking
* Setting configuration
* Protocol selection
## Transaction Flow
1. **Pre-lending Checks**
```typescript theme={"system"}
// Verify balance
const balance = await getBalance(USDC_MINT);
if (balance < amount) throw new Error("Insufficient balance");
```
2. **Transaction Creation**
```typescript theme={"system"}
// Create and sign transaction
const txn = VersionedTransaction.deserialize(buffer);
txn.message.recentBlockhash = blockhash;
txn.sign([wallet]);
```
3. **Confirmation**
```typescript theme={"system"}
// Wait for confirmation
await connection.confirmTransaction({
signature,
blockhash,
lastValidBlockHeight
});
```
## Related Functions
* `getBalance`: Check USDC balance
* `withdrawAssets`: Withdraw from Lulo
* `getAccountDetails`: Get account info
* `checkYield`: Monitor current APY
## Notes
1. **Protocol Specifics**
* USDC only supported
* Minimum deposit amounts
* APY variations
* Protocol fees
2. **Performance Tips**
* Larger deposits preferred
* Long-term holding benefits
* APY threshold setting
* Regular monitoring
3. **Risk Management**
* Diversification strategy
* Position sizing
* Exit planning
* Market monitoring
# SEND Arcade Games
Source: https://docs.sendai.fun/docs/v2/integrations/solana-blinks/send_arcade_rps
Play Rock Paper Scissors on Solana to win SEND tokens
Play Rock Paper Scissors on Solana using Send Arcade. Bet SOL and win SEND tokens in this interactive blockchain game.
## Core Features
1. Game Mechanics
* Three choices: rock, paper, scissors
* Multiple bet sizes
* Automated opponent
* Instant outcomes
2. Prize System
* SEND token rewards
* Automated claiming
* Transaction verification
* Multi-step collection
## Usage
```typescript theme={"system"}
const result = await agent.methods.rockPaperScissors(
0.01, // Amount in SOL
"rock" // Choice: "rock", "paper", or "scissors"
);
```
## Parameters
| Parameter | Type | Required | Values | Description |
| --------- | ------ | -------- | --------------------------- | ----------------- |
| amount | number | Yes | 0.005, 0.01, 0.1 | Bet amount in SOL |
| choice | string | Yes | "rock", "paper", "scissors" | Player's move |
## Example Prompts
### Natural Language Prompts
```text theme={"system"}
"Play rock paper scissors with 0.01 SOL"
"Choose rock and bet 0.1 SOL"
"Play scissors in RPS for minimum bet"
"Challenge with paper for 0.01 SOL"
```
### LangChain Tool Prompts
```text theme={"system"}
// Basic game
{
"choice": "rock",
"amount": 0.01
}
// Maximum bet
{
"choice": "paper",
"amount": 0.1
}
// Minimum bet
{
"choice": "scissors",
"amount": 0.005
}
```
## Game Flow
1. **Game Initiation**
```typescript theme={"system"}
// Start game
const gameResult = await agent.methods.rockPaperScissors(0.01, "rock");
```
2. **Outcome Resolution**
```typescript theme={"system"}
// Results can be:
"You won! Scissors beats Paper"
"You lost! Paper beats Rock"
"It's a tie!"
```
3. **Prize Claiming**
```typescript theme={"system"}
// Automated for wins:
"Prize claimed Successfully"
"You won X SEND tokens!"
```
## Implementation Details
### Game Process
```typescript theme={"system"}
interface GameParams {
amount: number; // Bet amount
choice: string; // Player's choice
account: string; // Player's wallet
}
// Features
- Transaction signing
- Outcome verification
- Prize distribution
- Multi-step claiming
```
## Error Handling
```typescript theme={"system"}
try {
const result = await agent.methods.rockPaperScissors(amount, choice);
} catch (error) {
if (error.message.includes("insufficient funds")) {
// Handle insufficient SOL
} else if (error.message.includes("invalid choice")) {
// Handle invalid move
}
}
```
## Best Practices
1. **Game Strategy**
* Verify SOL balance
* Start with small bets
* Monitor outcomes
* Track winnings
2. **Transaction Management**
* Wait for confirmations
* Handle timeouts
* Monitor failures
* Verify claims
3. **Prize Collection**
* Confirm receipts
* Track transactions
* Monitor balances
* Save signatures
4. **Error Recovery**
* Handle timeouts
* Retry claims
* Monitor status
* Save game IDs
## Common Issues
1. **Game Initiation**
* Invalid bet amounts
* Insufficient balance
* Network issues
* Timeout errors
2. **Outcome Resolution**
* Transaction failures
* Confirmation delays
* Status errors
* Connection issues
3. **Prize Collection**
* Claim failures
* Transaction errors
* Timeout issues
* Balance updates
## Game Mechanics
### Bet Amounts
* 0.005 SOL (minimum)
* 0.01 SOL (medium)
* 0.1 SOL (maximum)
### Winning Combinations
* Rock beats Scissors
* Paper beats Rock
* Scissors beats Paper
### Prize Structure
* Win: Receive SEND tokens
* Loss: Lose bet amount
* Tie: Return bet amount
## Transaction Flow
1. **Place Bet**
```typescript theme={"system"}
// Create and sign bet transaction
const txn = Transaction.from(Buffer.from(data.transaction, "base64"));
txn.sign(agent.methods.wallet);
```
2. **Resolve Outcome**
```typescript theme={"system"}
// Check game result
const outcome = await checkOutcome(signature, href);
```
3. **Claim Prize**
```typescript theme={"system"}
// For wins, claim automatically
if (outcome.won) {
await claimPrize(href);
}
```
## Related Functions
* `getBalance`: Check SOL balance
* `getSendBalance`: Check SEND balance
* `transfer`: Transfer tokens
* `getGameHistory`: View past games
## Notes
1. **Game Rules**
* One game at a time
* Fixed bet amounts
* Instant resolution
* Automated opponent
2. **Prize Details**
* SEND token rewards
* Automatic claiming
* Instant distribution
* Balance updates
3. **Security Tips**
* Verify transactions
* Check amounts
* Monitor outcomes
* Save records
# Solayer SOL Restaking
Source: https://docs.sendai.fun/docs/v2/integrations/solana-blinks/solayer_restaking
Restake SOL to receive sSOL through Solayer Protocol
Restake SOL tokens to receive sSOL (Solayer SOL) through Solayer's restaking protocol. Earn enhanced yields through restaking while maintaining liquidity through the sSOL token.
## Core Features
1. Restaking Operations
* SOL to sSOL conversion
* Enhanced staking yields
* Liquid staking token (LST)
* Automatic compounding
2. Key Benefits
* Higher APY through restaking
* Liquid token representation
* Double-yield potential
* Protocol security
## Usage
```typescript theme={"system"}
// Restake SOL to receive sSOL
const signature = await agent.methods.restake(
1.0 // Amount of SOL to restake
);
```
## Parameters
| Parameter | Type | Required | Description |
| --------- | ------ | -------- | ------------------------ |
| amount | number | Yes | Amount of SOL to restake |
## Example Prompts
### Natural Language Prompts
```text theme={"system"}
"Restake 1 SOL on Solayer"
"Convert SOL to sSOL for better yields"
"Stake 2.5 SOL with Solayer restaking"
"Get sSOL by staking 0.5 SOL"
```
### LangChain Tool Prompts
```text theme={"system"}
// Basic restaking
{
"amount": 1.0
}
// Minimum stake
{
"amount": 0.1
}
// Direct amount input
"1.5"
```
## Implementation Details
### Restaking Process
```typescript theme={"system"}
interface RestakeParams {
amount: number; // SOL amount
account: string; // Wallet address
}
// Features
- Versioned transactions
- Blockhash handling
- Multiple retries
- Confirmation tracking
```
## Response Format
```typescript theme={"system"}
// Success response
{
status: "success",
message: "Staked successfully",
transaction: "3FgHn9...",
amount: 1.0
}
// Error response
{
status: "error",
message: "Solayer sSOL staking failed: insufficient funds",
code: "UNKNOWN_ERROR"
}
```
## Error Handling
```typescript theme={"system"}
try {
const signature = await agent.methods.restake(amount);
} catch (error) {
if (error.message.includes("insufficient funds")) {
// Handle insufficient balance
} else if (error.message.includes("request failed")) {
// Handle API issues
}
}
```
## Best Practices
1. **Restaking Management**
* Verify SOL balance
* Consider gas fees
* Monitor yields
* Track restaking rewards
2. **Transaction Handling**
* Implement retries
* Check confirmations
* Handle timeouts
* Monitor failures
3. **Balance Management**
* Track SOL/sSOL ratio
* Monitor yield rates
* Consider unlock periods
* Plan exit strategy
4. **Security**
* Verify transactions
* Check approvals
* Monitor positions
* Review permissions
## Common Issues
1. **Restaking**
* Insufficient SOL
* Network congestion
* API timeouts
* Rate limits
2. **Transaction**
* Failed confirmations
* Version mismatches
* Blockhash issues
* Signature errors
3. **Balance**
* Sync delays
* Fee calculations
* Reward tracking
* Rate updates
## Technical Details
### Token Information
```typescript theme={"system"}
// Token addresses and information
const SSOL_MINT = "..."; // Solayer SOL mint address
const RESTAKING_PROGRAM = "..."; // Solayer program ID
```
### Transaction Flow
1. **Initialize**
```typescript theme={"system"}
// Prepare restaking request
const response = await fetch(
`https://app.solayer.org/api/action/restake/ssol?amount=${amount}`
);
```
2. **Process**
```typescript theme={"system"}
// Deserialize and sign transaction
const txn = VersionedTransaction.deserialize(buffer);
txn.message.recentBlockhash = blockhash;
txn.sign([wallet]);
```
3. **Confirm**
```typescript theme={"system"}
// Wait for confirmation
await connection.confirmTransaction({
signature,
blockhash,
lastValidBlockHeight
});
```
## Protocol Features
1. **Restaking Mechanism**
* Enhanced yield generation
* Automatic compounding
* Multiple validator support
* Risk distribution
2. **Security**
* Audited contracts
* Distributed validation
* Emergency procedures
* Risk management
3. **Rewards**
* Double-yield potential
* Automatic processing
* Real-time tracking
* Compound interest
## Related Functions
* `getBalance`: Check SOL balance
* `getSsolBalance`: Check sSOL balance
* `unrestake`: Convert back to SOL
* `checkYield`: View current APY
## Notes
1. **Minimum Stake**
* Network fees consideration
* Slippage tolerance
* Minimum amounts
* Protocol limits
2. **Performance**
* Monitor APY changes
* Track restaking rewards
* Compare rates
* Review fees
3. **Risk Management**
* Diversification strategy
* Exit planning
* Market monitoring
* Protocol updates
# Squads Protocol Multisig
Source: https://docs.sendai.fun/docs/v2/integrations/squads/squads_operations
Create and manage 2-of-2 multisig accounts using Squads Protocol
This implementation enables secure shared control over assets between an AI agent and a user.
## Core Features
1. **Multisig Management**
* Create 2-of-2 multisig
* Deposit funds
* Create proposals
* Execute transactions
2. **Proposal Operations**
* Create proposals
* Approve proposals
* Reject proposals
* Execute transactions
## Quick Start
```typescript theme={"system"}
// Create multisig
const multisig = await agent.methods.createSquadsMultisig(
new PublicKey("creator-address")
);
// Deposit funds
const deposit = await agent.methods.depositToMultisig(
1.5 // amount in SOL
);
// Transfer from multisig
const transfer = await agent.methods.transferFromMultisig(
1.0, // amount
new PublicKey("recipient")
);
```
## Example Prompts
### Natural Language Prompts
```text theme={"system"}
"Create a 2-of-2 multisig with me"
"Deposit 1 SOL to our multisig"
"Transfer 0.5 SOL from multisig to address"
"Approve pending proposal"
```
### LangChain Tool Prompts
#### Create Multisig
```text theme={"system"}
{
"creator": "creator-public-key"
}
```
#### Deposit Funds
```text theme={"system"}
{
"amount": 1.5
}
```
#### Transfer Funds
```text theme={"system"}
{
"amount": 1.0,
"recipient": "recipient-address"
}
```
## Detailed Function Reference
### Creation Operations
#### createSquadsMultisig
```typescript theme={"system"}
async function create_squads_multisig(
agent: SolanaAgentKit,
creator: PublicKey
): Promise
```
Creates a new 2-of-2 multisig account with the agent and creator as members.
* `agent`: SolanaAgentKit instance
* `creator`: Public key of the second member
* Returns: Transaction signature
#### depositToMultisig
```typescript theme={"system"}
async function deposit_to_multisig(
agent: SolanaAgentKit,
amount: number,
vaultIndex?: number,
mint?: PublicKey
): Promise
```
Deposits funds to the multisig vault.
* `amount`: Amount to deposit
* `vaultIndex`: Optional vault index (default: 0)
* `mint`: Optional SPL token mint address
* Returns: Transaction signature
### Proposal Operations
#### createProposal
```typescript theme={"system"}
async function create_proposal(
agent: SolanaAgentKit,
transactionIndex?: number | bigint
): Promise
```
Creates a new proposal for a pending transaction.
* `transactionIndex`: Optional specific transaction index
* Returns: Transaction signature
#### approveProposal
```typescript theme={"system"}
async function approve_proposal(
agent: SolanaAgentKit,
transactionIndex?: number | bigint
): Promise
```
Approves a pending proposal.
* `transactionIndex`: Optional specific transaction index
* Returns: Transaction signature
#### rejectProposal
```typescript theme={"system"}
async function reject_proposal(
agent: SolanaAgentKit,
transactionIndex?: number | bigint
): Promise
```
Rejects a pending proposal.
* `transactionIndex`: Optional specific transaction index
* Returns: Transaction signature
### Transaction Operations
#### transferFromMultisig
```typescript theme={"system"}
async function transfer_from_multisig(
agent: SolanaAgentKit,
amount: number,
to: PublicKey,
vaultIndex?: number = 0,
mint?: PublicKey
): Promise
```
Creates a transaction to transfer funds from the multisig vault.
* `amount`: Amount to transfer
* `to`: Recipient address
* `vaultIndex`: Optional vault index (default: 0)
* `mint`: Optional SPL token mint address
* Returns: Transaction signature
#### executeTransaction
```typescript theme={"system"}
async function execute_transaction(
agent: SolanaAgentKit,
transactionIndex?: number | bigint
): Promise
```
Executes an approved transaction.
* `transactionIndex`: Optional specific transaction index
* Returns: Transaction signature
## Usage Examples
### Complete Workflow Example
```typescript theme={"system"}
// 1. Create multisig
const multisig = await create_squads_multisig(
agent,
new PublicKey("creator")
);
// 2. Deposit funds
const deposit = await deposit_to_multisig(
agent,
1.5 // SOL amount
);
// 3. Create transfer
const transfer = await transfer_from_multisig(
agent,
1.0, // amount
new PublicKey("recipient")
);
// 4. Create proposal
const proposal = await create_proposal(agent);
// 5. Approve proposal
const approval = await approve_proposal(agent);
// 6. Execute transaction
const execution = await execute_transaction(agent);
```
### SPL Token Example
```typescript theme={"system"}
// Deposit SPL tokens
const tokenDeposit = await deposit_to_multisig(
agent,
100,
0, // vault index
new PublicKey("token-mint")
);
// Transfer SPL tokens
const tokenTransfer = await transfer_from_multisig(
agent,
50,
new PublicKey("recipient"),
0, // vault index
new PublicKey("token-mint")
);
```
## Common Function Patterns
### Transaction Index Management
```typescript theme={"system"}
// Get current transaction index
const multisigInfo = await Multisig.fromAccountAddress(
agent.methods.connection,
multisigPda
);
const currentIndex = Number(multisigInfo.transactionIndex);
// Use specific or current index
const transactionIndex = specificIndex || BigInt(currentIndex);
```
### Error Handling
```typescript theme={"system"}
try {
const result = await function();
} catch (error) {
throw new Error(`Operation failed: ${error.message}`);
}
```
## Multisig Operations
### 1. Create Multisig
```typescript theme={"system"}
interface MultisigParams {
threshold: number; // Always 2 for 2-of-2
members: {
key: PublicKey;
permissions: number;
}[];
timeLock?: number; // Optional timelock
}
```
### 2. Deposit Funds
```typescript theme={"system"}
interface DepositParams {
amount: number; // Amount to deposit
vaultIndex?: number; // Optional vault index
mint?: PublicKey; // Optional SPL token mint
}
```
### 3. Create Transfer
```typescript theme={"system"}
interface TransferParams {
amount: number; // Amount to transfer
recipient: PublicKey; // Recipient address
vaultIndex?: number; // Optional vault index
mint?: PublicKey; // Optional SPL token mint
}
```
## Proposal Lifecycle
1. **Create Proposal**
```typescript theme={"system"}
const proposal = await agent.methods.createMultisigProposal();
```
2. **Approve Proposal**
```typescript theme={"system"}
const approval = await agent.methods.approveMultisigProposal(
proposalIndex // Optional
);
```
3. **Execute Transaction**
```typescript theme={"system"}
const execution = await agent.methods.executeMultisigTransaction(
proposalIndex // Optional
);
```
## Implementation Details
### Member Permissions
```typescript theme={"system"}
const permissions = multisig.types.Permissions.all();
// Includes:
// - INITIATE
// - VOTE
// - EXECUTE
// - CANCEL
```
### Transaction Workflow
1. Create transaction
2. Create proposal
3. Collect approvals
4. Execute transaction
## Error Handling
```typescript theme={"system"}
try {
const tx = await agent.methods.createMultisigProposal();
} catch (error) {
if (error.message.includes("insufficient approvals")) {
// Handle approval issues
} else if (error.message.includes("already executed")) {
// Handle duplicate execution
}
}
```
## Best Practices
1. **Account Management**
* Secure private keys
* Track proposal indices
* Monitor balances
* Verify permissions
2. **Transaction Flow**
* Validate amounts
* Check approvals
* Monitor timeouts
* Handle failures
3. **Security**
* Double-check recipients
* Verify amounts
* Confirm approvals
* Track transactions
## Common Issues
1. **Transaction Failures**
* Insufficient approvals
* Invalid indices
* Balance issues
* Permission errors
2. **Proposal Management**
* Missing approvals
* Invalid sequences
* Timeout issues
* Execution failures
3. **Account Issues**
* Permission problems
* Invalid addresses
* Wrong indices
* State conflicts
## Response Format
### Success Response
```typescript theme={"system"}
{
status: "success",
message: "Operation completed successfully",
transaction: "transaction-signature",
// Additional operation-specific data
}
```
### Error Response
```typescript theme={"system"}
{
status: "error",
message: "Error message",
code: "ERROR_CODE"
}
```
## Technical Notes
1. **Vault Management**
* Vault indices
* Balance tracking
* Token support
* Permission checks
2. **Proposal Tracking**
* Index management
* State tracking
* Approval counting
* Execution status
3. **Transaction Building**
* Instruction creation
* Message compilation
* Signature collection
* Execution verification
## Related Functions
* `getMultisigBalance`: Check vault balance
* `getProposalStatus`: Check proposal state
* `getApprovals`: Get approval count
* `cancelProposal`: Cancel pending proposal
## Resources
* [Squads Protocol Docs](https://docs.squads.so)
* [Squads Multisig SDK](https://github.com/squads-dapp/squads-mpl)
* [Solana Docs](https://docs.solana.com)
* [Transaction Format](https://docs.solana.com/developing/programming-model/transactions)
# Check Token Balances
Source: https://docs.sendai.fun/docs/v2/integrations/token-operations/balance_check
Learn how to check SOL and SPL token balances for any wallet
Check SOL or SPL token balances for any wallet address. The toolkit provides two main methods:
* `getBalance`: Check balances for your own wallet
* `getBalanceOther`: Check balances for other wallets
## Usage
```typescript theme={"system"}
// Check your SOL balance
const solBalance = await agent.methods.getBalance();
// Check your SPL token balance
const tokenBalance = await agent.methods.getBalance(
new PublicKey("token-mint-address")
);
// Check another wallet's SOL balance
const otherSolBalance = await agent.methods.getBalanceOther(
new PublicKey("wallet-address")
);
// Check another wallet's token balance
const otherTokenBalance = await agent.methods.getBalanceOther(
new PublicKey("wallet-address"),
new PublicKey("token-mint-address")
);
```
## Parameters
### getBalance
| Parameter | Type | Required | Description |
| ------------ | --------- | -------- | --------------------------------- |
| tokenAddress | PublicKey | No | Token mint address (omit for SOL) |
### getBalanceOther
| Parameter | Type | Required | Description |
| ------------- | --------- | -------- | --------------------------------- |
| walletAddress | PublicKey | Yes | Wallet to check balance for |
| tokenAddress | PublicKey | No | Token mint address (omit for SOL) |
## Example Prompts
### Natural Language Prompts
```text theme={"system"}
"What's my SOL balance?"
"Check my USDC balance"
"Show the balance of wallet GDEkQF7UMr7RLv1KQKMtm8E2w3iafxJLtyXu3HVQZnME"
"Get BONK token balance for wallet 8x2dR8Mpzuz2YqyZyZjUbYWKSWesBo5jMx2Q9Y86udVk"
```
### LangChain Tool Prompts
For checking your own balance:
```text theme={"system"}
// Check SOL balance
{}
// Check USDC balance
{
"tokenAddress": "EPjFWdd5AufqSSqeM2qN1xzybapC8G4wEGGkZwyTDt1v"
}
```
For checking other wallets:
```text theme={"system"}
// Check other wallet's SOL balance
{
"walletAddress": "GDEkQF7UMr7RLv1KQKMtm8E2w3iafxJLtyXu3HVQZnME"
}
// Check other wallet's token balance
{
"walletAddress": "GDEkQF7UMr7RLv1KQKMtm8E2w3iafxJLtyXu3HVQZnME",
"tokenAddress": "DezXAZ8z7PnrnRJjz3wXBoRgixCa6xjnB7YaB1pPB263"
}
```
## Example Implementation
```typescript theme={"system"}
import { SolanaAgentKit } from "solana-agent-kit";
import { PublicKey } from "@solana/web3.js";
async function checkBalances(agent: SolanaAgentKit) {
// Check own balances
const mySolBalance = await agent.methods.getBalance();
console.log("My SOL balance:", mySolBalance);
const myUsdcBalance = await agent.methods.getBalance(
new PublicKey("EPjFWdd5AufqSSqeM2qN1xzybapC8G4wEGGkZwyTDt1v")
);
console.log("My USDC balance:", myUsdcBalance);
// Check other wallet's balances
const otherWallet = new PublicKey("GDEkQF7UMr7RLv1KQKMtm8E2w3iafxJLtyXu3HVQZnME");
const otherSolBalance = await agent.methods.getBalanceOther(otherWallet);
console.log("Other wallet SOL balance:", otherSolBalance);
const otherUsdcBalance = await agent.methods.getBalanceOther(
otherWallet,
new PublicKey("EPjFWdd5AufqSSqeM2qN1xzybapC8G4wEGGkZwyTDt1v")
);
console.log("Other wallet USDC balance:", otherUsdcBalance);
}
```
## Implementation Details
* Returns balances in UI units (e.g., SOL instead of lamports)
* Handles non-existent token accounts gracefully
* Supports all SPL tokens
* Returns 0 for non-existent accounts
## Error Handling
```typescript theme={"system"}
try {
const balance = await agent.methods.getBalance(tokenMint);
} catch (error) {
if (error.message.includes("invalid account")) {
// Handle invalid addresses
} else if (error.message.includes("not found")) {
// Handle non-existent accounts
}
}
```
## Best Practices
1. **Error Handling**
* Handle non-existent accounts gracefully
* Validate addresses before querying
* Consider caching for frequent checks
2. **Performance**
* Batch balance checks when possible
* Consider using getMultipleAccounts
* Cache results for short periods
3. **UI Display**
* Format numbers appropriately
* Show proper decimal places
* Include token symbols
## Common Token Addresses
* USDC: `EPjFWdd5AufqSSqeM2qN1xzybapC8G4wEGGkZwyTDt1v`
* USDT: `Es9vMFrzaCERmJfrF4H2FYD4KCoNkY11McCe8BenwNYB`
* BONK: `DezXAZ8z7PnrnRJjz3wXBoRgixCa6xjnB7YaB1pPB263`
* RAY: `4k3Dyjzvzp8eMZWUXbBCjEvwSkkk59S5iCNLY3QrkX6R`
* SRM: \`SRMuApVNdxXokk5GT7XD5cUUgXMBCoAz2LHeuAoKWR
# CoinGecko Market Data Integration
Source: https://docs.sendai.fun/docs/v2/integrations/token-operations/coingecko
Learn how to fetch market data, token information, and trends using CoinGecko
Solana Agent Kit provides comprehensive integration with CoinGecko's API for accessing market data, token information, and trending metrics. The integration supports both Pro and Demo API keys with fallback functionality.
## Key Features
* Token price data
* Token information
* Latest pools tracking
* Trending pools analysis
* Top gainers identification
* Trending tokens discovery
* Support for both Pro and Demo API
* Configurable time ranges
## Basic Usage
### Getting Token Price Data
```typescript theme={"system"}
const priceData = await agent.methods.getTokenPriceData([
"EPjFWdd5AufqSSqeM2qN1xzybapC8G4wEGGkZwyTDt1v", // USDC
"So11111111111111111111111111111111111111112" // SOL
]);
```
### Getting Token Information
```typescript theme={"system"}
const tokenInfo = await agent.methods.getTokenInfo(
"EPjFWdd5AufqSSqeM2qN1xzybapC8G4wEGGkZwyTDt1v" // USDC
);
```
### Getting Latest Pools
```typescript theme={"system"}
const latestPools = await agent.methods.getLatestPools();
```
### Getting Trending Pools
```typescript theme={"system"}
const trendingPools = await agent.methods.getTrendingPools("24h");
```
### Getting Top Gainers
```typescript theme={"system"}
const topGainers = await agent.methods.getTopGainers("24h", "all");
```
### Getting Trending Tokens
```typescript theme={"system"}
const trendingTokens = await agent.methods.getTrendingTokens();
```
## Configuration
### API Key Setup
```typescript theme={"system"}
interface CoinGeckoConfig {
COINGECKO_PRO_API_KEY?: string; // Pro API key
COINGECKO_DEMO_API_KEY?: string; // Demo API key
}
```
### Time Range Options
```typescript theme={"system"}
type DurationOptions = "5m" | "1h" | "6h" | "24h"; // For trending pools
type GainerDuration = "1h" | "24h" | "7d" | "14d" | "30d" | "60d" | "1y";
type TopCoinsLimit = 300 | 500 | 1000 | "all";
```
## API Response Types
### Token Price Data
```typescript theme={"system"}
interface TokenPriceData {
[tokenAddress: string]: {
usd: number;
usd_market_cap: number;
usd_24h_vol: number;
usd_24h_change: number;
last_updated_at: number;
}
}
```
### Pool Data
```typescript theme={"system"}
interface PoolData {
pool_address: string;
base_token: {
address: string;
symbol: string;
name: string;
};
quote_token: {
address: string;
symbol: string;
name: string;
};
volume_24h: number;
liquidity_usd: number;
created_at: string;
}
```
## Important Notes
1. **API Key Requirements**
* Pro API key required for advanced endpoints
* Demo API key supports basic endpoints
* Some endpoints work without any key
2. **Rate Limits**
* Pro API: Higher rate limits
* Demo API: Limited requests per minute
* Public API: Lowest rate limits
3. **Data Freshness**
* Price data updated every minute
* Pool data updated every 5 minutes
* Trending data updated every hour
## Best Practices
1. **API Key Management**
```typescript theme={"system"}
// Check for API key availability
if (!agent.methods.config.COINGECKO_PRO_API_KEY) {
// Fallback to demo key if available
if (agent.methods.config.COINGECKO_DEMO_API_KEY) {
// Use demo endpoints
}
}
```
2. **Error Handling**
```typescript theme={"system"}
try {
const data = await agent.methods.getTokenPriceData(tokens);
} catch (error) {
if (error.message.includes("API key")) {
// Handle authentication issues
} else if (error.message.includes("rate limit")) {
// Handle rate limiting
}
}
```
3. **Batch Processing**
```typescript theme={"system"}
// Process tokens in batches to avoid URL length limits
const batchSize = 100;
const batches = chunk(tokenAddresses, batchSize);
const results = await Promise.all(
batches.map(batch => agent.methods.getTokenPriceData(batch))
);
```
## Technical Details
### API Endpoints
```typescript theme={"system"}
const ENDPOINTS = {
PRO: {
BASE: "https://pro-api.coingecko.com/api/v3",
TOKEN_PRICE: "/simple/token_price/solana",
TRENDING_POOLS: "/onchain/networks/solana/trending_pools",
NEW_POOLS: "/onchain/networks/solana/new_pools",
TOP_GAINERS: "/coins/top_gainers_losers",
TRENDING: "/search/trending"
},
DEMO: {
BASE: "https://api.coingecko.com/api/v3",
// Similar endpoints without pro prefix
}
};
```
### Common Parameters
```typescript theme={"system"}
const PARAMS = {
VS_CURRENCY: "usd",
INCLUDE_FIELDS: [
"market_cap",
"24hr_vol",
"24hr_change",
"last_updated_at"
]
};
```
## Example Use Cases
1. **Market Analysis**
```typescript theme={"system"}
// Get price data and trending info
const prices = await agent.methods.getTokenPriceData(tokens);
const trending = await agent.methods.getTrendingTokens();
const gainers = await agent.methods.getTopGainers("24h", 300);
```
2. **Pool Discovery**
```typescript theme={"system"}
// Get new and trending pools
const newPools = await agent.methods.getLatestPools();
const trendingPools = await agent.methods.getTrendingPools("1h");
```
3. **Token Research**
```typescript theme={"system"}
// Get comprehensive token information
const tokenInfo = await agent.methods.getTokenInfo(address);
const priceData = await agent.methods.getTokenPriceData([address]);
```
## Error Messages
Common error messages and their meanings:
```typescript theme={"system"}
const ERROR_MESSAGES = {
NO_API_KEY: "No CoinGecko Pro API key provided",
RATE_LIMIT: "API rate limit exceeded",
INVALID_TOKEN: "Invalid token address",
NETWORK_ERROR: "Failed to fetch data from CoinGecko"
};
```
# Deploy SPL Token
Source: https://docs.sendai.fun/docs/v2/integrations/token-operations/deploy_spl_metaplex
Learn how to deploy SPL tokens with Metaplex metadata
Deploy fungible tokens on Solana with Metaplex metadata support. This guide covers token deployment with customizable parameters including name, symbol, decimals, and initial supply.
## Usage
```typescript theme={"system"}
const result = await agent.methods.deployToken(
"My Token", // name
"https://...", // uri
"MTK", // symbol
9, // decimals (optional)
1000000 // initialSupply (optional)
);
console.log("Token Mint Address:", result.mint.toString());
```
## Parameters
| Parameter | Type | Required | Default | Description |
| ------------- | ------ | -------- | --------- | ----------------------------------------- |
| name | string | Yes | - | The name of your token |
| uri | string | Yes | - | Metadata URI containing token information |
| symbol | string | Yes | - | Trading symbol for your token |
| decimals | number | No | 9 | Number of decimal places |
| initialSupply | number | No | undefined | Initial amount to mint |
## Example Prompts
### Natural Language Prompts
```text theme={"system"}
"Deploy a new token called 'Awesome Token' with symbol 'AWE'"
"Create a fungible token with 6 decimals and initial supply of 1 million"
"Deploy an SPL token named 'Gaming Credits' with metadata URI pointing to my JSON file"
```
### LangChain Tool Prompts
```text theme={"system"}
// Basic token deployment
{
"name": "Awesome Token",
"symbol": "AWE",
"uri": "https://arweave.net/awesome-token.json"
}
// Token with custom decimals
{
"name": "Gaming Credits",
"symbol": "GCRED",
"uri": "https://arweave.net/metadata.json",
"decimals": 6
}
// Token with initial supply
{
"name": "Reward Points",
"symbol": "RWPT",
"uri": "https://arweave.net/reward-points.json",
"decimals": 9,
"initialSupply": 1000000
}
```
The LangChain tool expects a JSON string input with these parameters. The tool will handle parsing and execute the deployment.
## Example Implementation
Here's a complete example showing token deployment with metadata:
```typescript theme={"system"}
import { SolanaAgentKit } from "solana-agent-kit";
async function deployGamingToken(agent: SolanaAgentKit) {
const tokenMetadata = {
name: "Gaming Credits",
symbol: "GCRED",
uri: "https://example.com/token-metadata.json",
decimals: 6,
initialSupply: 1_000_000
};
const result = await agent.methods.deployToken(
tokenMetadata.name,
tokenMetadata.uri,
tokenMetadata.symbol,
tokenMetadata.decimals,
tokenMetadata.initialSupply
);
return result.mint.toString();
}
```
## Metadata URI Format
The metadata URI should point to a JSON file following this format:
```json theme={"system"}
{
"name": "Gaming Credits",
"symbol": "GCRED",
"description": "In-game currency for gaming platform",
"image": "https://example.com/token-image.png",
"external_url": "https://example.com",
"attributes": []
}
```
## LangChain Integration
The toolkit provides a LangChain tool for token deployment:
```typescript theme={"system"}
const deployTokenTool = new SolanaDeployTokenTool(agent);
// Tool input format:
const input = {
name: "My Token",
uri: "https://example.com/metadata.json",
symbol: "MTK",
decimals: 9,
initialSupply: 1000000
};
```
## Implementation Details
* Uses Metaplex's UMI for token creation
* Supports fungible token standard
* Creates token with zero seller fee basis points
* Optional initial supply minting to deployer's wallet
* Confirms transaction with 'finalized' commitment
## Error Handling
The function includes comprehensive error handling:
```typescript theme={"system"}
try {
const result = await agent.methods.deployToken(...);
} catch (error) {
// Handle deployment failures
console.error("Token deployment failed:", error.message);
}
```
## Best Practices
1. **Metadata Preparation**
* Host metadata JSON before deployment
* Use permanent storage solutions (e.g., Arweave)
* Include all required metadata fields
2. **Initial Supply**
* Consider token economics when setting supply
* Account for decimal places in calculations
* Can mint more later if needed
3. **Symbol Selection**
* Use 2-5 characters
* Ensure uniqueness
* Uppercase letters recommended
4. **Security Considerations**
* Secure private keys
* Validate all input parameters
* Use trusted RPC endpoints
# Token Data Retrieval
Source: https://docs.sendai.fun/docs/v2/integrations/token-operations/rugcheck_token_retrieval
Fetch token data using Jupiter API and DexScreener
Fetch token data from Jupiter and DexScreener APIs. This implementation enables token lookup by both address and ticker symbol, providing comprehensive token information for Solana tokens.
## Core Features
1. **Token Data Retrieval**
* Address-based lookup
* Ticker symbol lookup
* Multiple data sources
* Comprehensive token info
2. **API Integration**
* Jupiter API integration
* DexScreener API support
* Error handling
* Data validation
## Usage
### Get Token by Address
```typescript theme={"system"}
// Using mint address
const tokenData = await getTokenDataByAddress(
new PublicKey("EPjFWdd5AufqSSqeM2qN1xzybapC8G4wEGGkZwyTDt1v")
);
// Returns JupiterTokenData
console.log(tokenData);
```
### Get Token by Ticker
```typescript theme={"system"}
// Using ticker symbol
const tokenData = await getTokenDataByTicker("USDC");
// Returns JupiterTokenData or undefined
console.log(tokenData);
```
## Data Structures
### Jupiter Token Data
```typescript theme={"system"}
interface JupiterTokenData {
address: string; // Token mint address
chainId: number; // Solana chain ID
decimals: number; // Token decimals
name: string; // Token name
symbol: string; // Token symbol
logoURI?: string; // Optional logo URL
tags?: string[]; // Optional token tags
extensions?: { // Optional extensions
[key: string]: any;
};
}
```
## Example Prompts
### Natural Language Prompts
```text theme={"system"}
"Get token data for USDC"
"Look up token info by address"
"Find token details for SOL"
"Get metadata for BONK token"
```
### LangChain Tool Prompts
```text theme={"system"}
// Get by ticker
{
"ticker": "USDC"
}
// Direct ticker input
"SOL"
```
## Implementation Details
### Address-based Lookup
```typescript theme={"system"}
async function getTokenDataByAddress(
mint: PublicKey
): Promise {
const response = await fetch(
`https://tokens.jup.ag/token/${mint}`
);
return response.json();
}
```
### Ticker-based Lookup
```typescript theme={"system"}
async function getTokenAddressFromTicker(
ticker: string
): Promise {
// Use DexScreener for address lookup
const response = await fetch(
`https://api.dexscreener.com/latest/dex/search?q=${ticker}`
);
// Filter and sort by FDV
const pairs = data.pairs
.filter(pair => pair.chainId === "solana")
.sort((a, b) => (b.fdv || 0) - (a.fdv || 0));
return pairs[0]?.baseToken.address;
}
```
## Error Handling
```typescript theme={"system"}
try {
const tokenData = await getTokenDataByTicker(ticker);
} catch (error) {
if (error.message.includes("not found")) {
// Handle unknown token
} else if (error.message.includes("API")) {
// Handle API issues
}
}
```
## Best Practices
1. **Data Validation**
* Validate addresses
* Check ticker format
* Handle missing data
* Verify responses
2. **API Management**
* Handle rate limits
* Cache responses
* Monitor errors
* Implement retries
3. **Response Processing**
* Filter results
* Sort by relevance
* Handle duplicates
* Format data
## Common Issues
1. **Token Lookup**
* Unknown tokens
* Invalid addresses
* Missing data
* API timeouts
2. **Data Quality**
* Outdated information
* Missing metadata
* Incorrect symbols
* Logo URL issues
3. **API Issues**
* Rate limiting
* Network errors
* Service outages
* Invalid responses
## Response Format
### Success Response
```typescript theme={"system"}
{
status: "success",
tokenData: {
address: "token-address",
symbol: "TOKEN",
name: "Token Name",
decimals: 6
// ... other fields
}
}
```
### Error Response
```typescript theme={"system"}
{
status: "error",
message: "Error message",
code: "ERROR_CODE"
}
```
## Tips for Token Resolution
1. **Address Resolution**
* Validate format
* Check checksum
* Handle case sensitivity
* Verify network
2. **Ticker Resolution**
* Handle case sensitivity
* Check aliases
* Filter by chain
* Sort by relevance
3. **Data Management**
* Cache common tokens
* Update periodically
* Log resolutions
* Monitor changes
## Common Token Addresses
```typescript theme={"system"}
const COMMON_TOKENS = {
USDC: "EPjFWdd5AufqSSqeM2qN1xzybapC8G4wEGGkZwyTDt1v",
SOL: "So11111111111111111111111111111111111111112",
BONK: "DezXAZ8z7PnrnRJjz3wXBoRgixCa6xjnB7YaB1pPB263"
};
```
## Resources
* [Jupiter API Docs](https://docs.jup.ag/apis/token-list-api)
* [DexScreener API](https://docs.dexscreener.com/api/reference)
* [Solana Token List](https://github.com/solana-labs/token-list)
* [Token Standards](https://spl.solana.com/token)
# Stake SOL
Source: https://docs.sendai.fun/docs/v2/integrations/token-operations/stake_sol
Learn how to stake SOL using Jupiter Validator
Stake your SOL tokens with Jupiter validator to earn staking rewards. This creates liquid staking positions using jupSOL token.
## Usage
```typescript theme={"system"}
// Stake 1 SOL
const signature = await agent.methods.stake(1);
// Stake 0.5 SOL
const signature = await agent.methods.stake(0.5);
```
## Parameters
| Parameter | Type | Required | Description |
| --------- | ------ | -------- | ---------------------- |
| amount | number | Yes | Amount of SOL to stake |
## Example Prompts
### Natural Language Prompts
```text theme={"system"}
"Stake 1 SOL with Jupiter validator"
"Create a liquid staking position with 2.5 SOL"
"Stake half a SOL to earn rewards"
"Convert my SOL to jupSOL by staking 5 SOL"
```
### LangChain Tool Prompts
```text theme={"system"}
// Stake 1 SOL
{
"amount": 1
}
// Stake 2.5 SOL
{
"amount": 2.5
}
// Stake minimum amount
{
"amount": 0.1
}
```
## Example Implementation
```typescript theme={"system"}
import { SolanaAgentKit } from "solana-agent-kit";
async function stakeSOL(agent: SolanaAgentKit) {
try {
// Stake 1 SOL
const signature = await agent.methods.stake(1);
console.log("Staking successful:", signature);
// You'll receive jupSOL tokens in return
const jupsolBalance = await agent.methods.getBalance(
new PublicKey("jupSoLaHXQiZZTSfEWMTRRgpnyFm8f6sZdosWBjx93v")
);
console.log("jupSOL balance:", jupsolBalance);
} catch (error) {
console.error("Staking failed:", error);
}
}
```
## Implementation Details
* Uses Jupiter's validator for staking
* Converts SOL to jupSOL tokens
* Automatically handles transaction versioning
* Includes proper transaction confirmation
* Provides liquid staking position
## Response Format
```typescript theme={"system"}
// Successful response
{
status: "success",
message: "Staked successfully",
transaction: "4VfgJ5vVZxUxefDGqzqkVLHzHxVTyYH9StYyHKgvHYmXJgqJKxEqy9k4Rz9LpXrHF9kUZB7",
amount: 1
}
// Error response
{
status: "error",
message: "Error message here",
code: "ERROR_CODE"
}
```
## Error Handling
```typescript theme={"system"}
try {
const signature = await agent.methods.stake(amount);
} catch (error) {
if (error.message.includes("insufficient funds")) {
// Handle insufficient SOL balance
} else if (error.message.includes("slippage")) {
// Handle price movement
}
}
```
## Best Practices
1. **Balance Verification**
* Check SOL balance before staking
* Account for transaction fees
* Consider minimum stake amounts
2. **Transaction Management**
* Monitor transaction status
* Implement proper error handling
* Use appropriate commitment levels
3. **Security**
* Verify transaction details
* Double-check amounts
* Keep private keys secure
4. **User Experience**
* Show transaction progress
* Display staking rewards
* Explain jupSOL conversion
## Important Notes
* Minimum staking amount: 0.1 SOL
* jupSOL token address: `jupSoLaHXQiZZTSfEWMTRRgpnyFm8f6sZdosWBjx93v`
* Returns liquid staking token (jupSOL)
* Staking rewards auto-compound
* No unbonding period required
## Related Functions
* `getBalance`: Check SOL/jupSOL balances
* `transfer`: Send SOL/jupSOL tokens
* `trade`: Swap between SOL and jupSOL
# TipLink Creation and Transfer
Source: https://docs.sendai.fun/docs/v2/integrations/token-operations/tiplink_operations
Create and manage TipLinks for SOL and SPL token transfers on Solana
Create and manage TipLinks for transferring SOL and SPL tokens on Solana. This implementation enables quick creation of shareable links for token transfers with comprehensive transaction handling and error management.
## Core Features
1. **TipLink Creation**
* SOL transfer support
* SPL token support
* Associated account creation
* Transaction optimization
2. **Transaction Management**
* Compute budget handling
* Minimum balance management
* Multi-instruction bundling
* Confirmation handling
## Usage
### Create SOL TipLink
```typescript theme={"system"}
// Create TipLink for SOL transfer
const { url, signature } = await create_TipLink(
agent,
1.0 // Amount in SOL
);
// Returns TipLink URL and transaction signature
console.log(url, signature);
```
### Create SPL Token TipLink
```typescript theme={"system"}
// Create TipLink for SPL token transfer
const { url, signature } = await create_TipLink(
agent,
100, // Amount in token units
new PublicKey("TokenMintAddress")
);
// Returns TipLink URL and transaction signature
console.log(url, signature);
```
## Data Structures
### TipLink Response
```typescript theme={"system"}
interface TipLinkResponse {
url: string; // TipLink URL
signature: string; // Transaction signature
}
```
## Example Prompts
### Natural Language Prompts
```text theme={"system"}
"Create a TipLink for 1 SOL"
"Generate a link to send 100 USDC"
"Make a TipLink for sending BONK tokens"
"Create a shareable link for 5 SOL"
```
### LangChain Tool Prompts
```text theme={"system"}
// SOL transfer
{
"amount": 1.0
}
// SPL token transfer
{
"amount": 100,
"splmintAddress": "TokenMintAddress123"
}
```
## Implementation Details
### SOL Transfer Implementation
```typescript theme={"system"}
async function createSolTipLink(
agent: SolanaAgentKit,
amount: number
): Promise {
const tiplink = await TipLink.create();
const transaction = new Transaction();
transaction.add(
SystemProgram.transfer({
fromPubkey: agent.methods.wallet_address,
toPubkey: tiplink.keypair.publicKey,
lamports: amount * LAMPORTS_PER_SOL,
})
);
return sendAndConfirmTransaction(...);
}
```
### SPL Token Implementation
```typescript theme={"system"}
async function createSplTipLink(
agent: SolanaAgentKit,
amount: number,
splmintAddress: PublicKey
): Promise {
const tiplink = await TipLink.create();
const transaction = new Transaction();
// Add compute budget instruction
// Add minimum SOL transfer
// Create ATA
// Transfer tokens
return sendAndConfirmTransaction(...);
}
```
## Error Handling
```typescript theme={"system"}
try {
const result = await create_TipLink(agent, amount, splmintAddress);
} catch (error) {
if (error.message.includes("insufficient balance")) {
// Handle insufficient funds
} else if (error.message.includes("invalid account")) {
// Handle invalid accounts
}
}
```
## Best Practices
1. **Transaction Optimization**
* Set compute budget
* Bundle instructions
* Handle confirmations
* Validate inputs
2. **Balance Management**
* Check balances
* Include rent
* Handle decimals
* Validate amounts
3. **Error Management**
* Handle timeouts
* Validate responses
* Log errors
* Implement retries
## Common Issues
1. **Transaction Issues**
* Insufficient balance
* Invalid accounts
* Failed confirmations
* Timeout errors
2. **Token Issues**
* Missing ATAs
* Invalid mints
* Decimal mismatches
* Transfer failures
3. **Network Issues**
* Connection errors
* Confirmation delays
* RPC issues
* Timeout errors
## Response Format
### Success Response
```typescript theme={"system"}
{
status: "success",
url: "https://tiplink.io/t/...",
signature: "transaction-signature",
amount: 1.0,
tokenType: "SOL", // or "SPL"
}
```
### Error Response
```typescript theme={"system"}
{
status: "error",
message: "Error message",
code: "ERROR_CODE"
}
```
## Tips for TipLink Creation
1. **Transaction Building**
* Order instructions properly
* Include all necessary accounts
* Set proper compute budget
* Handle confirmations
2. **Token Handling**
* Check decimals
* Validate addresses
* Create ATAs
* Handle balances
3. **Error Prevention**
* Validate inputs
* Check balances
* Handle timeouts
* Log operations
## Common Token Addresses
```typescript theme={"system"}
const COMMON_TOKENS = {
USDC: "EPjFWdd5AufqSSqeM2qN1xzybapC8G4wEGGkZwyTDt1v",
SOL: "So11111111111111111111111111111111111111112",
BONK: "DezXAZ8z7PnrnRJjz3wXBoRgixCa6xjnB7YaB1pPB263"
};
```
## Resources
* [TipLink API Docs](https://docs.tiplink.io)
* [Solana Web3.js](https://solana-labs.github.io/solana-web3.js)
* [SPL Token](https://spl.solana.com/token)
* [Solana Cookbook](https://solanacookbook.com)
# Transfer Tokens
Source: https://docs.sendai.fun/docs/v2/integrations/token-operations/transfer_assets
Learn how to transfer SOL and SPL tokens to other wallets
Transfer SOL or any SPL token to another wallet address. The function automatically handles both native SOL transfers and SPL token transfers with proper decimal adjustment.
## Usage
```typescript theme={"system"}
// Transfer SOL
const signature = await agent.methods.transfer(
new PublicKey("recipient-address"),
1.5 // amount in SOL
);
// Transfer SPL token
const signature = await agent.methods.transfer(
new PublicKey("recipient-address"),
100, // amount in token units
new PublicKey("token-mint-address")
);
```
## Parameters
| Parameter | Type | Required | Description |
| --------- | --------- | -------- | --------------------------------- |
| to | PublicKey | Yes | Recipient's wallet address |
| amount | number | Yes | Amount to transfer |
| mint | PublicKey | No | Token mint address (omit for SOL) |
## Example Prompts
### Natural Language Prompts
```text theme={"system"}
"Send 1 SOL to wallet 8x2dR8Mpzuz2YqyZyZjUbYWKSWesBo5jMx2Q9Y86udVk"
"Transfer 100 USDC to Dm9Un6DVCrCfkiUmPAhE4zVgxeUK8kZtUAgH3QUoQmHP"
"Send 50 tokens to recipient using mint address EPjFWdd5AufqSSqeM2qN1xzybapC8G4wEGGkZwyTDt1v"
```
### LangChain Tool Prompts
```text theme={"system"}
// SOL transfer
{
"to": "8x2dR8Mpzuz2YqyZyZjUbYWKSWesBo5jMx2Q9Y86udVk",
"amount": 1
}
// USDC transfer
{
"to": "8x2dR8Mpzuz2YqyZyZjUbYWKSWesBo5jMx2Q9Y86udVk",
"amount": 100,
"mint": "EPjFWdd5AufqSSqeM2qN1xzybapC8G4wEGGkZwyTDt1v"
}
// Custom SPL token transfer
{
"to": "8x2dR8Mpzuz2YqyZyZjUbYWKSWesBo5jMx2Q9Y86udVk",
"amount": 50,
"mint": "SENDdRQtYMWaQrBroBrJ2Q53fgVuq95CV9UPGEvpCxa"
}
```
## Example Implementation
Here's a complete example showing different types of transfers:
```typescript theme={"system"}
import { SolanaAgentKit } from "solana-agent-kit";
import { PublicKey } from "@solana/web3.js";
async function executeTransfers(agent: SolanaAgentKit) {
// Transfer SOL
const solTransfer = await agent.methods.transfer(
new PublicKey("recipient"),
1.5 // 1.5 SOL
);
console.log("SOL transfer:", solTransfer);
// Transfer USDC
const usdcTransfer = await agent.methods.transfer(
new PublicKey("recipient"),
100, // 100 USDC
new PublicKey("EPjFWdd5AufqSSqeM2qN1xzybapC8G4wEGGkZwyTDt1v")
);
console.log("USDC transfer:", usdcTransfer);
}
```
## Implementation Details
* Automatically detects SOL vs SPL token transfers
* Handles decimal adjustment for SPL tokens
* Creates Associated Token Accounts if needed
* Uses single-instruction transactions for efficiency
## Error Handling
```typescript theme={"system"}
try {
const signature = await agent.methods.transfer(recipient, amount, mint);
} catch (error) {
if (error.message.includes("insufficient funds")) {
// Handle insufficient balance
} else if (error.message.includes("invalid account")) {
// Handle invalid addresses
}
}
```
## Best Practices
1. **Amount Validation**
* Always verify token decimals
* Check balances before transfer
* Account for transaction fees
2. **Address Validation**
* Validate recipient addresses
* Double-check mint addresses
* Use address checksums
3. **Transaction Management**
* Monitor transaction status
* Implement retry logic
* Handle timeouts appropriately
4. **Security**
* Verify recipient addresses carefully
* Implement confirmation dialogs
* Consider using transaction previews
## Common Token Addresses
* SOL: Native token (no mint address needed)
* USDC: `EPjFWdd5AufqSSqeM2qN1xzybapC8G4wEGGkZwyTDt1v`
* USDT: `Es9vMFrzaCERmJfrF4H2FYD4KCoNkY11McCe8BenwNYB`
* BONK: `DezXAZ8z7PnrnRJjz3wXBoRgixCa6xjnB7YaB1pPB263`
# Introduction to Solana Agent Kit v2
Source: https://docs.sendai.fun/docs/v2/introduction
The open-source toolkit – now more modular and plug-and-play with embedded wallet support
# Solana Agent Kit v2
## Overview
Solana Agent Kit is an open-source toolkit designed to streamline the creation of Solana-powered applications with integrated wallet and transaction capabilities. Version 2 represents a complete evolution of our toolkit, providing developers with a more modular, plug-and-play experience with embedded wallet support.
With over 100,000 downloads, 1,400+ stars, and 800+ forks, Solana Agent Kit v1 saw tremendous adoption among developers but faced two major challenges:
* Input private key method that wasn't 100% secure
* Increasing tooling context and LLM hallucinations due to 100+ aggregate tools
Version 2 directly addresses these issues with a completely redesigned architecture that improves security, reduces hallucinations, and enhances developer experience.
## Key Features of v2
Secure wallet integration with support for Embedded wallets like Turnkey and Privy for enhanced security and human-in-the-loop confirmation.
Modular plugins that reduce hallucinations and context bloat by allowing agents to call only relevant tools for specific tasks.
Mobile-friendly development with a React Native support and out of the box examples
LangChain evals for most tools, significantly increasing the performance of prompts passed to the agent kit.
## Plugin Ecosystem
Solana Agent Kit v2 introduces a powerful plugin system that lets you install only what you need:
* **Token Plugin** (`@solana-agent-kit/plugin-token`): Transfer assets, swap tokens, bridge assets, and perform rug checks
* **NFT Plugin** (`@solana-agent-kit/plugin-nft`): Mint, list, and manage Metaplex NFT metadata
* **DeFi Plugin** (`@solana-agent-kit/plugin-defi`): Stake, lend, borrow, and trade on spot and perpetual markets
* **Misc Plugin** (`@solana-agent-kit/plugin-misc`): Request airdrops, access price feeds, get token information, and register domains
* **Blinks Plugin** (`@solana-agent-kit/plugin-blinks`): Interact with arcade games and other Solana protocol blinks
## Core Architecture
Solana Agent Kit v2 is built around a modular, plugin-based architecture:
```mermaid theme={"system"}
graph TD
A[Application] --> B[Agent Core]
B --> C[Embedded Wallets]
C --> CT[Turnkey]
C --> CP[Privy]
B --> D[Plugin System]
D --> E[DeFi Plugin]
D --> F[Token Plugin]
D --> G[NFT Plugin]
D --> H[Misc Plugin]
D --> I[Blinks Plugin]
B --> J[Adapters]
J --> K[MCP]
J --> L[N8N]
```
The architecture delivers significant improvements:
* **Reduced Hallucinations**: By limiting LLM exposure to only relevant tools
* **Enhanced Security**: Private keys never need to be directly input
* **Human-in-the-loop**: Optional transaction confirmation through Privy integration
* **Fine-grained Rules**: Advanced control through Turnkey integration
* **Better Performance**: Improved prompts and comprehensive evaluations
## Getting Started
Check out the [Quick Start Guide](docs/v2/setup/quickstart) for more detailed setup instructions and to create your first agent-powered application in minutes.
For complete working examples, see our [implementation examples](/docs/v2/examples/embedded-wallets/privy) that demonstrate the Agent Kit in action.
## Key Integrations
Solana Agent Kit v2 integrates with powerful tools to enhance your applications:
* **[Turnkey](https://turnkey.com)**: Implement fine-grained rules for your autonomous agent, enhancing security
* **[Privy](https://privy.io)**: Enable human-in-the-loop functionality where the agent waits for transaction confirmation
* **[LangChain](https://langchain.com)**: Leverage comprehensive evals to ensure optimal prompt performance
## Community and Support
Join our growing community of developers building with Solana Agent Kit:
* [GitHub Repository](https://github.com/sendaifun/solana-agent-kit)
# Blinks Plugin
Source: https://docs.sendai.fun/docs/v2/plugins/blinks/blinks-plugin-intro
Quick, fun interactions on Solana using Solana blinks
# Blinks Plugin
The `@solana-agent-kit/plugin-blinks` plugin enables your agent to interact with Solana blinks, providing quick and fun ways to engage with the Solana ecosystem.
## Installation
Install the plugin alongside the core Solana Agent Kit:
```bash theme={"system"}
npm install solana-agent-kit @solana-agent-kit/plugin-blinks
```
## Integration
Add the Blinks plugin to your agent:
```javascript theme={"system"}
import { SolanaAgentKit } from "solana-agent-kit";
import BlinksPlugin from "@solana-agent-kit/plugin-blinks";
const agent = new SolanaAgentKit(
wallet,
"YOUR_RPC_URL",
{
OPENAI_API_KEY: "YOUR_OPENAI_API_KEY",
}
).use(BlinksPlugin);
```
## Available Tools
| Tool Name | Description |
| ----------------- | ---------------------------------------------------- |
| `sendArcadeGames` | Integrate with arcade games on the Solana blockchain |
# DeFi Plugin
Source: https://docs.sendai.fun/docs/v2/plugins/defi/defi-plugin-intro
Interact with DeFi protocols on the Solana blockchain
# DeFi Plugin
The `@solana-agent-kit/plugin-defi` plugin provides a comprehensive suite of tools and actions to interact with various DeFi protocols on the Solana blockchain. It enables users to perform a wide range of DeFi operations, including trading, lending, borrowing, and cross-chain bridging.
## Installation
Install the plugin alongside the core Solana Agent Kit:
```bash theme={"system"}
npm install solana-agent-kit @solana-agent-kit/plugin-defi
```
## Integration
Add the DeFi plugin to your agent:
```javascript theme={"system"}
import { SolanaAgentKit } from "solana-agent-kit";
import DefiPlugin from "@solana-agent-kit/plugin-defi";
const agent = new SolanaAgentKit(
wallet,
"YOUR_RPC_URL",
{
OPENAI_API_KEY: "YOUR_OPENAI_API_KEY",
}
).use(DefiPlugin);
```
## Available Tools
### Adrena
| Tool Name | Description |
| --------------------- | ----------------------------- |
| `openPerpTradeLong` | Open a long perpetual trade |
| `openPerpTradeShort` | Open a short perpetual trade |
| `closePerpTradeLong` | Close a long perpetual trade |
| `closePerpTradeShort` | Close a short perpetual trade |
### Flash
| Tool Name | Description |
| ----------------- | ------------------- |
| `flashOpenTrade` | Open a flash trade |
| `flashCloseTrade` | Close a flash trade |
### Lulo
| Tool Name | Description |
| -------------- | ------------------ |
| `lendAsset` | Lend an asset |
| `luloLend` | Lend using Lulo |
| `luloWithdraw` | Withdraw from Lulo |
### Manifest
| Tool Name | Description |
| ---------------------- | --------------------------- |
| `limitOrder` | Create a limit order |
| `cancelAllOrders` | Cancel all orders |
| `withdrawAll` | Withdraw all assets |
| `manifestCreateMarket` | Create a market on Manifest |
### Debridge
| Tool Name | Description |
| -------------------------------- | ------------------------------------------ |
| `checkDebridgeTransactionStatus` | Check the status of a Debridge transaction |
| `createDebridgeBridgeOrder` | Create a bridge order |
| `executeDebridgeBridgeOrder` | Execute a bridge order |
| `getBridgeQuote` | Get a bridge quote |
| `getDebridgeSupportedChains` | Get supported chains for Debridge |
| `getDebridgeTokensInfo` | Get token information for Debridge |
### Drift
| Tool Name | Description |
| -------------------------------- | ------------------------------------------------- |
| `driftPerpTrade` | Open a perpetual trade on Drift |
| `calculatePerpMarketFundingRate` | Calculate the funding rate for a perpetual market |
| `createVault` | Create a vault |
| `createDriftUserAccount` | Create a Drift user account |
| `depositIntoVault` | Deposit into a vault |
| `withdrawFromDriftVault` | Withdraw from a Drift vault |
| `stakeToDriftInsuranceFund` | Stake to the Drift insurance fund |
### Openbook
| Tool Name | Description |
| ---------------------- | ----------------------------------- |
| `openbookCreateMarket` | Create a market on the Openbook DEX |
### Fluxbeam
| Tool Name | Description |
| -------------------- | ------------------------- |
| `fluxBeamCreatePool` | Create a pool on FluxBeam |
### Orca
| Tool Name | Description |
| --------------------------------------- | ----------------------------------------------- |
| `orcaClosePosition` | Close a position on Orca |
| `orcaCreateCLMM` | Create a CLMM on Orca |
| `orcaOpenCenteredPositionWithLiquidity` | Open a centered position with liquidity on Orca |
### Ranger
| Tool Name | Description |
| ---------------------------- | ----------------------------------------------- |
| `openPerpTradeRanger` | Open a new perpetual trading position |
| `closePerpTradeRanger` | Close an existing perpetual trading position |
| `increasePerpPositionRanger` | Increase an existing perpetual position |
| `decreasePerpPositionRanger` | Decrease an existing perpetual position |
| `withdrawBalanceRanger` | Withdraw available balance from Ranger |
| `withdrawCollateralRanger` | Withdraw collateral from an existing position |
| `getPositions` | Get all positions for a specific wallet |
| `getQuote` | Get a quote for opening or modifying a position |
| `getTradeHistory` | Get the trade history for a specific wallet |
| `getLiquidationsLatest` | Get the latest liquidation events |
| `getLiquidationsTotals` | Get total liquidation statistics |
| `getFundingRateArbs` | Get funding rate arbitrage opportunities |
| `getFundingRatesAccumulated` | Get accumulated funding rates |
| `getBorrowRatesAccumulated` | Get accumulated borrow rates |
### Raydium
| Tool Name | Description |
| ----------------------------- | ---------------------------------------------------------------------------- |
| `raydiumCreateAmmV4` | Create an AMM v4 (Legacy) pool with OpenBook market integration |
| `raydiumCreateClmm` | Create a Concentrated Liquidity Market Maker (CLMM) pool with custom ranges |
| `raydiumCreateCpmm` | Create a Constant Product Market Maker (CPMM) pool with Token-2022 support |
| `raydiumCreateLaunchlabToken` | Create and launch tokens with automatic pool migration and buy functionality |
### Solayer
| Tool Name | Description |
| ------------------ | ---------------------- |
| `stakeWithSolayer` | Stake SOL with Solayer |
### Voltr
| Tool Name | Description |
| ------------------------ | ----------------------------- |
| `voltrDepositStrategy` | Deposit into a Voltr strategy |
| `voltrGetPositionValues` | Get position values for Voltr |
### Sanctum
| Tool Name | Description |
| ------------------------ | -------------------------------- |
| `sanctumSwapLST` | Swap LSTs on Sanctum |
| `sanctumAddLiquidity` | Add liquidity on Sanctum |
| `sanctumRemoveLiquidity` | Remove liquidity on Sanctum |
| `sanctumGetLSTAPY` | Get the APY for LSTs on Sanctum |
| `sanctumGetLSTPrice` | Get the price of LSTs on Sanctum |
| `sanctumGetLSTTVL` | Get the TVL for LSTs on Sanctum |
| `sanctumGetOwnedLST` | Get owned LSTs on Sanctum |
For more detailed information, please refer to the full documentation at [docs.sendai.fun](https://docs.sendai.fun).
# Misc Plugin
Source: https://docs.sendai.fun/docs/v2/plugins/misc/misc-plugin-intro
Miscellaneous tools and actions for the Solana blockchain
# Misc Plugin
The `@solana-agent-kit/plugin-misc` plugin provides a set of miscellaneous tools and actions for interacting with various services and protocols on the Solana blockchain. It includes functionalities for domain registration, webhook creation, and more.
## Installation
Install the plugin alongside the core Solana Agent Kit:
```bash theme={"system"}
npm install solana-agent-kit @solana-agent-kit/plugin-misc
```
## Integration
Add the Misc plugin to your agent:
```javascript theme={"system"}
import { SolanaAgentKit } from "solana-agent-kit";
import MiscPlugin from "@solana-agent-kit/plugin-misc";
const agent = new SolanaAgentKit(
wallet,
"YOUR_RPC_URL",
{
OPENAI_API_KEY: "YOUR_OPENAI_API_KEY",
}
).use(MiscPlugin);
```
## Available Tools
### AllDomains
| Tool Name | Description |
| ----------------------- | ------------------------------------------------ |
| `getAllDomainsTLDs` | Retrieve all top-level domains |
| `getOwnedAllDomains` | Get all domains owned by a specific wallet |
| `getOwnedDomainsForTLD` | Get domains owned by a wallet for a specific TLD |
| `resolveDomain` | Resolve a domain to get its owner's public key |
### Allora
| Tool Name | Description |
| ----------------------- | ------------------------------ |
| `getAllTopics` | Retrieve all topics |
| `getInferenceByTopicId` | Get inference data by topic ID |
| `getPriceInference` | Get price inference data |
### Gibwork
| Tool Name | Description |
| ------------------- | ---------------------------- |
| `createGibworkTask` | Create a new task on Gibwork |
### Helius
| Tool Name | Description |
| ------------------ | -------------------------------------------- |
| `createWebhook` | Create a new webhook to monitor transactions |
| `deleteWebhook` | Delete an existing webhook |
| `getAssetsByOwner` | Get assets owned by a specific wallet |
| `getWebhook` | Retrieve webhook details |
| `parseTransaction` | Parse a Solana transaction |
### Alchemy
The Alchemy tools are additive to the existing Helius and RPC provider integrations. They do not replace any existing provider and intentionally do not include DAS/NFT asset tools.
Configure Alchemy credentials only when using these tools. RPC, price, and portfolio helpers use `ALCHEMY_API_KEY`; Notify webhook helpers use `ALCHEMY_NOTIFY_AUTH_TOKEN`.
| Tool Name | Description |
| ------------------------------------- | --------------------------------------------------------------- |
| `alchemySolanaRpcRequest` | Call Solana JSON-RPC through Alchemy |
| `alchemyGetPriorityFeeEstimate` | Fetch Solana priority fee estimates through Alchemy |
| `alchemyGetTokenPricesBySymbol` | Fetch current token prices by symbol |
| `alchemyGetTokenPricesByAddress` | Fetch current token prices by network and token address |
| `alchemyGetHistoricalTokenPrices` | Fetch historical token prices |
| `alchemyGetPortfolioTokens` | Fetch wallet token balances, metadata, and prices |
| `alchemyCreateAddressActivityWebhook` | Create a Solana Address Activity webhook |
| `alchemyDeleteWebhook` | Delete an Alchemy Notify webhook |
| `alchemyListWebhooks` | List team webhooks |
| `alchemyUpdateWebhookAddresses` | Add or remove addresses from an Address Activity webhook |
| `alchemyReplaceWebhookAddresses` | Replace the full address list for an Address Activity webhook |
| `alchemyVerifyWebhookSignature` | Verify `X-Alchemy-Signature` webhook payloads |
| `getAlchemySolanaEndpointInfo` | Get RPC, WebSocket, gRPC, and x402 reference endpoint templates |
### SNS
| Tool Name | Description |
| ---------------------------- | ----------------------------------- |
| `resolveSolDomain` | Resolve a .sol domain |
| `registerDomain` | Register a new .sol domain |
| `getPrimaryDomain` | Get the primary domain for a wallet |
| `getMainAllDomainsDomain` | Get the main domain for AllDomains |
| `getAllRegisteredAllDomains` | Get all registered domains |
### Squads
| Tool Name | Description |
| ------------------------------ | --------------------------------------- |
| `transferFromMultisigTreasury` | Transfer funds from a multisig treasury |
| `rejectMultisigProposal` | Reject a multisig proposal |
| `executeMultisigProposal` | Execute a multisig proposal |
| `depositToMultisigTreasury` | Deposit funds into a multisig treasury |
| `createMultisig` | Create a new multisig account |
| `createMultisigProposal` | Create a new multisig proposal |
### Coingecko
| Tool Name | Description |
| ---------------------------- | ------------------------------------ |
| `getCoingeckoTokenInfo` | Get token information from Coingecko |
| `getCoingeckoTopGainers` | Get top gaining tokens |
| `getCoingeckoLatestPools` | Get the latest pools |
| `getCoingeckoTrendingPools` | Get trending pools |
| `getCoingeckoTokenPriceData` | Get token price data |
| `getCoingeckoTrendingTokens` | Get trending tokens |
### ElfaAi
| Tool Name | Description |
| ------------------------------ | ---------------------------------------- |
| `getElfaAiApiKeyStatus` | Check the status of an ElfaAi API key |
| `getSmartMentions` | Get smart mentions using ElfaAi |
| `getSmartTwitterAccountStats` | Get Twitter account stats using ElfaAi |
| `getTopMentionsByTicker` | Get top mentions by ticker using ElfaAi |
| `getTrendingTokensUsingElfaAi` | Get trending tokens using ElfaAi |
| `pingElfaAiApi` | Ping the ElfaAi API |
| `searchMentionsByKeywords` | Search mentions by keywords using ElfaAi |
### Switchboard
| Tool Name | Description |
| --------------------------- | --------------------------- |
| `simulate_switchboard_feed` | Simulate a switchboard feed |
### Tiplink
| Tool Name | Description |
| ---------------- | ---------------- |
| `create_TipLink` | Create a tiplink |
### Crossmint
| Tool Name | Description |
| -------------- | ----------------- |
| `checkout` | Checkout an order |
| `confirmOrder` | Confirm an order |
### HOMOMEMETUS
| Tool Name | Description |
| ------------------------------ | ---------------------------------------------------------------- |
| `fetch_oldest_tokens` | Fetch the oldest token list among tokens created in the last 24h |
| `fetch_recent_tokens` | Fetch the most recent tokens created in the last 24h |
| `fetch_token_by_creator` | Fetch tokens filtered by a specific creator |
| `fetch_token_by_initializer` | Filter tokens initialized by a specific address |
| `fetch_token_by_mint` | Filter tokens by a specific token (mint) address |
| `fetch_token_by_signature` | Filter tokens by a specific transaction signature |
| `fetch_tokens_by_creators` | Filter tokens created by a list of creator addresses |
| `fetch_tokens_by_initializers` | Filter tokens initialized by a list of addresses |
| `fetch_tokens_by_duration` | Filter tokens by creation time |
| `fetch_tokens_by_market_cap` | Filter tokens by their market cap |
| `fetch_tokens_by_metadata` | Filter tokens by token metadata |
| `fetch_tokens_by_mints` | Filter tokens by a list of mint addresses |
### OTTERSEC
| Tool Name | Description |
| --------------------------------- | --------------------------------------- |
| `create_verification_pda` | Generate a PDA for program verification |
| `decode_verification_pda_data` | Decode the PDA data composed in hex |
| `get_program_build_log` | Get build logs for a solana program |
| `get_program_verification_status` | Get program verification status |
| `get_verification_job_status` | Get status of an async verification job |
| `get_verified_programs` | Get list of all verified programs |
| `verify_program` | Verify a Solana program |
For more detailed information, please refer to the full documentation at [docs.sendai.fun](https://docs.sendai.fun).
# NFT Plugin
Source: https://docs.sendai.fun/docs/v2/plugins/nft/nft-plugin-intro
Interact with NFTs on the Solana blockchain
# NFT Plugin
The `@solana-agent-kit/plugin-nft` plugin provides a set of tools and actions to interact with NFTs on the Solana blockchain.
## Installation
Install the plugin alongside the core Solana Agent Kit:
```bash theme={"system"}
npm install solana-agent-kit @solana-agent-kit/plugin-nft
```
## Integration
Add the NFT plugin to your agent:
```javascript theme={"system"}
import { SolanaAgentKit } from "solana-agent-kit";
import NFTPlugin from "@solana-agent-kit/plugin-nft";
const agent = new SolanaAgentKit(
wallet,
"YOUR_RPC_URL",
{
OPENAI_API_KEY: "YOUR_OPENAI_API_KEY",
}
).use(NFTPlugin);
```
## Available Tools
### Metaplex
| Tool Name | Description |
| ---------------------- | --------------------------- |
| `deployCollection` | Deploy a new NFT collection |
| `deployToken` | Deploy a new NFT token |
| `getAsset` | Retrieve asset details |
| `getAssetsByAuthority` | Get assets by authority |
| `getAssetsByCreator` | Get assets by creator |
| `mintCollectionNFT` | Mint an NFT in a collection |
| `searchAssets` | Search for assets |
### Magic Eden
| Tool Name | Description |
| -------------------------------- | ----------------------------------------------------- |
| `listMagicEdenNFT` | List an NFT for sale on Magic Eden |
| `bidOnMagicEdenNFT` | Place a bid on a listed NFT |
| `getMagicEdenCollectionListings` | Get available NFTs in a collection |
| `getMagicEdenCollectionStats` | Get collection statistics (floor price, volume, etc.) |
| `getPopularMagicEdenCollections` | Discover trending NFT collections |
### Tensor
| Tool Name | Description |
| ---------------- | --------------------- |
| `listNFTForSale` | List an NFT for sale |
| `cancelListing` | Cancel an NFT listing |
### 3Land
| Tool Name | Description |
| ----------------------- | ---------------------------- |
| `create3LandCollection` | Create a collection on 3Land |
| `create3LandSingle` | Create a single NFT on 3Land |
# Token Plugin
Source: https://docs.sendai.fun/docs/v2/plugins/token/token-plugin-intro
Interact with, create and transfer tokens on the Solana blockchain
# Token Plugin
The `@solana-agent-kit/plugin-token` plugin provides a set of tools and actions to interact with, create and transfer tokens on the Solana blockchain.
## Installation
Install the plugin alongside the core Solana Agent Kit:
```bash theme={"system"}
npm install solana-agent-kit @solana-agent-kit/plugin-token
```
## Integration
Add the Token plugin to your agent:
```javascript theme={"system"}
import { SolanaAgentKit } from "solana-agent-kit";
import TokenPlugin from "@solana-agent-kit/plugin-token";
const agent = new SolanaAgentKit(
wallet,
"YOUR_RPC_URL",
{
OPENAI_API_KEY: "YOUR_OPENAI_API_KEY",
}
).use(TokenPlugin);
```
## Available Tools
### Dexscreener
| Tool Name | Description |
| --------------------------- | -------------------------------------------------- |
| `getTokenDataByAddress` | Get token data using a token's mint address |
| `getTokenAddressFromTicker` | Get a token's mint address using its ticker symbol |
### Jupiter
| Tool Name | Description |
| ------------------ | -------------------------------------------- |
| `fetchPrice` | Get the current price of a token in USDC |
| `stakeWithJup` | Stake SOL to receive jupSOL |
| `trade` | Swap tokens using Jupiter's aggregator |
| `getTokenByTicker` | Get token data using a token's ticker symbol |
### Light Protocol
| Tool Name | Description |
| ----------------------- | ---------------------------------------------------------------- |
| `sendCompressedAirdrop` | Send compressed token airdrops to multiple addresses efficiently |
### Solana
| Tool Name | Description |
| ------------------------- | ---------------------------------------------- |
| `closeEmptyTokenAccounts` | Close empty token accounts to reclaim rent |
| `getTPS` | Get current transactions per second on Solana |
| `get_balance` | Get SOL or token balance for a wallet |
| `get_balance_other` | Get balance for another wallet address |
| `get_token_balance` | Get detailed token balances including metadata |
| `request_faucet_funds` | Request tokens from a faucet (devnet/testnet) |
| `transfer` | Transfer SOL or tokens to another address |
| `getWalletAddress` | Get the wallet address of the current user |
### Mayan
| Tool Name | Description |
| --------- | --------------------------------------- |
| `swap` | Cross-chain token swaps using Mayan DEX |
### Pumpfun
| Tool Name | Description |
| -------------------- | ----------------------------- |
| `launchPumpFunToken` | Launch new tokens on pump.fun |
### Pyth
| Tool Name | Description |
| ---------------------- | ------------------------------------------ |
| `fetchPythPrice` | Get real-time price data from Pyth oracles |
| `fetchPythPriceFeedID` | Get price feed ID for a token |
### Rugcheck
| Tool Name | Description |
| -------------------------- | ------------------------------------ |
| `fetchTokenDetailedReport` | Get detailed token security analysis |
| `fetchTokenReportSummary` | Get summarized token security report |
### Solutiofi
| Tool Name | Description |
| --------------- | -------------------------------------- |
| `burnTokens` | Burn tokens using Solutiofi |
| `closeAccounts` | Close token accounts using Solutiofi |
| `mergeTokens` | Merge multiple tokens into one |
| `spreadToken` | Split tokens across multiple addresses |
For more detailed information, please refer to the full documentation at [docs.sendai.fun](https://docs.sendai.fun).
# Embedded wallets
Source: https://docs.sendai.fun/docs/v2/setup/embedded-wallets
## Embedded Wallet Integration
For a better user experience, you can integrate with embedded wallets like Privy instead of directly handling private keys. Here's how to use Solana Agent Kit with the Solana wallet adapter:
```javascript theme={"system"}
import { SolanaAgentKit, createVercelAITools } from "solana-agent-kit";
import TokenPlugin from "@solana-agent-kit/plugin-token";
import DefiPlugin from "@solana-agent-kit/plugin-defi";
import BlinksPlugin from "@solana-agent-kit/plugin-blinks";
import MiscPlugin from "@solana-agent-kit/plugin-misc";
import { Connection, PublicKey } from "@solana/web3.js";
// Assuming you have a wallet from Privy or another wallet adapter
const wallet = wallets[0]; // From useSolanaWallets() or similar
// Create an agent with the wallet adapter
const agent = new SolanaAgentKit(
{
publicKey: new PublicKey(wallet.address),
signTransaction: async (tx) => {
const signed = await wallet.signTransaction(tx);
return signed;
},
signMessage: async (msg) => {
const signed = await wallet.signMessage(msg);
return signed;
},
sendTransaction: async (tx) => {
const connection = new Connection(
"YOUR_RPC_URL",
"confirmed"
);
return await wallet.sendTransaction(tx, connection);
},
signAllTransactions: async (txs) => {
const signed = await wallet.signAllTransactions(txs);
return signed;
},
signAndSendTransaction: async (tx) => {
const signed = await wallet.signTransaction(tx);
const connection = new Connection(
"YOUR_RPC_URL",
"confirmed"
);
const sig = await wallet.sendTransaction(signed, connection);
return { signature: sig };
},
},
"YOUR_RPC_URL",
{}
)
.use(TokenPlugin)
.use(DefiPlugin)
.use(BlinksPlugin)
.use(MiscPlugin);
// Create tools for your AI model
const tools = createVercelAITools(agent, agent.actions);
```
# Keypair
Source: https://docs.sendai.fun/docs/v2/setup/keypair
Here's how to initialize the agent with a keypair wallet:
```javascript theme={"system"}
import { SolanaAgentKit, createVercelAITools, KeypairWallet } from "solana-agent-kit";
import TokenPlugin from "@solana-agent-kit/plugin-token";
import NFTPlugin from "@solana-agent-kit/plugin-nft";
import DefiPlugin from "@solana-agent-kit/plugin-defi";
import MiscPlugin from "@solana-agent-kit/plugin-misc";
import BlinksPlugin from "@solana-agent-kit/plugin-blinks";
import { Keypair } from "@solana/web3.js";
import bs58 from "bs58";
// Create a keypair from a private key
const keyPair = Keypair.fromSecretKey(bs58.decode("YOUR_SECRET_KEY"));
const wallet = new KeypairWallet(keyPair);
// Initialize with wallet and optional RPC URL
const agent = new SolanaAgentKit(
wallet,
"YOUR_RPC_URL",
{
OPENAI_API_KEY: "YOUR_OPENAI_API_KEY",
}
)
.use(TokenPlugin)
.use(NFTPlugin)
.use(DefiPlugin)
.use(MiscPlugin)
.use(BlinksPlugin);
// Create Vercel AI tools (or use createLangchainTools for LangChain)
const tools = createVercelAITools(agent, agent.actions);
```
# Quickstart
Source: https://docs.sendai.fun/docs/v2/setup/quickstart
# Quick Start Guide
This guide will help you set up Solana Agent Kit v2 in your application, including installation, initialization, and embedded wallet integration.
## Core Installation
First, install the core Solana Agent Kit package:
```bash theme={"system"}
npm install solana-agent-kit
```
## Install Plugins
You can choose to install specific plugins based on your needs or install all available plugins:
```bash theme={"system"}
npm install @solana-agent-kit/plugin-token @solana-agent-kit/plugin-nft @solana-agent-kit/plugin-defi @solana-agent-kit/plugin-misc @solana-agent-kit/plugin-blinks
```
## Plugin Navigation
Transfer tokens, check balances, and deploy tokens with the Token Plugin.
Create collections, mint NFTs, and manage digital assets with the NFT Plugin.
Swap tokens, provide liquidity, and interact with DeFi protocols using the DeFi Plugin.
Execute fast and atomic transactions with the Blinks Plugin.
## Basic Initialization
Here's how to initialize the agent with a keypair wallet:
```javascript theme={"system"}
import { SolanaAgentKit, createVercelAITools, KeypairWallet } from "solana-agent-kit";
import TokenPlugin from "@solana-agent-kit/plugin-token";
import NFTPlugin from "@solana-agent-kit/plugin-nft";
import DefiPlugin from "@solana-agent-kit/plugin-defi";
import MiscPlugin from "@solana-agent-kit/plugin-misc";
import BlinksPlugin from "@solana-agent-kit/plugin-blinks";
import { Keypair } from "@solana/web3.js";
import bs58 from "bs58";
// Create a keypair from a private key
const keyPair = Keypair.fromSecretKey(bs58.decode("YOUR_SECRET_KEY"));
const wallet = new KeypairWallet(keyPair);
// Initialize with wallet and optional RPC URL
const agent = new SolanaAgentKit(
wallet,
"YOUR_RPC_URL",
{
OPENAI_API_KEY: "YOUR_OPENAI_API_KEY",
}
)
.use(TokenPlugin)
.use(NFTPlugin)
.use(DefiPlugin)
.use(MiscPlugin)
.use(BlinksPlugin);
// Create Vercel AI tools (or use createLangchainTools for LangChain)
const tools = createVercelAITools(agent, agent.actions);
```
## Embedded Wallet Integration
For a better user experience, you can integrate with embedded wallets like Privy instead of directly handling private keys. Here's how to use Solana Agent Kit with the Solana wallet adapter:
```javascript theme={"system"}
import { SolanaAgentKit, createVercelAITools } from "solana-agent-kit";
import TokenPlugin from "@solana-agent-kit/plugin-token";
import DefiPlugin from "@solana-agent-kit/plugin-defi";
import BlinksPlugin from "@solana-agent-kit/plugin-blinks";
import MiscPlugin from "@solana-agent-kit/plugin-misc";
import { Connection, PublicKey } from "@solana/web3.js";
// Assuming you have a wallet from Privy or another wallet adapter
const wallet = wallets[0]; // From useSolanaWallets() or similar
// Create an agent with the wallet adapter
const agent = new SolanaAgentKit(
{
publicKey: new PublicKey(wallet.address),
signTransaction: async (tx) => {
const signed = await wallet.signTransaction(tx);
return signed;
},
signMessage: async (msg) => {
const signed = await wallet.signMessage(msg);
return signed;
},
sendTransaction: async (tx) => {
const connection = new Connection(
"YOUR_RPC_URL",
"confirmed"
);
return await wallet.sendTransaction(tx, connection);
},
signAllTransactions: async (txs) => {
const signed = await wallet.signAllTransactions(txs);
return signed;
},
signAndSendTransaction: async (tx) => {
const signed = await wallet.signTransaction(tx);
const connection = new Connection(
"YOUR_RPC_URL",
"confirmed"
);
const sig = await wallet.sendTransaction(signed, connection);
return { signature: sig };
},
},
"YOUR_RPC_URL",
{}
)
.use(TokenPlugin)
.use(DefiPlugin)
.use(BlinksPlugin)
.use(MiscPlugin);
// Create tools for your AI model
const tools = createVercelAITools(agent, agent.actions);
```
## MCP Adapter Integration
The Model Context Protocol (MCP) adapter allows you to create an MCP server that Claude Desktop can use to interact with the Solana blockchain. This provides a standardized way for Claude to access Solana functionality.
### Installation
```bash theme={"system"}
npm install solana-agent-kit @solana-agent-kit/plugin-token @solana-agent-kit/adapter-mcp dotenv
```
### Basic Setup
Create an `index.js` file with the following code:
```javascript theme={"system"}
import { SolanaAgentKit, KeypairWallet } from "solana-agent-kit";
import { startMcpServer } from '@solana-agent-kit/adapter-mcp';
import TokenPlugin from '@solana-agent-kit/plugin-token';
import * as dotenv from "dotenv";
// Load environment variables
dotenv.config();
// Initialize wallet with private key from environment
const wallet = new KeypairWallet(process.env.SOLANA_PRIVATE_KEY);
// Create agent with plugin
const agent = new SolanaAgentKit(
wallet,
process.env.RPC_URL,
{
OPENAI_API_KEY: process.env.OPENAI_API_KEY,
},
).use(TokenPlugin);
// Select which actions to expose to the MCP server
const finalActions = {
BALANCE_ACTION: agent.actions.find((action) => action.name === "BALANCE_ACTION")!,
TOKEN_BALANCE_ACTION: agent.actions.find((action) => action.name === "TOKEN_BALANCE_ACTION")!,
GET_WALLET_ADDRESS_ACTION: agent.actions.find((action) => action.name === "GET_WALLET_ADDRESS_ACTION")!,
};
// Start the MCP server
startMcpServer(finalActions, agent, { name: "solana-agent", version: "0.0.1" });
```
### Claude Desktop Configuration
Configure Claude Desktop to use your MCP server:
1. Edit the Claude Desktop configuration file:
**MacOS:**
```bash theme={"system"}
code ~/Library/Application\ Support/Claude/claude_desktop_config.json
```
**Windows:**
```bash theme={"system"}
code $env:AppData\Claude\claude_desktop_config.json
```
2. Add your MCP server configuration:
```json theme={"system"}
{
"mcpServers": {
"agent-kit": {
"command": "node",
"env": {
"RPC_URL": "your_solana_rpc_url_here",
"SOLANA_PRIVATE_KEY": "your_private_key_here"
},
"args": [
"/ABSOLUTE/PATH/TO/YOUR/MCP/PROJECT/FILE"
]
}
}
}
```
3. Restart Claude Desktop after updating the configuration.
This integration allows Claude to interact directly with your Solana agent through the MCP protocol, providing seamless blockchain functionality within conversations.
# React native
Source: https://docs.sendai.fun/docs/v2/setup/react-native
## React Native Integration
For React Native applications, you can integrate Solana Agent Kit with wallet adapters that work in a mobile environment. Here's a simplified example using a custom wallet hook:
```javascript theme={"system"}
import { useCallback, useMemo, useState } from "react";
import { generateText, type Message } from "ai";
import { SolanaAgentKit, createVercelAITools } from "solana-agent-kit";
import TokenPlugin from "@solana-agent-kit/plugin-token";
import { Connection, PublicKey } from "@solana/web3.js";
import { useWallet } from "@/walletProviders"; // Your wallet provider hook
export function useChat({ id, initialMessages = [] }) {
const [messages, setMessages] = useState(initialMessages);
const [isLoading, setIsLoading] = useState(false);
const [error, setError] = useState(null);
// Get wallet functionality from your custom wallet hook
const { connected, address, signTransaction, signMessage, sendTransaction } = useWallet();
// Initialize Solana tools with the connected wallet
const solanaTools = useMemo(() => {
if (connected && address) {
const agent = new SolanaAgentKit(
{
publicKey: new PublicKey(address),
signTransaction: async (tx) => await signTransaction(tx),
signMessage: async (msg) => await signMessage(msg),
sendTransaction: async (tx) => {
const connection = new Connection("YOUR_RPC_URL", "confirmed");
return await sendTransaction(tx, connection);
},
signAndSendTransaction: async (tx) => {
const connection = new Connection("YOUR_RPC_URL", "confirmed");
const signature = await sendTransaction(tx, connection);
return { signature };
},
},
"YOUR_RPC_URL",
{}
).use(TokenPlugin);
return createVercelAITools(agent, agent.actions);
}
}, [connected, address, signTransaction, signMessage, sendTransaction]);
// Send a message to the AI assistant
const sendMessage = useCallback(async (newMessage) => {
if (!connected) {
setError("You must be connected to your wallet to send messages");
return;
}
setIsLoading(true);
setError(null);
// Update UI with user message
setMessages((prev) => [...prev, newMessage]);
try {
// Generate AI response
const res = await generateText({
model: myProvider.languageModel("chat-model"),
system: `You're a helpful Solana assistant that helps people carry out transactions. Connected wallet: ${address}`,
messages: [...messages, newMessage],
tools: solanaTools,
});
// Process and display assistant response
const assistantMessage = res.response.messages.find(m => m.role === "assistant");
if (assistantMessage) {
setMessages((prev) => [...prev, {
id: assistantMessage.id,
content: assistantMessage.content,
role: "assistant",
parts: assistantMessage.parts,
}]);
}
} catch (err) {
setError(err.message || "An error occurred");
} finally {
setIsLoading(false);
}
}, [messages, solanaTools, connected, address]);
return {
messages,
isLoading,
error,
sendMessage,
};
}
```
## Using with Vercel AI SDK
Once you've set up your agent and tools, you can use them with the Vercel AI SDK:
```javascript theme={"system"}
import { generateText } from "ai";
// Generate a response with your AI provider
const res = await generateText({
model: myProvider.languageModel("your-model"),
system: "You're a helpful Solana assistant that helps people carry out transactions on the Solana blockchain.",
messages: messages, // Your chat messages
tools: solanaTools, // The tools created above
});
```
# Overview
Source: https://docs.sendai.fun/docs/v2/using-llms/overview
# Using LLMs with Solana Agent Kit
Solana Agent Kit's documentation is designed to be LLM-friendly, helping developers integrate with the toolkit more efficiently. This guide covers two powerful ways to integrate Solana Agent Kit with LLMs: Cursor IDE integration and Model Context Protocol (MCP) setup.
## Cursor IDE Integration
### Prerequisites
* [Cursor IDE](https://cursor.sh) installed on your machine
* Basic familiarity with Cursor's interface
### Configuration Steps
1. Open Cursor IDE
2. Navigate to **Settings** > **Features** > **Docs**
3. Click on **Add new doc**
4. In the URL field, paste:
```
https://docs.sendai.fun/llms-full.txt
```
### Using Documentation in Cursor
Once configured, you can access Solana Agent Kit's documentation directly within Cursor using the following methods:
#### Method 1: Using @docs Command
Type `@docs` followed by "Solana Agent Kit" to reference the documentation in your code. For example:
```typescript theme={"system"}
// @docs -> Solana Agent Kit: How to initialize a wallet connection
```
#### Method 2: Local Docs Integration
You can also ask questions about Solana Agent Kit directly in comments, and Cursor will use the documentation to provide relevant answers and code suggestions.
## Model Context Protocol (MCP) Integration
### Overview
The Model Context Protocol (MCP) connects Solana Agent Kit's functions to LLMs and AI applications, enabling AI-powered interactions with the toolkit. With MCP, you can leverage Solana Agent Kit's documentation and APIs directly in your AI applications.
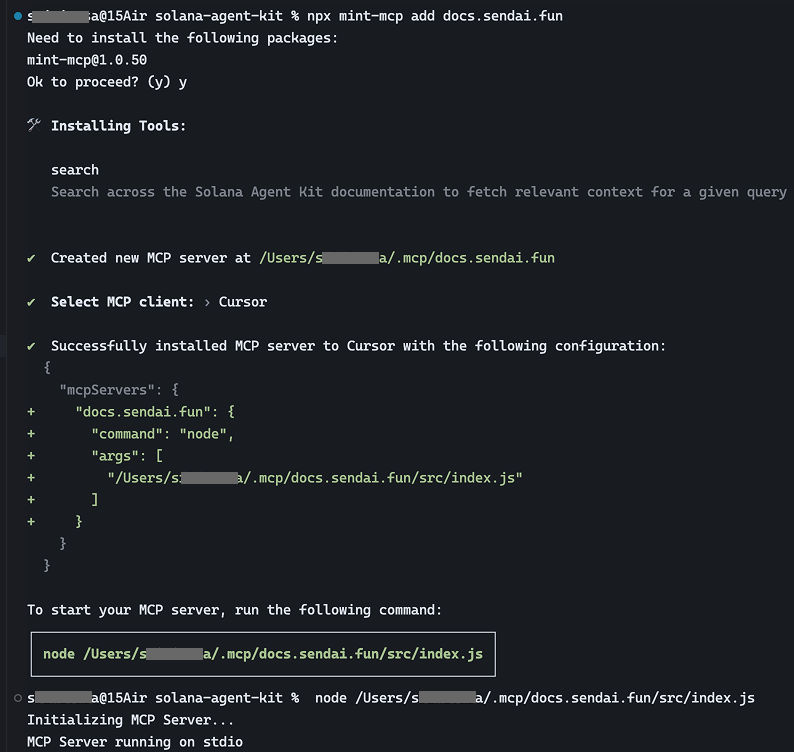
### Quick Setup
Install the Solana Agent Kit Docs MCP server using:
```bash theme={"system"}
npx mint-mcp add docs.sendai.fun
```
### Configuration Steps
1. After running the installation command, you'll be prompted to select which MCP clients to enable
2. Choose the clients that best suit your development needs
3. The terminal will provide you with the final configuration and usage instructions
### Using MCP in Your Project
Once configured, you can use the MCP server to:
* Query Solana Agent Kit documentation programmatically
* Access API endpoints with AI-powered context
* Get intelligent suggestions based on the documentation
## Benefits
* **Contextual Help**: Get immediate access to Solana Agent Kit documentation while coding
* **Smart Completions**: Both Cursor and MCP use the documentation context to provide accurate suggestions
* **Faster Development**: Reduce time spent switching between documentation and code
* **AI-Powered Integration**: Leverage LLMs to interact with Solana Agent Kit more effectively
## Troubleshooting
If you encounter any issues:
1. Verify that all URLs and API keys are correctly entered
2. Ensure necessary permissions are granted for both Cursor and MCP
3. Check your network connection and firewall settings
4. Try refreshing or reinstalling the tools if issues persist
## Next Steps
After setting up both Cursor and MCP:
1. Explore the various modules and features available in Solana Agent Kit
2. Test the AI-powered documentation queries in your development workflow
3. Start building your Solana application with enhanced AI assistance